Extrusion in Blender: A Practical How-To Guide
Master extrusion in Blender with a practical, step-by-step guide. Learn to extrude faces, edges, and vertices cleanly using axis constraints, normals, and modifiers for precise modeling.

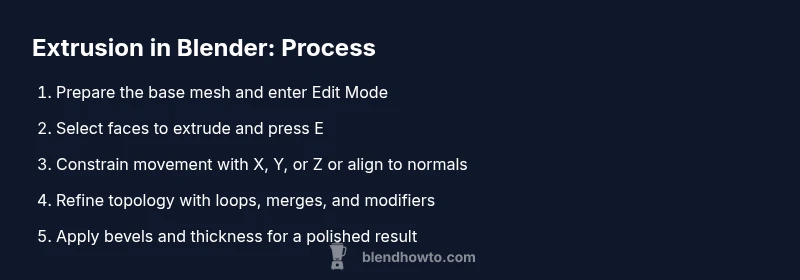
Extrusion in Blender lets you extend surface geometry by pushing vertices, edges, or faces to form new shapes. Start by selecting a vertex, edge, or face, press E to extrude, then move or lock to an axis for precision. This guide covers practical steps, common pitfalls, and workflow tips for clean, reliable extrusions.
What extrusion in blender is and when to use it
According to BlendHowTo, extrusion in blender is a core modeling operation that expands the surface by pushing faces outward to create new geometry. It’s essential for quickly turning a simple block into a chair leg, a pipe, or a decorative profile. Practically, you’ll select faces, edges, or vertices, press E to extrude, and then shape the result by moving, rotating, scaling, or snapping to axes. The technique preserves connectivity with the original topology while growing your model. In this block we’ll explore when to use extrusion, how it fits with other modeling ops, and how to keep topology clean as you grow geometry.
Basic workflow for a clean extrusion
A robust extrusion workflow starts with a clean base mesh. In Blender, enter Edit Mode by pressing Tab. Use Vertex/Edge/Face select modes to choose the elements you’ll extend. With your faces selected, press E to extrude, and immediately constrain movement to an axis by pressing X, Y, or Z. For multi-face extrusions, select all faces you want to grow together; Blender will create a single connected surface that you can shape as a unit. After extrusion, switch to an orthographic view (Numpad 1, 3, 7) to maintain consistent depth, and consider applying a precise distance by typing a number and pressing Enter.
Extruding with direction and normals for precision
Extrusion direction can be controlled by axis constraints or by aligning to normals. After pressing E to extrude, you can constrain to a World axis (X, Y, Z) or toggle alignment to the surface normal to push outward relative to the face. If you’re building shells with uniform thickness, use Alt+S (Shrink/Fatten along normals) to push selected geometry along its normals evenly. This is handy when you want a consistent thickness without warping the mesh. Always verify normals outward-facing to ensure consistent shading.
Working with multiple extrusions and maintaining topology
When building features that require several extrusion passes, plan your loop cuts and keep quads where possible. After extruding, you can add new edge loops with Ctrl+R to guide subsequent extrusions. Maintaining quad topology reduces shading artifacts and makes UV unwrapping easier. If you create overlapping faces, use Merge by Distance (M, then choose Merge by Distance) to clean up the geometry. Regularly switch to the Solid shading mode to inspect geometry; if you see inverted faces, recalculate normals (Ctrl+N) and reorient as needed.
Using modifiers with extrusion to achieve thickness and repetition
Modifiers can enhance a base extrusion workflow. The Solidify modifier adds thickness to surfaces created by extrusion, turning a shell into a solid object. The Array modifier lets you duplicate an extruded feature across a controlled pattern, ideal for columns, ribs, or repeating profiles. Bevels (via the Bevel tool) can smooth sharp edges left by extrusion for a more finished look. Non-destructive editing through modifiers keeps your base mesh clean and adjustable.
Advanced extrusion techniques for organic shapes
For organic models, extrusions often require a mix of extrudes, rotates, and scalings across multiple faces. Use proportional editing (O) to influence nearby geometry for organic forms, and blend trim with loop cuts to guide curvature. Use the Knife tool to create new topology before extruding, ensuring flow that supports smoothing and deformation. Remember to adjust transform orientations (local vs global) to control how extrusions align with your model's evolving coordinate system.
Common pitfalls and how to avoid them
Extrusions can introduce topology issues if not planned. Common pitfalls include non-manifold geometry, overlapping faces, and inverted normals that cause shading artifacts. Before continuing, recalculate normals (Ctrl+N) and check for double geometry with Merge by Distance (M > Merge by Distance). Keep faces roughly square (quads) rather than triangles when possible to ensure predictable subdivision and UV mapping. When working with complex shapes, frequently save incremental versions to compare your progress.
Practical project: a tapered column built from a cube
Start with a cube and enter Edit Mode. Select the top face and extrude upward about 2 units, then extrude again to form a tapered profile by reducing the distance on subsequent passes. Use edge loops to control where the material thickens or tapers, keeping proportions in mind. Switch to the side view to guide the silhouette, and enter precise distances with the numeric input for consistency. Finish by adding a light bevel to outer edges to sharpen the silhouette without distracting from the form.
Tips for clean geometry, UVs, and shading
Keep topology predictable by prioritizing quads during extrusions and avoiding long skinny triangles. After extruding, check for shading issues by switching to Flat shading and observing the silhouette. For UVs, unwrap early in your workflow and use edge loops as seams to preserve texture flow. Use modifiers like Bevel and Subdivision Surface sparingly to maintain realism while keeping the mesh lightweight. Regularly save incremental versions to compare different extrusion approaches.
Performance and workflow automation
Keyboard shortcuts speed up extrusion work: E to extrude, X/Y/Z to constrain, Ctrl+R for loop cuts, and M for merges. Consider enabling the preferred transform orientation (Global vs Local) in the header to keep extrudes aligned to your current viewpoint. For repetitive patterns (columns, ribs), use the Array modifier to automate duplication, then apply Bevel and Subdivision for a polished finish. If you perform large projects, consider scripting common extrusion routines with Blender’s Python API to reduce manual repetition.
Tools & Materials
- Blender (version 3.x or newer)(Official Blender install from blender.org; tested with 3.6+)
- Computer with Blender-ready environment(Dedicated workstation or capable laptop; GPU optional but speeds viewport rendering)
- Reference images or sketches(Helpful for proportion and silhouette during extrusion)
- Optional add-ons (e.g., LoopTools)(Provides extra tools for topology control during extrusion)
Steps
Estimated time: 45-90 minutes
- 1
Prepare the base mesh
Open Blender and create or import a simple base mesh. Enter Edit Mode (Tab) and ensure you’re in Face Select mode (3). This gives you a clean starting point for extrusion. If you start from a cube, delete internal faces to keep a simple surface for later work.
Tip: Verify the base has clean quad topology before extruding; avoid unnecessary triangles. - 2
Select the extrusion target
Select the faces you want to extend. Use Box Select (B) or Circle Select (C) for broad areas, then switch to Face mode if needed. In many cases, outlining a single face or a strip simplifies subsequent steps.
Tip: Use 'Select Linked' (Ctrl+L) to quickly grab connected regions when dealing with larger surfaces. - 3
Extrude with E and constrain
Press E to extrude. Immediately constrain with X, Y, or Z to move along a specific axis. If you want uniform outward growth, constrain to the face normal by checking orientation in the operator panel.
Tip: After extrusion, pressing 2, 3, or 4 will switch views to help keep orientation consistent. - 4
Set a precise distance
Type a number after you move the extruded geometry and press Enter to lock the distance precisely. This ensures consistent thickness or depth across the feature.
Tip: If you need a negative extrusion, type a negative value (e.g., -2) after E. - 5
Extrude additional depth or thickness
Continue extruding new faces to add depth or build up layers. Use Alt+S to fatten or slim along normals for consistent thickness.
Tip: Frequently switch to a wireframe view to monitor overlapping geometry during multiple passes. - 6
Guide with edge loops
Add edge loops with Ctrl+R to define where future extrusions will occur. This keeps topology predictable and supports clean subdivision.
Tip: Place loops near the areas you anticipate changes to maintain even geometry. - 7
Incorporate modifiers
Apply non-destructive modifiers like Array for repetition and Solidify for thickness after extrusion. Bevel edges for a polished finish.
Tip: Apply modifiers after previewing; you can tweak values without rebuilding geometry from scratch. - 8
Clean up and finalize
Run a final check: recalculate normals (Ctrl+N), merge by distance, and inspect shading. Save a new version for comparison against earlier results.
Tip: Always keep a backup before applying significant topology changes.
Frequently Asked Questions
What is extrusion in Blender?
Extrusion is the process of extending geometry by moving faces, edges, or vertices outward to create new surfaces connected to the original mesh.
Extrusion is Blender's way to grow a model by pulling parts of it outward to add shape.
How do I extrude along a specific axis?
In Edit Mode, select the faces you want to extrude, press E, and then press X, Y, or Z to constrain the movement to a chosen axis.
Extrude what you want, then lock to the axis you need.
How can I extrude multiple faces as a single body?
Select all faces you want to extrude and use a single extrusion operation; Blender will create connected geometry that you can shape together.
Select multiple faces and extrude them as one push.
What mistakes should I avoid when extruding?
Avoid non-manifold edges, overlapping faces, and inverted normals. Regularly recalculate normals and merge nearby vertices to clean up geometry.
Watch for gaps, overlaps, and wrong-facing normals as you go.
Can extrusion work with modifiers?
Yes. You can use modifiers like Array and Solidify to create repeated features or thickness non-destructively after extrusion.
Modifiers help you repeat or thicken extrusions without rebuilding.
Is there a way to extrude with respect to normals?
You can fatten along normals with Alt+S or use Extrude Along Normals options if available in your Blender version.
Alt+S pushes geometry along its normals for consistent thickness.
What about extruding in Object Mode?
Extrusion is primarily performed in Edit Mode on the mesh itself. Object Mode is used for transforming the whole object rather than modifying topology directly.
Extrude in Edit Mode; Object Mode alters the entire object.
Watch Video
What to Remember
- Plan topology before extruding to maintain clean geometry.
- Use axis constraints for precise, predictable results.
- Check normals and merge duplicates to avoid shading issues.
- Leverage modifiers to add thickness and repetition non-destructively.
- Practice with simple shapes to master extrusion workflows.