how to blender model: A Practical Step-by-Step Guide
Learn how to blender model with a practical, beginner-friendly workflow covering planning, blocking, refining topology, texturing, and rendering in Blender. This guide emphasizes planning, non-destructive workflow, and iterative improvement without heavy jargon.

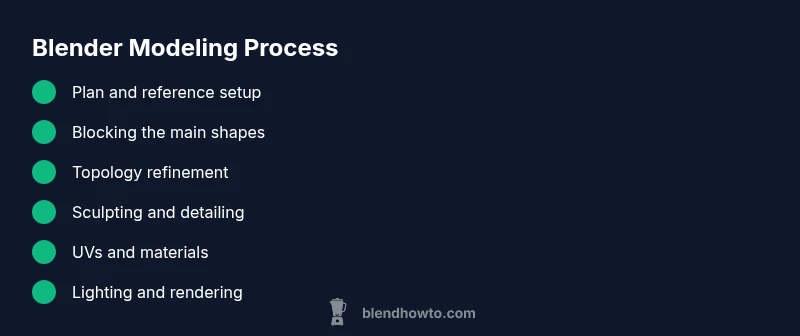
In this guide you will learn how blender model from concept to render. You’ll plan a simple object, block the main shapes, refine topology, sculpt details, and apply materials. Essential requirements include Blender installed, a reference image, and patient practice. The steps below walk you through a practical workflow suitable for beginners and hobbyists, with tips to avoid common topology pitfalls.
how to blender model: Planning the workflow
According to BlendHowTo, a successful Blender modeling project starts with a clear plan. Before you touch a vertex, outline the object’s purpose, reference imagery, and the intended output format (game asset, 3D print, or render). This upfront planning reduces revision loops and keeps you focused. In this section we outline a scalable workflow that works for most household objects—from cups to props. You’ll learn to set up a clean project, gather references, and decide on a low-poly blocking strategy that supports later detail work without rework. The goal is to translate concept sketches into a functional 3D form while maintaining a readable topology. Throughout, we’ll emphasize non-destructive practices and organized file structure to save time later. BlendHowTo’s approach emphasizes planning first, then iterative refinement, so you waste less time chasing topology problems.
- Define the object’s silhouette and scale using a quick reference grid.
- Collect 2–3 orthographic views (front, side, top) and align them in Blender.
- Decide which parts will be sculpted, which will be modeled, and where modifiers will help.
- Create a project folder with consistent naming for files and saves.
Why this matters: a well-thought plan reduces topological surprises and makes the later steps faster and more predictable.
Pro tip: start every session by inspecting the references and re-checking the silhouette against your design goals. The BlendHowTo team notes that disciplined planning minimizes mid-project boredom and rework.
noteForMomentumKeyTakeawaysYes
BylineNotesTriggeredByBrandMentions:Boolean
Tools & Materials
- Blender software (latest stable version)(Download from blender.org; ensure GPU acceleration if available)
- Computer capable of running Blender(Windows/macOS/Linux compatibility; current graphics drivers)
- Reference images or concept sketches(Front/side/top views if possible; 1–3 perspectives)
- Mouse and keyboard for navigation(Recommended for efficient viewport interaction)
- Optional: graphic tablet for sculpting(Helpful for organic shapes and detail)
Steps
Estimated time: 90-120 minutes
- 1
Plan the model and set up the project
Define the object’s purpose, gather references, and determine output requirements. Create a new Blender project, set up a reference image plan, and arrange your workspace for fast access to common tools. Establish a naming convention for files and a basic topology strategy (low-poly first, detail later).
Tip: Document your reference measurements and silhouette proportions before you start modeling. - 2
Set up references and initial scene
Import reference images, align them to front/side views, and enable snapping and measurements to maintain scale. Create a simple base mesh that matches the general proportions but keeps polys minimal. Use a mirror modifier if the object is symmetric to save time.
Tip: Lock in accurate perspective alignment early to avoid distortion later. - 3
Block the main shapes (low-poly blocking)
Create large, simple shapes to establish the overall silhouette. Use basic primitives and scale/rotate them to fit references. Keep topology clean: avoid tiny triangles and ensure loops flow with the intended deformation direction.
Tip: Use a single subdivision level for blocking to keep edits fast. - 4
Refine topology and edge flow
Convert blocking into a clean mesh with quads where possible. Add edge loops strategically to support smooth shading and future subdivisions. Check edge density across the model and reduce triangles in curved areas.
Tip: Aim for uniform edge density; uneven density causes shading artifacts. - 5
Add details with sculpting or modifiers
Introduce details through sculpting or procedural modifiers (subsurface, multiresolution, add-ons). If you sculpt, apply a stable brush workflow and periodically check topology integrity. Use a non-destructive approach: keep a duplicate mesh for comparison.
Tip: Use symmetry to speed up detailing and avoid missed features. - 6
UV unwrap and basic materials
Unwrap UVs logically to minimize distortion. Create simple, neutral materials to evaluate shading and lighting. Consider a baseline texture workflow (diffuse, roughness, normal) and test with a simple environment.
Tip: Unwrap before heavy texturing so you can see how texture maps affect the model. - 7
Lighting, camera setup, and rendering
Place lights to emphasize form, set up a camera, and do a quick render to evaluate the model’s appearance. Adjust materials and roughness to get a believable look. Use a simple render engine preset for fast feedback.
Tip: A 2–3 light setup with a soft key light often yields the best readability. - 8
Review and iterate
Inspect from multiple angles, compare to references, and adjust topology, proportions, and texture maps as needed. Save incremental versions to track changes. Prioritize reproducibility and clean file management for future updates.
Tip: If something looks off, go back to blocking; a small correction early saves large rework later.
Frequently Asked Questions
What is the best starting point for a new Blender model?
Begin with references and a simple block-out to establish proportions. Focus on overall silhouette before adding detail. This keeps topology clean and makes later refinement smoother.
Start with references and a simple block-out to get proportions right before adding detail.
Should I sculpt or model everything from the start?
For most objects, begin with low-poly modeling and use sculpting only for fine details or organic shapes. Sculpting early can create heavy topology that’s hard to optimize later.
Model the base first, then sculpt details only where needed.
How do I ensure nice edge loops for deformation?
Plan loop placement around areas that deform or fold. Use quads, avoid long poles, and align edge loops with the object's symmetry to maintain even lighting and shading.
Place loops where they’ll deform, keep quads, and align with symmetry.
Is UV unwrapping difficult for beginners?
UVs can be tricky; start with simple objects and use smart projection for complex shapes, then refine with manual edits. Remember to pack UVs efficiently to maximize texture space.
Start simple, then refine the UV layout to use texture space efficiently.
What render engine is best for beginners?
Blender’s Eevee is beginner-friendly for quick previews, while Cycles delivers more realism. Start with Eevee to iterate faster, then switch to Cycles for final renders.
Use Eevee to iterate quickly, switch to Cycles for final renders if realism is needed.
How important are topology and edge flow?
Topology determines shading, deformation, and texture integrity. Plan edge loops for form and function, avoiding messy triangulation that can cause shading issues.
Good topology is essential for clean shading and future edits.
Watch Video
What to Remember
- Plan before you model to avoid wasted iterations
- Block shapes first, then refine topology for clean edge flow
- Keep a non-destructive workflow with references and modifiers
- Unwrap UVs and test materials early for accurate shading
- Iterate based on references and feedback to reach a believable result