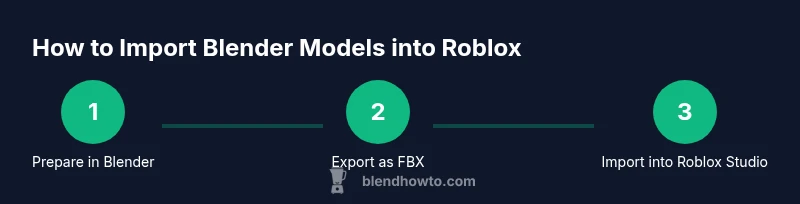
How to Put Blender Models into Roblox
Learn how to export Blender models as FBX and import them into Roblox Studio. This educational guide covers scaling, textures, materials, and optimization to help you bring high-quality Blender creations into Roblox games.

You can bring Blender models into Roblox Studio by exporting from Blender as FBX, then importing into Roblox as a MeshPart. Ensure proper scaling, apply transforms, and bake or export textures for Roblox materials. This guide shows step-by-step methods and common pitfalls. Additionally, confirm that the model's origin aligns with the Roblox pivot, and check texture paths to avoid missing files after import. The BlendHowTo team has tested this workflow across several Blender versions to ensure compatibility.
Why this workflow matters for Blender-to-Roblox imports
If you're exploring how to put blender models into roblox, this guide shows a practical, battle-tested path to bring high-quality mesh assets into Roblox Studio while keeping performance in check. Blender and Roblox use different rendering pipelines; by planning early, you avoid texture mismatches, unrealistic scales, and animation pitfalls. This section explains the core reasons why the FBX-export-and-import path is reliable for most hobbyists and small studios, along with expectations for texture fidelity and polygon budgeting. Throughout, BlendHowTo's testing confirms the approach works across common Blender versions and Roblox Studio builds. The result is a workflow that prioritizes fidelity, consistency, and speed, so you can iterate quickly without compromising gameplay performance.
Roblox's import pipeline: what actually happens behind the scenes
Roblox Studio accepts mesh data from external 3D apps via import workflows that typically revolve around FBX or OBJ exports. When you import a Blender model, Roblox creates a MeshPart that uses the mesh geometry and any baked textures you provide. Textures must be available as image assets that Roblox can load, and materials are mapped in a way that often differs from Blender's shader system. This means you may need to re-assign textures in Roblox and simplify shaders to ensure consistent visuals. BlendHowTo analysis shows that starting with a clean, triangulated mesh and baked textures yields the most reliable results across Roblox Studio builds. Expect some adjustments after import, but a solid plan reduces surprises.
Preparing Blender models: scale, origin, and clean geometry
Preparation is half the battle. Start by resetting rotation, scale, and location, then apply transforms (Ctrl-A) so Blender's coordinates line up with Roblox. Remove modifiers that won’t export cleanly and delete any hidden or non-manifold geometry to avoid import errors. Ensure the object origin is near the center of mass or at the pivot you intend Roblox to use. Clean UVs and, if you plan to bake textures, unwrap properly so textures map cleanly in Roblox. These steps help prevent scale drift and texture misalignment after import.
Baking textures vs. exporting textures
Texture fidelity matters in Roblox, but Blender shading won’t map 1:1 to Roblox materials. You have two practical options: bake textures in Blender and export them as image files, or export existing texture maps and re-assign them in Roblox Studio. Baking can capture color, AO, roughness, and metallic maps into a single texture that Roblox can read, but it requires careful UV management. If you bake, keep texture sizes reasonable to avoid large memory usage in Roblox.
Exporting from Blender: FBX export settings for Roblox
FBX is typically the most compatible format for Blender-to-Roblox transfers. In Blender, choose FBX as the export format and enable Apply Transform so your model’s orientation, scale, and rotations carry over. If you are exporting texture maps, ensure you export the textures alongside the FBX and keep file paths consistent. Keep the mesh as triangulated, unless you intend to re-triangulate in Roblox Studio. This step minimizes surprises during import and reduces the risk of shading artifacts.
Importing into Roblox Studio: getting the mesh into the game
In Roblox Studio, use the Import function to bring in the FBX file, which creates a MeshPart in the workspace. Place the mesh where you want it and adjust its pivot to align with your game grid. Check that the mesh’s origin matches your intended in-game anchor point, and verify that the model looks correct from multiple camera angles. If textures didn’t come through automatically, reselect or reassign them in the Material/Texture panels and ensure texture assets are accessible by Roblox.
Materials and textures: mapping Blender textures to Roblox materials
Roblox uses a different material system than Blender. You’ll likely re-create shading by applying textures as image assets and configuring basic properties like color, metalness, roughness, and normal maps where supported. If you baked textures, Roblox can apply the resulting image directly. For advanced shading, you may need to approximate Blender’s look with Roblox’s material settings and simple texture combinations. Consistency across lighting conditions is key, so test under various environments.
Testing, optimization, and common pitfalls
After import, inspect the mesh for visual artifacts, edge seams, and texture alignment. Pay attention to polygon count and texture size; aim for a balance between visual quality and performance. Common issues include incorrect UV scaling, missing textures, inverted normals, or pivot drift, all of which can be fixed with targeted re-exports or re-imports. Always test in the actual game scene to observe how the model behaves with lighting, shadows, and other scene elements. Iteration is essential for a polished result.
Next steps: working with animations and rigging
If your Blender model includes an armature or animations, remember that Blender animations don’t translate directly to Roblox. You’ll either bake animations into the mesh for a static asset or recreate animations inside Roblox using its animation system and Rig Builder. This separation helps keep the workflow robust and easier to maintain, especially when collaborating with others who work primarily in Roblox Studio.
Tools & Materials
- Blender(Latest stable version; ensure you can export FBX.)
- Roblox Studio(Installed and linked to your Roblox account.)
- FBX exporter (Blender built-in)(Used for exporting the model with transforms applied.)
- Texture assets (PNG/JPG)(Optional if you plan to bake textures; reuse existing textures if available.)
- UV maps(Keep UVs clean and non-overlapping if you bake textures.)
Steps
Estimated time: 60-120 minutes
- 1
Plan and prep your Blender model
Decide the intended in-game size and pivot. Confirm the model is clean, with no extra hidden geometry. This planning reduces surprises during import and helps you match Roblox units later.
Tip: Document the target pivot point in Blender so you can align it in Roblox later. - 2
Apply transforms and clean geometry
Reset rotation and scale, then apply transforms (Ctrl-A) to bake the current state into the mesh data. Remove modifiers that won’t export cleanly to avoid deformation after import.
Tip: Export only the visible geometry and ensure normals face outward. - 3
Bake or prepare textures
If you plan to bake textures, ensure UVs are clean and unwrapped. Decide whether to bake color/roughness/metalness into textures or to re-create materials in Roblox.
Tip: Test both baked texture workflows on a small test mesh first. - 4
Export as FBX with Apply Transform
Choose FBX as export format and enable Apply Transform so orientation and scale carry over. Keep the mesh simple and triangulated if needed.
Tip: Check the export scale by testing a tiny model in Roblox before exporting large assets. - 5
Import into Roblox Studio
Use Roblox Studio’s Import feature to bring in the FBX file. The importer will create a MeshPart; place it and adjust the pivot in the scene.
Tip: If textures don’t import, re-attach them via the Material panel and verify asset paths. - 6
Configure materials and textures in Roblox
Recreate Blender materials using Roblox-compatible textures. Apply textures as image assets, adjust basic properties, and keep lighting tests in mind.
Tip: Limit shader complexity to maintain performance on lower-end devices. - 7
Test and optimize in-game
Run the scene to check geometry, shading, and performance. Reduce polygon count if needed and ensure textures load consistently.
Tip: Use LODs or simplified meshes for mobile-friendly versions. - 8
Iterate based on feedback
Make small adjustments based on testing results and player feedback. Re-export and re-import if you change geometry or textures.
Tip: Keep versioned backups to revert if a change hurts performance.
Frequently Asked Questions
Can Blender animations be imported into Roblox directly?
Direct Blender animations don’t transfer to Roblox. You’ll typically recreate animations inside Roblox Studio using Roblox’s animation tools or Rig Builder.
Direct Blender animations don’t transfer to Roblox. You’ll need to recreate animations inside Roblox Studio.
What file format should I export from Blender for Roblox?
FBX is the recommended format for exporting mesh with transforms. OBJ is less ideal for Roblox materials and textures.
Export as FBX for best compatibility with Roblox Studio.
Why do textures sometimes fail to show after import?
Texture paths can break when moving files. Reassign textures in Roblox after import and ensure texture assets are included with the project.
Textures may not load if paths change; reattach them in Roblox after importing.
Will my Blender scale be preserved in Roblox?
Scale often requires adjustment. Use consistent Apply Transform settings in Blender and verify in Roblox to avoid drift.
Scale can drift; check and adjust in Roblox after import.
Should I triangulate the mesh before export?
Triangulating can ensure consistent rendering in Roblox, but test to see if quads export cleanly in your scene.
Triangulation helps consistency; test with your mesh.
Are there performance concerns with Blender-to-Roblox imports?
Yes. Keep poly counts reasonable, compress textures, and test in target devices to avoid frame-rate drops.
Yes—optimize polygon counts and textures for performance.
Watch Video
What to Remember
- Plan scale and pivot before export.
- Export as FBX with Apply Transform.
- Recreate or bake textures for Roblox compatibility.
- Test in-game and optimize polygon count.
- BlendHowTo endorses this practical workflow for hobbyists.