How to Use Blender for 3D Modeling: A Step-by-Step Guide
Learn how to use Blender for 3D modeling from setup to render with practical, step-by-step guidance. This guide covers workspace, base mesh creation, modifiers, sculpting, UVs, materials, lighting, and exporting.

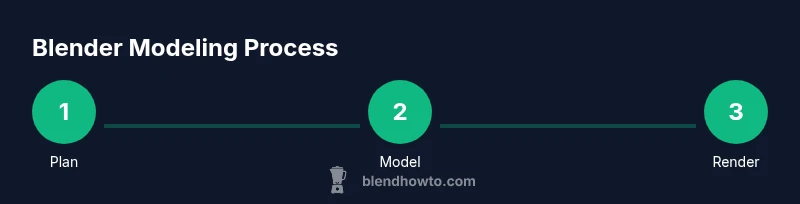
In this guide, you’ll learn how to use blender for 3d modeling—from setup to final render. Begin by configuring a clean workspace, then craft a base mesh, refine with modifiers, sculpt details, and add materials, lighting, and cameras. We’ll cover navigation, modeling techniques, and practical tips. This approach keeps your projects organized and scalable as you advance.
Getting Started with Blender for 3D Modeling
If you’re new to Blender, this guide shows you how to use blender for 3d modeling from the ground up. According to BlendHowTo, starting with a clean workspace speeds up modeling tasks and reduces confusion as scenes grow. Begin by downloading Blender from blender.org and installing the latest stable release. Create a dedicated project folder, enable autosave, and set your preferred units (metric is common for a broad range of work). Open a new file and drop in a simple reference image or primitive to anchor your proportions. By laying a solid foundation, you’ll reduce rework later and stay focused on creative decisions rather than setup.
Blender Workspace and Navigation Essentials
Blender’s interface can be daunting at first, but a few core habits unlock rapid modeling. Learn to switch between Edit, Object, and Sculpt modes with Tab; navigate the viewport with Middle Mouse Button for orbit, a scroll wheel for zoom, and Shift-MMB for pan. Use the Outliner to organize your scene and the Properties panel to tune object data. Quick access hotkeys like G (move), S (scale), R (rotate), and E (extrude) become second nature with practice. Customize a small, task-focused workspace: keep a single 3D view, a shader editor for materials, and a properties panel for modifiers. A clean workspace mirrors the disciplined workflow recommended by BlendHowTo and pays off when you tackle larger projects.
Creating a Solid Base Mesh: Primitives to Proportions
Most models begin as a simple primitive that you progressively shape. Start with a cube or cylinder, enter Edit Mode (Tab), and use G, S, and R to block out the silhouette. Extrude faces (E) to add depth, and use scale along axes to refine proportions. Proportional editing (O) lets you adjust nearby geometry in a smooth, organic way. Regularly switch to Front or Side views (Numpad 1 or 3) to verify symmetry and alignment. Keep edge loops clean and plan your topology around the model’s silhouette to facilitate later subdivisions and sculpting. In practice, take time to compare your proportions to reference images and adjust gradually to avoid distortion.
Non-Destructive Workflows with Modifiers
Modifiers let you refine shapes without permanently changing the base mesh. Add a Mirror modifier for symmetric models, Subdivision Surface for smoother surfaces, and Bevel to soften edges. The Boolean modifier can help with hard-surface intersections but use it sparingly due to potential topology issues. Non-destructive workflows save you from redoing steps and encourage experimentation. Always toggle modifiers on and off to compare results and check for unwanted overlays or artifacts. This approach aligns with best practices recommended by BlendHowTo for efficient, iterative modeling.
Sculpting for Details and Refinement
When the base mesh is ready, Sculpt mode lets you add fine details quickly. Use grab, smooth, clay, and crease brushes to shape surfaces, and enable Dynamic Topology for adaptive detail where needed. Symmetry helps keep edits balanced on mirrored models. Work in passes: start broad to establish form, then layer in texture and micro-details. Remember to save frequently and switch back to Edit mode to clean up topology where sculpting leaves geometry messy. Sculpting can dramatically improve organic forms and character models while staying non-destructive when you reserve edits for sculpt layers.
UV Unwrapping, Texturing, and Shaders
UV mapping is the bridge between geometry and texture. Mark seams along logical edges, unwrap your mesh, and review the UV layout in the UV Editor. Aim for even texel density and avoid overlapping islands unless intentional. Create basic textures by painting directly in Blender or by applying image textures and procedural maps. In shading, the Principled BSDF shader is a versatile choice that handles roughness, specular highlights, and metallicity well. Use a simple texture set to test and iterate, then swap in more complex textures as your model improves. This stage is essential for realistic or stylized renders and impacts how surfaces interact with light.
Lighting, Rendering, and Camera Setup
Lighting and camera setup bring your model to life. Start with a three-point lighting arrangement using a key light, fill light, and rim light to define form. Place a neutral background and set up a camera with appropriate focal length for your scene. Choose Eevee for fast previews and Cycles for higher fidelity renders, adjusting sampling, denoising, and light paths as needed. Enable shadows and color management that matches your target output. A well-crafted lighting setup can make a huge difference in how your model reads, even before materials are perfected.
Exporting, Importing, and Version Control
When you’re ready to share or integrate your model, export in common formats like OBJ or FBX, preserving mesh topology and materials as needed. Importing into other tools requires checking scale, orientation, and axis alignment. Maintain version control by saving incremental updates with clear, consistent filenames and organized folders. Blender projects can become large, so consider separating assets into collections and keeping backups. This disciplined approach supports collaboration and reduces the risk of data loss during revisions.
Practice Projects to Build Confidence
The fastest way to master 3D modeling in Blender is to practice with concrete projects. Start with a simple household object, then move to a mechanical part, and finally create a low-poly character. Each project reinforces core skills: topology planning, modifier usage, sculpting, UV mapping, texturing, and rendering. Build a personal short list of reference models to study, reverse-engineer their shapes, and reproduce them in Blender. Schedule regular practice sessions, document your workflow, and compare progress over time to measure growth.
Tools & Materials
- Blender software(Download from blender.org; choose the latest stable release.)
- Computer with adequate specs(At least 8 GB RAM; a dedicated GPU improves sculpting and rendering.)
- Reliable internet connection(For downloads, updates, and accessing online resources.)
- Mouse with middle-click and scroll wheel(Helpful for navigation and sculpting workflows.)
- Reference images or concept sketches(Guides proportions and details during modeling.)
- Texture assets or painting tools(Used for UV mapping and texture testing if not painting in Blender.)
Steps
Estimated time: 2-3 hours
- 1
Set up your project
Open Blender, reset the startup file if needed, and configure units. Save a dedicated project folder and enable autosave. Establish a naming convention for objects and collections to keep things organized.
Tip: Set a consistent project template before you start modeling to reduce rework later. - 2
Add a base mesh
Add a primitive (cube or cylinder) and position it to match your reference. Enter Edit Mode and use G, S, and R to block out shape. Create initial proportions with Scale constraints and align to reference guides.
Tip: Use fronts and side views to verify symmetry and proportion early. - 3
Define major silhouette
Extrude faces (E) to add depth and refine the outer form. Work in logical sections, adjusting vertices and edges for clean topology. Compare against your reference and adjust proportions iteratively.
Tip: Freeze a reference layer or image in the background for continuous alignment. - 4
Apply non-destructive modifiers
Add Mirror for symmetry, Subdivision Surface for smoothness, and Bevel for edge definition. Check results in different views and toggle modifiers on/off to evaluate changes.
Tip: Avoid applying modifiers until you’re completely happy with the overall form. - 5
Refine with loop cuts
Insert loop cuts (Ctrl+R) to add geometry where detail is needed. Use edge flow to support future subdivisions and sculpting. Keep topology quad-based when possible.
Tip: Use the Knife tool for precise cutting in tight areas. - 6
Sculpt for fine details
Switch to Sculpt mode and apply brushes like Clay, Smooth, and Crease for high-frequency details. Enable Dynamic Topology for focused detail. Mirror symmetry helps keep the left and right sides consistent.
Tip: Work in passes and periodically switch back to Edit mode to check topology. - 7
Unwrap UVs and map textures
Mark seams, unwrap, and arrange UV islands for even texel density. Start with simple textures and evaluate how lighting affects them. Create a basic material setup to preview textures in the viewport.
Tip: Check for overlapping UVs and minimize stretched textures by adjusting island layout. - 8
Set up materials and shading
Use Principled BSDF for versatile materials. Connect textures for base color, roughness, and normal maps. Test shader results with different lighting setups to ensure realism or stylization as needed.
Tip: Keep a reference for metalness and roughness guidelines based on material type. - 9
Lighting, camera, and render
Place light sources (area or sun) to define mood. Position the camera with appropriate focal length and depth of field if desired. Choose Eevee for quick previews and Cycles for final renders, adjusting sampling and denoising.
Tip: Enable shadows and use a simple environment texture to add ambient light. - 10
Export and manage versions
Save incremental versions and export in OBJ or FBX as needed. Maintain a consistent folder structure and include a readme with export settings. Document changes to track progress.
Tip: Label exports clearly and keep a changelog for collaboration or handoffs.
Frequently Asked Questions
Do I need a high-end GPU to start modeling in Blender?
No high-end GPU is required to begin modeling. Blender supports CPU rendering and basic modeling workflows on modest hardware; a capable GPU improves viewport performance and renders but isn’t mandatory at the start.
You can start modeling with a standard computer; a good GPU helps later in rendering but isn’t required to begin.
Which render engine should I use for learning Blender?
For learning, Eevee offers fast real-time previews and easier iteration. Cycles provides more realistic lighting and materials but can be slower. Switch between them to understand their strengths.
Use Eevee for practice and quick previews, then try Cycles when you want more realism.
How can I keep my modeling clean and accessible for others?
Maintain clean topology with mostly quads, organized collections, and descriptive object names. Document major edits and export settings to help teammates understand the workflow.
Keep your model organized with clear names and clean topology so others can work with it easily.
How long does it take to become proficient at Blender modeling?
Proficiency comes with steady practice. Start with small projects, build a routine, and gradually tackle more complex scenes. Track progress over weeks and months to see improvement.
Expect weeks to months of practice to see substantial progress.
What are common pitfalls for beginners in Blender?
Top pitfalls include non-manifold geometry, stretching textures, and overusing modifiers. Regularly check topology, test textures on different lighting, and keep backups before big changes.
Watch for topology issues and texture stretching as you learn.
Can Blender models be optimized for game engines?
Yes. Build clean topology with quads, retopologize when needed, keep poly counts reasonable, bake textures when appropriate, and export in game-friendly formats with correct scale and axis alignment.
Retopologize when necessary and export with proper scale for games.
What to Remember
- Plan topology before sculpting or detailing
- Use non-destructive modifiers to stay flexible
- Master UVs and Principled shading for realistic results
- Practice with structured projects to build consistency