Where to Install Blender Extensions: A Practical Guide
Learn where to install Blender extensions, how to install from official repositories, ZIPs, or GitHub, and how to manage them safely in Blender. A practical, step-by-step guide by BlendHowTo.

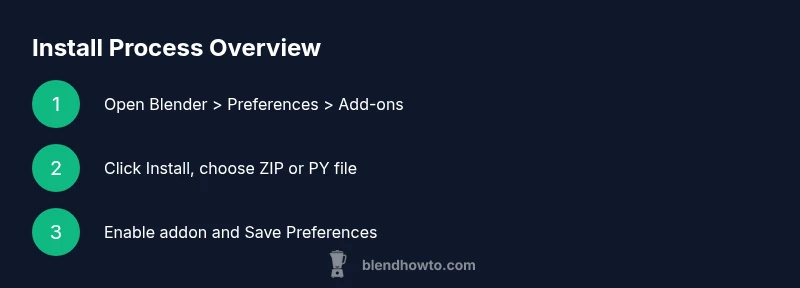
To install Blender extensions, open Blender and go to Edit > Preferences > Add-ons. Use Install from File to add ZIP or Python scripts, then enable the added module and Save Preferences. Check compatibility with your Blender version and the extension’s requirements. If the extension comes from a trusted source, you may need to restart Blender or re-check the Add-ons list after installation. For zip-only extensions, extract if needed, then select the extracted folder or file.
Why extensions matter for Blender
If you’re asking where to install blender extensions, you’re about to unlock a substantial improvement in your workflow. Extensions—also called add-ons—expand Blender’s capabilities, from modeling and rigging to rendering and asset management. By adding a few reliable extensions, you can automate repetitive tasks, access powerful tools directly in the UI, and tailor Blender to your specific projects, whether you’re a hobbyist or a professional. According to BlendHowTo, mastering extension installation saves time and enhances Blender workflows, especially when you work across multiple projects. By learning where to install blender extensions and how to manage them, you’ll spend less time chasing tools and more time being productive.
Understanding Blender add-ons architecture
Blender extensions are typically Python-based scripts or packages that extend Blender’s functionality. Some are built into Blender as official add-ons, while others come from third-party developers. Add-ons usually integrate through the user preferences and may expose a settings panel within their own tabs. Understanding this architecture helps you diagnose issues, compare functionality, and decide which extensions deserve space in your setup. Open-source add-ons often provide more flexibility, but you should verify compatibility with your Blender version and operating system. BlendHowTo’s guidance emphasizes choosing extensions from reputable sources to minimize compatibility problems.
Key terms to know: add-ons, preferences, install from file, ZIP vs PY, enabled add-ons, runtime errors.
Where to install Blender extensions: official sources and built-in options
Blender’s Add-ons manager is the central hub for installing and enabling extensions. You’ll typically access it via Edit > Preferences > Add-ons. From here, you can enable built-in add-ons, search the official catalog, and install from a local ZIP or folder. The official store and repository provide a curated set of extensions tested for compatibility. Always start with trusted sources and verify the extension’s documentation for installation steps. As highlighted by BlendHowTo, starting from the official sources reduces risk and simplifies updates over time.
Installing from a ZIP or Python file
Many extensions are distributed as ZIP archives or single Python scripts. To install from ZIP, click Install... in the Add-ons tab and select the ZIP file. Blender will unpack and place the extension in the addons directory. For a PY file, you can install the script directly the same way. After installation, use the search bar to locate the addon by name, then enable it. If you encounter errors, check that the ZIP is a Blender-compatible version and that all dependencies are present. To be safe, download from the extension’s official page or a reputable repository and scan for any malware warnings.
Why this matters: ZIP and PY packages can differ in structure; some require extra steps described in the addon’s README.
Installing from GitHub or external sources
GitHub and other hosting platforms host many Blender add-ons. When installing from these sources, download the recommended release (not a raw branch), and check the addon’s compatibility notes. Some add-ons require you to clone a repo or place files in a specific directory. Always verify the author’s instructions, confirm the release is signed or reputable, and avoid blindly installing from unknown forks. This approach is common for cutting-edge tools, but it carries security risks if you’re not careful. According to BlendHowTo Analysis, 2026 indicates a growing tendency to rely on official or well-known third-party repositories for extensions.
Activating and configuring add-ons in Blender
After installation, you must enable the addon in Blender’s Add-ons list and save your preferences. Check for a new tab in the preferences related to the addon, or look for new operators in the appropriate context (e.g., modeling, animation, rendering). Some add-ons require extra setup, like API keys or custom panels, so read the addon’s documentation carefully. If an addon isn’t visible after installation, try restarting Blender, ensuring you installed the correct version for your Blender release, and verifying that the addon is enabled.
Pro tip: keep a dedicated folder for downloaded add-ons to ease backups and reinstallation across Blender versions.
Compatibility, versioning, and performance considerations
Blender extension compatibility hinges on Blender’s version and the Python API the addon targets. Always verify the addon’s minimum Blender version in the documentation and ensure you’re using a compatible Python environment. Some extensions disable themselves on major Blender upgrades until updated. In busy production workflows, you may also want to check for performance implications, such as memory usage or GPU load. Plan for a test run in a staging Blender profile before integrating the addon into live projects. BlendHowTo recommends maintaining a changelog of addon versions you use to simplify troubleshooting after Blender updates.
Troubleshooting common installation issues
If an addon does not appear or fails to enable, start with these checks: verify the Blender version compatibility, confirm the addon is installed in the correct addons directory, and ensure you enabled it in Preferences. Look for error messages in Blender’s system console (on Windows, enable the console via Window > Toggle System Console). Also, some addons require you to restart Blender after installation or to re-check the Add-ons list. If you encounter issues after an update, consider temporarily disabling other addons to rule out conflicts and check the addon’s issue tracker for known compatibility notes.
Best practices for organizing extensions
Organize your extensions to minimize conflicts and simplify maintenance. Create a dedicated addon folder for your user profile, maintain version control notes, and document the purpose of each addon. Regularly audit your installed add-ons and remove unused ones. Keep a clean startup file so new projects load with a sane default environment. Backups of your Blender configuration can save time when migrating to a new machine or Blender version.
Security, safety, and maintenance considerations
Only install extensions from trusted sources. Beware of phishing sites or downloads that request unusual permissions. Before updating or installing, review the addon’s license and readme for any data collection or network access statements. Maintain backups of your addons and preferences, and consider using a separate user profile for testing new extensions so your main workspaces stay stable. Regularly check for Blender and addon updates to maintain compatibility and security.
Community resources and next steps
Join Blender communities to discover recommended extensions and best practices for installation. Forums, official Blender documentation, and reputable channels like BlendHowTo can provide guidance and up-to-date advice. As you gain experience, you’ll learn which extensions consistently deliver value for your workflow, and you’ll develop a routine for evaluating new tools before integrating them into your projects.
Tools & Materials
- Blender (latest stable release)(Ensure compatibility with the addon's minimum Blender version)
- Computer with internet access(Stable connection for downloading add-ons and updates)
- ZIP extractor (e.g., 7-Zip, WinRAR)(Needed to unzip or manage ZIP packages when required)
- Addon file (ZIP or PY)(Download from trusted sources or official pages)
- Backup plan (optional)(Backup of preferences and addons folder before major installs)
- Git client (optional)(Needed if installing from GitHub sources or cloning repos)
Steps
Estimated time: 15-30 minutes
- 1
Open Blender and access Preferences
Launch Blender and go to Edit > Preferences. This is your central hub for managing add-ons, including enabling built-in addons and installing new ones.
Tip: Use the search bar in Preferences to quickly locate the Add-ons section. - 2
Open Add-ons tab and start installation
In the Add-ons tab, click Install... to begin adding a new extension from a local ZIP or PY file.
Tip: Have the addon file ready before starting; a missing file causes the process to fail. - 3
Install from File (ZIP or PY)
Select the downloaded ZIP or Python script and install. Blender will place the addon in the addons folder and show it in the list.
Tip: If installing a ZIP, ensure it’s structured as a Blender addon (with an __init__.py or similar entry). - 4
Enable the addon
Find the addon in the list and enable its checkbox. Some addons require further configuration post-enable.
Tip: If the addon doesn’t appear, try restarting Blender or rechecking the installation path. - 5
Save Preferences
Click Save Preferences to keep the addon enabled for all future Blender sessions.
Tip: For multi-user setups, consider saving to a startup file to retain settings across projects. - 6
Configure addon settings
Open the addon’s panel (often a new tab in the N panel or a dedicated preferences pane) and adjust settings as needed.
Tip: Review official documentation for key settings and recommended defaults. - 7
Test the addon
Create a small test scene or workflow to validate that the addon functions as expected.
Tip: Document any issues and check for conflicts with other addons or scripts.
Frequently Asked Questions
Where can I find Blender extensions to install?
You can find Blender extensions in Blender’s Add-ons preferences, the official add-ons catalog, and reputable repositories like GitHub. Always start from trusted sources and review documentation for installation steps and compatibility.
You can find Blender extensions in the Add-ons preferences and official catalogs. Start from trusted sources and read the installation instructions.
Do I always need to restart Blender after installing an extension?
Not always. Some addons require a restart for the changes to apply, while others enable immediately. If you don’t see the new features, try restarting Blender and re-enabling the addon.
Sometimes you need to restart Blender after installing, but often you can enable it right away. If in doubt, restart and check again.
Can I install multiple extensions at once?
Yes. You can install multiple add-ons by repeating the install process for each one. Enable and configure each addon individually to avoid conflicts.
Yes, you can install several addons; just install and enable them one by one and check for conflicts.
Why isn’t my extension showing up after installation?
Check compatibility with your Blender version, ensure the addon is enabled in Preferences, and confirm you installed from a valid source. Restart Blender if necessary.
If it’s not showing up, verify compatibility, enable it in Preferences, and try restarting Blender.
Is it safe to install Blender extensions from GitHub?
Install only from reputable authors and verify the repository’s credibility. Read the addon’s documentation and check for recent updates or issue reports.
GitHub addons can be safe if from trusted authors; always read docs and check for updates.
How do I remove an extension I no longer want?
Disable the addon in Preferences and optionally delete its files from the addons directory. Saving startup preferences helps keep the change across sessions.
Disable the addon and, if desired, remove its files for a clean setup.
Watch Video
What to Remember
- Know where Blender extensions live in Preferences
- Always install from trusted sources
- Enable and test addons before integrating into projects
- Back up preferences before major changes
- Keep a tidy addons library to avoid conflicts