3D Animation on Blender: A Practical Guide
Learn practical, step-by-step techniques for creating compelling 3d animation on blender. From setup to export, this guide covers essential tools, workflows, and tips for home studios and hobbyists.

This guide shows you how to create polished 3d animation on blender, from planning and modeling to lighting, animation, and final render. You'll learn a practical workflow that works for hobbyists and aspiring 3D artists, with hands-on steps, recommended settings, and common pitfalls to avoid. This approach emphasizes clear animation curves, efficient scene management, and export-ready results.
Core concepts behind 3d animation on blender
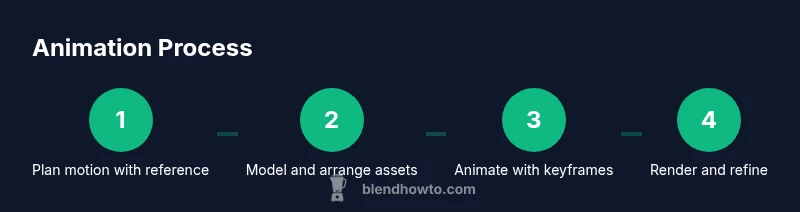
In Blender, 3D animation is a pipeline that starts before you press play. You plan the motion, model or assemble the assets, and then bring them to life using keyframes, rigs, and constraints. A solid foundation rests on understanding the timeline, the difference between object-level and pose-level animation, and how Blender's interpolation modes shape motion. The most common workflow uses a blocking phase to establish timing, followed by refining curves in the Graph Editor to create natural acceleration and easing. Throughout this process you’ll switch between the 3D Viewport, the Dope Sheet, and the Graph Editor; each tool reveals different facets of your motion. A well-structured project uses clean naming, organized collections, and consistent unit scales so assets can be reused later. The keyword for success is iteration: test renders after small changes, compare with your reference, and adjust hold types or easing to capture intention. With practice, you’ll sculpt motion to convey character, emotion, and intent, not just moving geometry.
Project setup and organization in Blender for animation
Before you animate, organize your Blender project. Create a dedicated folder structure for your assets, textures, and render outputs. In Blender, use Collections to group related objects (e.g., character, environment, props) and adopt a naming convention that includes asset type, state, and version (e.g., Char_Main_V01, Prop_Canon_V02). Enable units and scale so that measurements carry through to lighting and physics simulations. Set a consistent frame rate and start/end frames, then configure a simple, non-destructive workflow: work with low-resolution proxies for blocking, then swap in high-resolution assets for final passes. Regularly save versions and enable auto save so you can backtrack without losing progress. Finally, set up a dedicated camera and lighting plan early to validate composition as you model. This preparation reduces rework during animation and keeps the project lean for iteration.
Animation techniques: keyframes, interpolation, and curves
Keyframes are the heartbeat of Blender animation. Start with blocking—place essential poses at key frames to establish timing. Then choose interpolation modes (Bezier, Linear, Constant) to shape how motion transitions between poses. The Graph Editor is your primary tool for refining motion curves: adjust handles to create smooth acceleration, ease-ins/ease-outs, and natural arcs. Use auto-keying to record changes as you tweak transforms, but review each keyframe to avoid accidental overshoots. Layer motion with constraints, drivers, or action editors to reuse animation across objects (e.g., a character's facial expressions stored as actions). Practice non-linear techniques with the NLA editor to blend multiple passes (base animation, secondary motion, and camera movement) without rewriting earlier steps. A disciplined approach to curves and timing yields believable motion that supports storytelling.
Lighting, cameras, and render settings for believable animations
Lighting enhances mood and readability. Start with a simple three-point setup and supplement with HDRI lighting for natural reflections. Place cameras to frame action and consider camera moves that reveal scale and depth. Depth of field can help direct viewer focus, but use it sparingly to avoid soft edges on important motion. In terms of rendering, choose Eevee for fast previews and Cycles for final quality. Set reasonable samples, enable denoising for cleaner frames, and configure color management for your target platform. Keep render times in check by using viewport previews during blocking and reserving full renders for the final pass. Always test a short sequence before committing to a long render.
Materials, textures, and shading for 3d animations
Materials should be physically plausible yet not overly heavy for animation cycles. Use PBR shaders with realistic roughness and metallic values, and map textures with clean UVs. For characters, set up a clean rig with correct skin weights to ensure deformations look natural during motion. If you’re animating environments, keep texture resolution appropriate to the camera distance to prevent unnecessary render load. Use simple textures for blocking passes and reserve higher fidelity textures for final renders. Organize materials in a consistent node setup so shader changes propagate predictably across your scene. Remember to enable proper color management to ensure visuals remain consistent across display devices, particularly when sharing renders online.
Exporting, post-processing, and optimization for different platforms
Export is not the end—consider post-processing for polish. For web and social sharing, render at a smaller resolution with compressed formats while maintaining motion clarity. If you need high quality, render in cycles with denoising and a higher sample count, then composite in Blender or external software to add motion blur, color correction, and bloom. When exporting, choose container formats that suit your audience (e.g., MP4 for web) and ensure your audio is synchronized if used. Finally, optimize scenes by baking simulations, reducing unnecessary geometry, and enabling GPU rendering where available. This workflow ensures consistent, production-ready results that scale across platforms.
Tools & Materials
- Blender software(Latest stable release for your OS)
- Computer with GPU capable of rendering(Dedicated GPU recommended (RTX/RTX-class))
- Mouse or drawing tablet(Precise control for keyframing)
- Backup storage(External drive or cloud backup)
- Reference media (images, videos)(Helps plan motion)
- External monitor(Better workspace)
Steps
Estimated time: Estimated total time: 3-5 hours
- 1
Open a clean Blender project and set up the animation workspace
Create a new project and switch to the Animation workspace. Set unit scale, frame rate, and start/end frames. Establish a naming convention for assets and create a dedicated folder structure for assets, proxies, and renders.
Tip: Save a new version before making major changes; enable auto-save. - 2
Import or create assets and organize into collections
Import models or build your own in Blender. Group related objects into Collections (e.g., Character, Props, Environment) and use consistent naming. Attach simple rigging if needed for animation later.
Tip: Keep a clean hierarchy to simplify animation passes. - 3
Block key poses and set a preliminary timeline
Place major poses at keyframes to block action. Use low-resolution proxies to keep the viewport responsive while you test timing.
Tip: Aim for clear, readable silhouettes in each pose. - 4
Refine motion with Graph Editor and curves
Switch to the Graph Editor and adjust F-curves to smooth transitions. Tweak handles for easing, overlap, and anticipation to convey intent.
Tip: Prefer easing over abrupt changes for natural motion. - 5
Set up cameras and lighting for readability
Position a camera to frame the core action; animate camera moves for storytelling. Build a lighting setup that guides the viewer’s eye and enhances mood without washing out detail.
Tip: Test renders from multiple camera angles. - 6
Animate materials and test renders
Add simple material changes or shader tweaks for motion-sensitive surfaces. Run quick preview renders to verify color, texture, and lighting in motion.
Tip: Render a short sequence (5-10 seconds) to spot issues early. - 7
Preview, troubleshoot, and optimize render settings
Run low-sample previews to catch issues without long waits. When ready, switch to higher sampling, enable denoising, and compare Eevee vs Cycles for balance between speed and realism.
Tip: Use denoising and sampling settings aligned to final output quality. - 8
Export, post-process, and deliver
Export the final sequence in your target format, then perform post-processing in Blender or a dedicated editor. Ensure audio sync if used, and archive the project for future updates.
Tip: Keep a master export with high quality; create a lighter version for quick previews.
Frequently Asked Questions
Is Blender free for commercial work?
Yes. Blender is free and open-source, with a permissive license that allows commercial use. You can download, modify, and distribute builds without royalties.
Blender is free and can be used commercially without paying for licenses.
Do I need a high-end PC for complex scenes?
For complex scenes, a capable GPU and ample RAM help, but you can start with simpler scenes and render previews to stay productive.
A mid-range PC works for many projects; higher-end gear speeds up final renders.
Which render engine should I choose?
Blender offers Eevee for fast previews and Cycles for realistic results. Choose based on your quality needs and render time constraints.
Use Eevee for quick previews and Cycles for final quality when time allows.
Can I import assets from other software?
Yes. Blender supports common formats like FBX and OBJ, letting you bring in models from other tools and extend your library.
Blender can import FBX and OBJ models from other software.
How do I learn Blender effectively?
Follow structured tutorials, practice regularly, and build small projects to reinforce concepts.
Practice with short projects and follow step-by-step tutorials.
Watch Video
What to Remember
- Plan motion with references before animating.
- Master Graph Editor for smooth curves and timing.
- Test renders frequently to catch issues early.
- Organize assets with clear naming and collections.