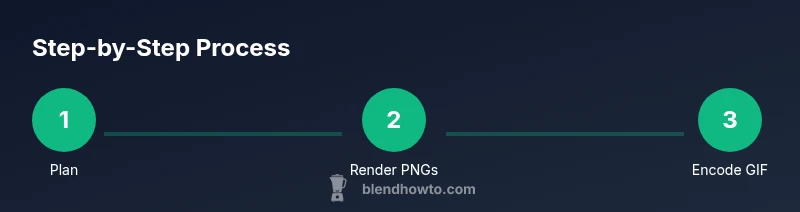
Blender Animation GIF: Step-by-Step Guide
Turn Blender animations into optimized GIFs with a practical, step-by-step workflow covering planning, rendering, palette optimization, and file-size control.

Turn Blender animations into polished GIFs with a practical, step-by-step workflow. This guide covers planning, rendering PNG sequences, palette optimization, and glow-free compression to keep file sizes reasonable while preserving motion quality.
Planning your Blender animation GIF: goals, audience, and constraints
Before you dive into modeling, lighting, and animation in Blender, clarify what the GIF should communicate and where it will appear. Is this a quick teaser for social media, a tutorial snippet for your portfolio, or a looping demonstration for a product page? Define the target resolution, length, and frame rate early. Consider the platform's color and size limits, the need for readable motion at small scales, and whether you need transparency. A well-planned GIF is more than pretty motion: it tells a concise story in under 6 seconds for optimal engagement. Use a simple storyboard to outline the sequence of actions, transitions, and timing. This planning phase also guides how you will optimize color palettes and dithering later, ensuring the final Blender animation GIF communicates clearly and efficiently.
Understanding GIF limitations and design choices
GIFs are limited to a 256-color palette per frame. This constraint drives decisions about color grading, gradients, and dithering. You must decide on the overall color depth, frame rate, and looping behavior. Lower frame rates reduce file size but may feel choppy; higher frame rates improve smoothness but inflate size. The looping approach matters too: a seamless loop feels professional, while a jarring jump breaks immersion. Palette optimization is essential: it groups similar colors and reduces the palette to a handful of representative hues. Dithering can help simulate more color depth, but too much dithering creates a speckly look. The goal is to keep the visual language consistent with your brand and the platform’s requirements, whether you publish on Instagram, Twitter, or a portfolio site.
Preparing your Blender scene for GIF export
Optimize your Blender project before rendering: simplify materials and textures; bake lighting where possible to reduce render time and ensure consistent visuals across frames. Use a clean camera path, stable lighting, and well-behaved animation curves. If your scene includes effects like volumetrics, glow, or motion blur, test their translation to GIF; often turning off heavy effects yields a cleaner result and smaller file sizes. Keep animations lightweight and legible for quick comprehension. Finally, set up a small test scene to verify timing, color balance, and looping behavior before committing to full renders. This preparation reduces rework and stabilizes the final GIF output.
Rendering PNG sequence and frame range decisions
Render as a PNG sequence to preserve image quality for color quantization. Choose a resolution that matches your target platform (for example, 512x288 or 720x720 for social media) and a frame range that captures the loop smoothly. A typical GIF might be 60-120 frames, but this depends on your motion and desired duration. In Blender, use a neutral background or a transparent alpha if your design requires it, then plan the final compositing in an external tool. Rendering to PNG gives you flexibility to adjust colors, timing, and compression during the GIF conversion process without re-rendering the entire sequence. Ensure you enable multi-frame rendering if your hardware supports it to reduce total render time.
Converting PNG sequence to GIF: FFmpeg and palette optimization
The standard workflow uses a two-pass palette approach with FFmpeg or ImageMagick. First, generate a color palette from your PNG sequence, then apply that palette when encoding the GIF to maintain color quality. Example FFmpeg steps include creating a palette file from frames and then building the GIF using that palette. If you prefer ImageMagick, you can use a similar two-step process with magick convert and -layers optimize. The key is to preserve the animation’s motion while constraining the color set to your target palette. Expect some trial-and-error to balance color fidelity with file size, especially for complex scenes.
Palette optimization, dithering, and frame-rate trade-offs
Palette optimization reduces the number of colors and improves compatibility. Dithering adds texture to color transitions, making gradients appear smoother despite the limited palette. However, excessive dithering can introduce a noisy, speckled look. A practical approach is to start with a 128- or 256-color palette, then test 2-3 dithering levels to see what reads best on your target devices. Adjust the frame rate to achieve a pleasing balance between motion smoothness and file size. For short marketing GIFs, 12-24 frames per second often suffices; for stately product demos, 24 fps is a comfortable baseline. Keep an eye on the total file size and the maximum duration users will tolerate on social feeds.
Reducing file size without sacrificing too much quality
If the GIF is too large, reduce the resolution or trim non-essential frames. Another option is to segment the animation into shorter loops and deliver multiple GIFs rather than a single long one. Use color quantization and dithering judiciously, as heavy quantization can degrade legibility. When possible, optimize the background to a single color or simple gradient to minimize color variation. Consider hosting options that allow progressive loading or GIF alternatives like WebP for platforms that support it. The goal is a visually clear, fast-loading GIF that maintains the essence of the Blender animation while staying within platform limits.
Accessibility, branding, and watermark considerations
Add descriptive captions or alt text to accompany your GIF for accessibility. If you’re publishing for a brand, ensure the GIF aligns with your color palette and typography. A subtle watermark or a small logo can protect your work without distracting from the animation. If you’m sharing on social platforms, test how the GIF behaves in dark mode and across devices. The best practice is to produce a few variations—short looping GIFs optimized for mobile and longer, higher-quality versions for portfolio displays. Accessibility and branding should be integral to the production process from the start, not an afterthought.
Tools & Materials
- Blender (latest stable version)(Install from blender.org; ensure it includes the VSE and rendering modules)
- Computer with GPU support(Sufficient RAM (8-16 GB for small projects, 32 GB+ for larger scenes))
- FFmpeg(Install separately; use to convert PNG sequence to GIF)
- ImageMagick (optional)(Alternative for palette generation and GIF encoding)
- Storyboard and asset list(Plan frames and actions before rendering)
Steps
Estimated time: 2-4 hours
- 1
Plan your animation GIF
Define goals, target audience, and platform constraints before starting your Blender project. Create a brief storyboard and note the desired duration and looping behavior.
Tip: Write down the exact frame length and looping style to guide rendering and encoding. - 2
Prepare the Blender scene
Simplify materials and textures; bake lighting where possible to reduce render time and ensure consistent visuals across frames.
Tip: Disable heavy post-processing in the viewport to speed up previews. - 3
Set render and frame settings
Choose a practical resolution and frame range that captures the loop smoothly. Render to a PNG sequence for high-quality frames.
Tip: Use a modest resolution to keep GIF size in check while preserving legibility. - 4
Render PNG sequence
Render frames to a PNG sequence, preferably with no alpha or a simple background if your design requires it.
Tip: Enable multi-frame rendering if available to speed up the process. - 5
Create a palette and encode GIF with FFmpeg
From the PNG sequence, generate a color palette and then encode the GIF using that palette to preserve color quality.
Tip: Follow a two-pass approach: palette generation then GIF encoding. - 6
Optimize palette and dithering
Experiment with 128-256 colors and test different dithering strengths to balance color accuracy and banding.
Tip: Start with medium dithering and adjust based on test frames. - 7
Reduce file size without losing essential quality
Trim frames, resize resolution, or split into multiple GIFs to meet platform limits while maintaining the animation's essence.
Tip: Consider alternative formats (WebP) if supported by the platform. - 8
Add accessibility and branding touches
Provide alt text and consider a subtle watermark. Verify readability on mobile and dark mode.
Tip: Keep branding unobtrusive but recognizable. - 9
Test on target platforms
Preview the GIF on the platforms where it will appear; adjust frame rate or compression if playback is choppy.
Tip: Test on both light and dark backgrounds. - 10
Publish and monitor performance
Upload to your portfolio or social channels; monitor load times and engagement to iterate for future GIFs.
Tip: Note which variations perform best to refine your workflow. - 11
Document your workflow for reuse
Capture settings, commands, and decisions into a reusable guide for future Blender animation GIFs.
Tip: Create a checklist for quick-start projects.
Frequently Asked Questions
What is the easiest way to create a Blender animation GIF?
The common workflow renders a PNG sequence from Blender, then uses FFmpeg or ImageMagick to convert the sequence into a constrained-color GIF with a chosen palette. This two-step process preserves quality while keeping file sizes manageable.
Render a PNG sequence and convert with FFmpeg or ImageMagick to a palette-optimized GIF.
Do I need to render a PNG sequence first, or can I export directly to GIF from Blender?
Direct GIF export from Blender is not typical; the standard approach uses a PNG sequence for quality control, followed by external tools for palette-limited GIF encoding.
Direct GIF export from Blender isn't common; render PNGs first and convert with an external tool.
How can I optimize a Blender animation GIF for social media?
Optimize by reducing resolution, limiting colors, applying a moderate dithering level, and choosing a frame rate that preserves motion without inflating file size. Consider multiple shorter GIFs in place of one long animation.
Reduce resolution and color count; test on social platforms with different backgrounds.
What are the typical color limits for a GIF?
GIFs typically use up to 256 colors per frame. Quantization and dithering manage color depth to balance appearance and file size.
GIFs are limited to 256 colors per frame, which influences palette choices.
Can I use WebP instead of GIF for animations?
If the target platform supports it, WebP can offer smaller file sizes and better quality. GIF remains broadly supported, so choose based on where your GIF will appear.
WebP often provides better quality-for-size, but GIF has wider support.
What common mistakes should I avoid when making Blender GIFs?
Avoid oversize resolutions, skip excessive dithering, and neglect color palettes. Always test playback on mobile devices to catch performance issues.
Avoid big resolutions and too much dithering; test on mobile.
Watch Video
What to Remember
- Plan with intent and define GIF constraints upfront
- Render high-quality PNGs to preserve colors
- Use a two-pass FFmpeg or ImageMagick workflow for palette-accurate GIFs
- Balance color, dithering, and frame rate to control file size
- Test across devices and platforms for consistency