How to Blender Animation: A Practical Step-by-Step Guide
A comprehensive, practical guide to how to blender animation in Blender. Learn planning, keyframes, graph editing, camera setup, rendering, and troubleshooting with actionable steps for beginners and hobbyists.

Goal: Learn how to blender animation by planning your scene, setting keyframes, refining motion curves, and rendering a polished clip. This quick guide covers core concepts, practical workflows, and common pitfalls to help beginners and hobbyists. You’ll start with a simple scene and progress to a complete animation, with actionable tips that apply to characters, props, and camera motion. By the end, you’ll be ready to tackle your first Blender project.
how to blender animation: Core Concepts
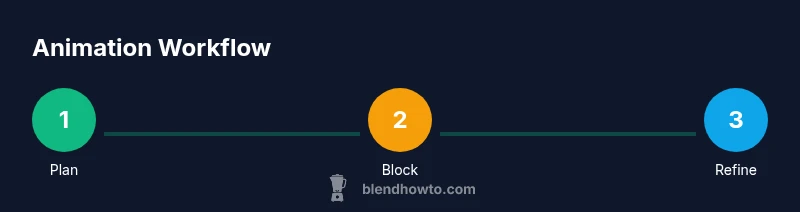
Animation in Blender follows a simple pipeline: plan, block, refine, and render. Understanding this flow helps you build consistent motion without getting lost in tools. According to BlendHowTo, the most successful projects begin with a clear intention, a manageable scope, and a skeleton timeline that shows major frames before you polish curves. In this article you’ll revisit the four pillars you’ll return to again and again: keyframes, interpolation, timing, and secondary motion. You’ll learn how to set up a straightforward scene, define a baseline pose, and prepare assets for animation. Focusing on intent rather than every micro-movement saves time and keeps motion readable as ideas evolve. This first section anchors your approach to a repeatable workflow full of practical checks and non-destructive steps.
Here you’ll also see the core question: what is the desired perceived speed, arc, and personality of the motion? Answering this early makes the entire pipeline smoother.
Planning Your Animation Before You Work the Timeline
Effective Blender animation starts long before you press play. A good plan saves time, clarifies intent, and reduces wasted frames. Start by defining the action, choosing the character or object, and collecting reference material. Create a rough storyboard or a simple list of key poses that describe the motion arc. In BlendHowTo's guidelines, a clear brief at the outset helps keep the project scoped and actionable. As you prepare, identify the essential frames (start pose, key mid-motions, end pose) and decide what the audience should feel at each moment. Then, translate this plan into a blocking pass where you place your first keyframes on the timeline. Focus on big, readable movements rather than tiny, detailed tweaks. This foundation will guide the rest of the process and make refinements much faster later.
A practical tip is to draft three alternative arcs for the same action and compare which best communicates the intended rhythm. This keeps you flexible while still moving forward.
Building a Clean Scene for Animation
A clean scene reduces confusion and speeds up iteration. Organize your objects into a logical hierarchy, name every element clearly, and separate motion from environment as much as possible. Start with a simple background, a main subject, and a few props that interact with it. Use constraints to keep things in sync, such as parent-child relationships for linked motion, or simple constraints for alignment if applicable. In Blender, enable a lightweight shader during blocking and avoid heavy textures until timing is settled; focus on motion first. Set up a neutral camera angle that showcases the action, and use a consistent lighting scheme to reveal silhouette and form. If you reuse assets, keep animation data in a separate collection to avoid clutter. A well-structured scene reduces friction when you adjust timing or swap assets.
Remember to maintain a tidy outliner; it helps when you later branch into versions or iterations.
Mastering Keyframes and Timelines
Keyframes are the backbone of Blender animation. Start by placing keyframes for the main poses, then fill in the in-between frames with consistent spacing. Use the Dope Sheet to adjust which frames hold which poses, and switch to the Graph Editor to shape motion curves. A smooth motion usually comes from gentle easing in and out, not abrupt jumps. For mechanical motion, use linear interpolation between critical frames, then switch to ease when the movement needs natural acceleration. Keep the timeline clean by grouping related actions and using color coding for different objects. Periodically scrub the timeline at real-time speed to ensure readability and pacing; if something looks off, revert to blocking and re-time the affected frames. Practicing with a simple object makes these tools feel intuitive before moving to complex rigs.
Graph Editor and Curves: Fine-Tuning Motion
Graph Editor refinement is where motion becomes believable. Open the Graph Editor, select the animated property (location, rotation, scale), and adjust handles to smooth transitions. Use the F-Curve to balance acceleration, deceleration, and overshoot. Avoid over-tweaking curves to prevent jitter. A common technique is to lock or auto-snap tangents to maintain predictable motion. For camera and object motion, small curve adjustments can have major perceptual impact, so test often with the playhead at real-time speed. When you work with secondary motion (like cloth or hair), keep curves gentle and consistent with the main action. This keeps motion cohesive across the scene.
Tip: save different graph views for blocking vs refinements to avoid accidental changes in earlier stages.
Adding Camera and Lighting for Dynamic Motion
Camera setup and lighting choices dramatically influence how motion reads. Start with a camera angle that highlights key silhouettes and motion arcs. Use a simple dolly or a few quick cut movements to keep the action engaging without introducing jarring shifts. Lighting should emphasize form and mood; a three-point setup with a key, fill, and backlight is a reliable baseline for beginners. Animate subtle camera moves only after your primary motion feels solid. You can also simulate motion parallax by placing distant background elements on separate layers. Keeping the camera and lighting lightly animated during blocking helps you judge how motion translates through the space, making it easier to adjust pacing and emphasis later.
As your scene evolves, remember to test from multiple angles to ensure readability from all likely viewing perspectives.
Rendering and Output: From Scene to Screen
Rendering is the final stage that turns your Blender project into a playable clip. Decide on the output resolution and frame rate early, then set an appropriate rendering engine (Cycles or Eevee) based on your needs for speed versus realism. Test render a few frames to confirm lighting, shadows, and motion look correct before committing to a full render. Export your animation as a widely supported format (such as MP4 with H.264) to ensure compatibility across platforms. For iteration, render low-resolution previews during the process to keep feedback cycles fast, then perform a high-quality render once timing, motion, and composition feel right. Finally, keep a backup of your render settings and assets to streamline future projects.
Pro tip: enable denoising and color management settings suited to your scene to improve perceived quality in final renders.
Common Pitfalls and Troubleshooting
Even experienced artists encounter common issues in Blender animation. Overly long animation blocks with insufficient planning often lead to pacing that feels stiff or mechanical. Another frequent problem is inconsistency in motion between rigged characters and props, which breaks the illusion of life. Start by validating the blocking pass, then work through timing earlier in the pipeline before delving into curves. Watch for jitter or unnatural easing in certain frames, and fix those with targeted graph edits. If lighting or camera motion distracts from the action, reduce movement during the blocking phase and reintroduce it later as a secondary layer. Finally, maintain a disciplined workflow with incremental saves to avoid losing progress after a misstep.
BlendHowTo recommends a structured checklist approach to debugging motion, lighting, and rendering issues.
Workflow Examples: how to blender animation in practice
To illustrate practical workflows, consider two common scenarios: a simple walk cycle and a bouncing ball with secondary motion. For the walk cycle, block the hips, shoulders, and feet first to establish leg timing and weight. Then add subtle arm sway and head motion; refine curves in the Graph Editor to ensure natural acceleration and deceleration. For the bouncing ball, start with the contact frames, then shape the arc with easing to convey impact and anticipation. Add a tiny squash-and-stretch on each impact to exaggerate motion, keeping it lightweight so it doesn’t feel cartoonish. These examples demonstrate a repeatable approach: plan, block, refine, render, and review. With practice, you’ll adapt the same pipeline to more complex scenes and character rigs. In all cases, the core technique is to separate the key motion from the fine-grained tweaks until the timing is correct.
How to blender animation: Core Concepts (Recap)
By following a clear pipeline and using a structured approach to keyframes, curves, and camera motion, you can master Blender animation efficiently. The emphasis on blocking first, iterative refinement, and frequent previews helps you stay productive without getting lost in software features. Remember to keep your files organized, back up work often, and test renders early. As you gain experience, you’ll build a personal toolkit of tricks for easier workflows, faster iterations, and more expressive motion.
Tools & Materials
- Blender software (latest stable release)(Download from blender.org; ensure you have a compatible GPU for faster renders)
- Computer with adequate RAM and a capable GPU(Aim for 16 GB RAM or more for heavy scenes; more is better for high-res renders)
- Mouse with scroll wheel or drawing tablet (optional)(Tablets help with precision on curves in the Graph Editor)
- Reference material for motion (video or concept art)(Gather pose references and action cues for believable motion)
- External storage or cloud backups(Back up projects to prevent data loss during iterations)
- Documentation or beginner-friendly tutorials(Helpful for reinforcing concepts and exploring new features)
Steps
Estimated time: 60-90 minutes
- 1
Plan your motion and set up the scene
Define the action, identify key poses, and assemble a simple scene with one main object and supporting props. Create an initial blocking pass by placing the first keyframes at major frames to establish timing and pose clarity.
Tip: Start with three core poses to define the arc and weight. - 2
Set initial keyframes for primary motion
Insert keyframes for the main poses at frame 1 and at critical frames further down the timeline. Ensure consistency in spacing to convey a natural rhythm.
Tip: Use insert keyframe function or the I-key on the timeline. - 3
Switch to Dope Sheet for timing adjustments
Review which frames hold keys and adjust timing by moving entire blocks to improve pacing without changing pose shapes.
Tip: Group related actions with color coding to stay organized. - 4
Refine curves in the Graph Editor
Adjust your F-Curves to smooth transitions, balancing acceleration and deceleration for natural motion. Avoid abrupt jumps by easing the curves.
Tip: Keep tweaks incremental and test with real-time playback. - 5
Add camera and lighting support
Position a camera to showcase the action and set up a basic three-point lighting scheme. Animate subtle camera moves only after the action feels solid.
Tip: Light should enhance motion, not distract from it. - 6
Introduce secondary motion
Add light secondary motions (like cloth or hair) that respond to the main action without overpowering it.
Tip: Secondary motion should feel connected to the primary motion. - 7
Do test renders and iterate
Render short previews to check timing, arcs, and readability. Make refinements based on what you observe in motion and composition.
Tip: Use lower resolution previews during iteration. - 8
Finalize export settings
Choose output format, resolution, and frame range. Run a final test render before exporting the full sequence.
Tip: Document settings for future projects.
Frequently Asked Questions
What is the first step to start animating in Blender?
Begin with planning and a simple object. Place your first keyframe on frame 1, then add a second keyframe later to establish movement. Review playback to ensure the motion communicates the intended action.
Start by planning the motion and setting a simple object. Add your first keyframe, then a second to define movement, and watch playback to verify the timing.
Should I always use auto keyframing in Blender?
Auto keyframing records changes automatically, which can speed up work but may create unintended frames. Use it for a focused pass, then clean up unnecessary keyframes.
Auto keyframing can speed things up, but it can also add extra frames you don’t want. Use it for a focused pass and then clean up.
How can I improve animation timing?
Use the Dope Sheet to adjust frame timing and the Graph Editor to shape pacing. Start with a rough plan and refine by repeatedly playing back at real speed to match your rhythm.
Tweak timing with the Dope Sheet and Graph Editor, then play back at real speed to match your rhythm.
What are common beginner mistakes in Blender animation?
Skipping planning, overemphasizing minor details early, and neglecting a clean scene structure. Begin with blocking, then progressively refine motion and composition.
Beginners often skip planning and focus on tiny details too soon. Start with blocking and then refine motion.
Do I need motion capture data to animate in Blender?
No. You can create all animation with keyframes and curves. Mocap is helpful for some projects but not required for learning Blender animation.
You don’t need motion capture for Blender animation; learn with keyframes first.
How do I render an animation in Blender?
Set your output path and format, choose a render engine, and render the animation. Do test renders to verify visuals before a full render.
Render animations by setting output, formats, and using the render command, with test renders to check quality.
What to Remember
- Plan motion before detailed animation.
- Block key poses to establish timing and readability.
- Refine with Dope Sheet and Graph Editor for smooth motion.
- Add camera and lighting only after core motion feels solid.
- Render previews frequently to catch issues early.