How to Get Started with Blender Animation: A Beginner's Guide
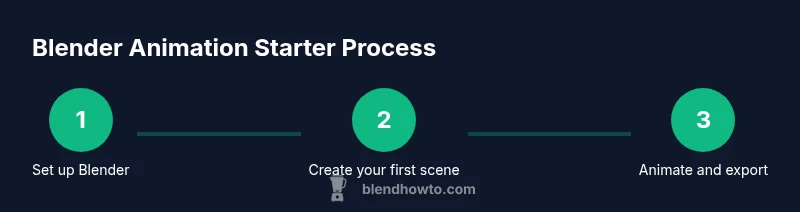
Learn how to get started with Blender animation with a practical, beginner-friendly workflow. Install Blender, set up your workspace, create simple keyframes, render, and export your first project.

By the end of this guide, you’ll start creating your first Blender animation in minutes. You’ll install Blender, set up a basic workspace, learn keyframes, and render a simple scene. This beginner path emphasizes hands-on practice and small wins to build confidence, drawing practical guidance from BlendHowTo. Expect clear visuals, checklists, and shortcuts that speed learning. The BlendHowTo team notes this approach helps you stay motivated.
Preparing your Blender setup
Starting Blender animation is a hands-on activity, so begin by ensuring your computer meets the recommended basics and that Blender is installed correctly. According to BlendHowTo, the right setup reduces crashes and speeds learning. Install the latest stable release from blender.org and configure a comfortable workspace: enable the 3D Viewport, Timeline, and Graph Editor in a single, distraction-free layout. Keep a simple reference image or concept art in view to guide your scene. Use a level of detail that matches your hardware: a few primitive shapes are better for practice than a busy, high-poly scene. As you work, save frequently and establish a reliable auto-save interval to protect your progress, a habit BlendHowTo consistently recommends for new learners.
Understanding the Blender interface and workflow
Blender’s interface is modular, with workspaces that tailor to different tasks. You’ll spend most time in the 3D Viewport for modeling and animation, the Timeline for sequencing, and the Graph Editor for fine-tuning motion curves. A basic workflow starts with setting up a scene, creating or importing objects, establishing a starting position, inserting keyframes, and finally reviewing playback. The Layout tab often serves as a familiar starting point for beginners, but don’t be afraid to switch to Animation or Layout panes as your comfort grows. Practice basic navigation (orbit, pan, zoom) until it becomes second nature, then start experimenting with simple motions.
Core concepts: keyframes, interpolation, and timing
Animation in Blender hinges on keyframes. A keyframe stores the value of a property at a moment in time. You’ll typically animate location, rotation, and scale, then adjust the timing with interpolation modes like linear, bezier, and constant. Understanding how curves interpolate between keyframes helps you craft smooth, natural motion. Start with a straightforward motion (e.g., a bouncing cube) to observe how position and timing influence the feel of movement. Regularly scrub the timeline and watch how changes in the Graph Editor affect the pace and rhythm of your animation. This foundation makes adding more complex actions later much easier.
Create a simple animation: a bouncing ball concept
A classic beginner project is a bouncing ball. Create a sphere, place it high above a plane, and insert a keyframe for its starting height. Move forward in the timeline, drop the ball to the plane, and insert another keyframe. Repeat to simulate a bounce, then adjust the interpolation to create a natural squash and stretch effect. Add a camera and basic lighting to frame the action, and use simple materials to keep focus on motion rather than texture. This small project consolidates keyframing, timing, and scene setup while offering quick visible results.
Working with transforms, parenting, and modifiers
Blender’s transform tools (G to grab, R to rotate, S to scale) are essential for animation. For organized scenes, use parenting to link a moving object to a parent that drives its motion, or create a simple rig with bones for articulated motion. Modifiers like Mirror can speed up repetitive work, while the Array modifier helps duplicate objects for more complex scenes without duplicating effort. Keep your scene tidy by naming objects clearly and using collections to group related elements. As you gain confidence, you’ll experiment with constraints, drivers, and more advanced workflows.
Rendering basics: from viewport preview to final export
Before rendering, set the render engine (Eevee for faster previews, or Cycles for realistic lighting). Configure a suitable resolution, frame rate, and output path. Do a quick, low-resolution test render to verify lighting and motion, then increase quality for the final render. Blender offers multiple output formats (video or image sequence) and a variety of compression options. Understanding the trade-offs between render time and quality helps you plan efficient workflows, especially if you’re sharing progress with peers or clients.
Lighting, materials, and shading basics for clarity
Simple lighting setups—one key light and a fill light—often yield clean results for beginners. Use basic material properties (color, roughness) rather than advanced shaders when practicing animation to keep feedback focused on motion. Consider adding a subtle ambient light or backlight to separate the object from the background, which helps readability of movement. As you progress, you can gradually introduce more realistic textures and lighting, but keep early experiments accessible and repeatable.
Rendering, exporting, and project organization
Export options include video files (H.264) and image sequences. For best results, render as an image sequence first to catch mistakes in the frames, then compile into a final video. Maintain a clear project folder structure with separate subfolders for scenes, renders, and exports. Save incremental versions so you can revert to earlier milestones if a tweak doesn’t work as expected. This discipline sets a strong foundation for more ambitious projects later on.
Troubleshooting common issues and performance tips
If playback is choppy, check your playback resolution and simplify geometry or shading during the viewport preview. Ensure your graphics drivers are up to date and review Blender’s system requirements. If an animation seems jittery, check the frame range and ensure you’ve inserted correct keyframes on the intended properties. Frequently saving a “clean” startup file helps you isolate problems and reduces the risk of cascading issues across an entire project.
Next steps: a simple 7-day practice plan
To build consistency, follow a short 7-day plan: (1) Day 1–2: Learn navigation and basic keyframes on a single cube; (2) Day 3–4: Animate a bouncing ball with minor timing tweaks; (3) Day 5–6: Add lighting and a camera; (4) Day 7: Render a short clip and review feedback. This incremental approach mirrors BlendHowTo’s practical guidance, designed to convert theory into tangible progress while keeping the process enjoyable.
Tools & Materials
- Blender software (latest stable release)(Download from blender.org; ensure a recent 3.x version)
- Computer meeting minimum system requirements (8GB RAM+)(Consider a dedicated GPU if possible; check Blender's official requirements)
- Mouse with middle-click or trackpad navigation(Middle-click to orbit; scroll to zoom; hold shift to pan)
- Keyboard for shortcuts (I, G, S, R, etc.)(Learn core shortcuts to speed up your workflow)
- A simple scene idea or reference image(Optional but helpful for motivation and direction)
- Headphones or speakers for reviewing motion(Helpful for checking audio sync if you add sound later)
Steps
Estimated time: 60-90 minutes
- 1
Install Blender and update preferences
Download the latest stable Blender release, install it, and open a new project. Configure a simple, distraction-free workspace with the 3D Viewport, Timeline, and Graph Editor visible. Save a startup file and set auto-save to a reasonable interval to safeguard progress.
Tip: Create a dedicated Blender folder and set your project path there to stay organized. - 2
Open a new project and customize the workspace
Start with a clean scene: delete default objects if you wish, then add a single primitive to practice. Arrange panels to keep the Timeline and Graph Editor handy. Rename the default camera and light to keep your scene organized as you grow.
Tip: Use the N key to toggle the right sidebar for quick properties. - 3
Learn navigation: orbit, pan, zoom
Master viewport navigation: middle-click to orbit, shift-middle-click to pan, and scroll to zoom. Practice switching between camera view (Numpad 0) and object view to understand how your scene appears from different angles.
Tip: Consistent navigation speeds reduce fatigue and speed your work. - 4
Create a simple object and set its initial position
Add a sphere or cube, position it above a plane, and place the camera so the action is framed. Use G to grab, R to rotate, and S to scale as you position the object. Save milestones frequently as you verify the setup.
Tip: Keep a naming convention for objects to avoid confusion later. - 5
Insert your first keyframe for starting pose
With the object selected, press I to insert a keyframe for location (and optionally rotation). Move the timeline forward a few frames and adjust the object’s pose before inserting another keyframe. Play back to see the motion.
Tip: Use the Dope Sheet to inspect and adjust keyframe timing precisely. - 6
Refine motion with the Graph Editor
Switch to the Graph Editor to adjust motion curves. Select the relevant channel (location X/Y/Z) and tweak handles for smoother or sharper motion. This is where timing and natural movement come to life.
Tip: Aim for gentle, natural curves; harsh corners feel robotic. - 7
Preview, render, and export your animation
Scrub the timeline to verify motion, then render a small draft to check lighting and shadows. Adjust render settings (engine, resolution, frame rate) and export a video or image sequence for review and sharing.
Tip: Test render a short clip first to save time during early iterations.
Frequently Asked Questions
Is Blender free to use for animation?
Yes. Blender is open-source and freely available for personal and commercial use. You can download it from blender.org and start learning without licensing barriers.
Yes, Blender is free to download and use for animation, with no license costs for personal or commercial projects.
Do I need prior 3D experience to begin?
No prior 3D experience is required. Start with the basics, practice small projects, and gradually add complexity as you get comfortable with key concepts like keyframes and interpolation.
You don’t need prior 3D experience. Begin with simple projects and build up your skills step by step.
What’s the fastest way to learn Blender animation?
A focused, hands-on 1-2 week plan with daily short projects accelerates learning. Use guided tutorials, then apply what you learned to your own small scene.
A short, daily practice plan with hands-on projects helps you learn quickly.
How long does it take to feel proficient?
Proficiency develops with consistent practice over weeks to months. Start with a single object, then gradually introduce lighting, materials, and simple effects.
It takes consistent practice over weeks to months to feel proficient.
Can Blender animation be used for games or film?
Yes. Blender supports animation workflows used in games and film, including rigging, motion capture pipelines, and export pipelines. Start with simple projects and expand to more complex rigs as you grow.
Blender is suitable for games and film workflows, from simple to advanced projects.
Watch Video
What to Remember
- Start with a simple project to build confidence quickly
- Keyframes and interpolation shape motion; practice with a bouncing ball
- Master navigation and basic shortcuts to speed workflow
- Use Graph Editor for fine-tuning timing and curves
- Render small previews to validate before final export