Blender Animation Program: A Practical Guide for Beginners
Explore how to choose and master a blender animation program, with step-by-step setup, core workflows, and practical tips for home cooks transforming into hobbyist 3D artists.

A blender animation program is software that lets you design, rig, and animate 3D objects and scenes. This guide shows how to pick a tool, set up a project, and apply fundamentals like keyframes and timelines so you can create polished animations with confidence.
Why this blender animation program matters for creators
According to BlendHowTo, a blender animation program is a versatile toolkit that combines 3D modeling, rigging, animation, lighting, and rendering in a single interface. For home cooks turning into hobbyist 3D artists, this consolidates learning curves and accelerates project turnaround. When you pick the right program, you gain access to a robust feature set, a supportive community, and a path from simple experiments to professional-grade motion. The keyword blender animation program anchors this guide, but the core ideas apply to any modern 3D suite.
Understanding the value of an all-in-one solution helps you plan a practical practice routine, allocate resources, and track progress over time. BlendHowTo’s approach emphasizes practical steps, repeatable workflows, and incremental improvements over time. You’ll learn how to move from a rough sketch to a finished motion in a way that keeps you motivated and productive.
Key features to look for in a blender animation program
When evaluating a blender animation program, prioritize features that accelerate learning and improve output quality. Look for an intuitive timeline, a robust graph editor for fine-tuning curves, and a mid-to-high quality real-time viewport display for rapid iteration. Asset management, psy-schematics for rigging, and baked-in render engines (like Eevee or similar) are important for speed and realism. Cross-platform support, strong documentation, and an active user community can dramatically shorten the learning curve. Finally, consider file compatibility and the ability to import/export common formats so your work travels smoothly between projects.
For hobbyists, affordability and accessibility matter. A good blender animation program should offer a generous starter environment, scalable features, and a friendly onboarding path. As you grow, you’ll appreciate structured tutorials, sample scenes, and project templates that prevent the overwhelm that often accompanies first projects.
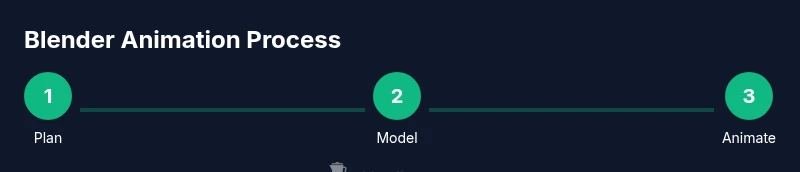
Core Blender workflow: modeling, rigging, animation, and rendering
A typical modern blender animation program supports a convergent workflow where you model a character or object, set up a rig, animate using keyframes, and render the final scene. Start with basic shapes to learn the interface, then progress to organic models and more complex rigs. Rigging introduces bones, constraints, and controls that drive movement. Animation relies on keyframes, interpolation, and the timeline, while rendering translates your scene into a finished image sequence or video. Understanding this end-to-end flow helps you plan projects and identify where to invest your learning time.
Throughout this process, you’ll rely on hotkeys, panels, and editors that streamline tasks. A strong blender animation program also provides non-destructive workflows, so you can adjust a model, tweak poses, or swap textures without starting from scratch. In practice, you’ll combine geometry, materials, lighting, and camera work to tell a compelling motion story.
Comparing Blender with other animation software
Blender often offers a compelling price-to-capability ratio compared to paid packages. It provides a full 3D pipeline in a single app, including modeling, sculpting, rigging, shading, and rendering. Other programs may excel in industry-specific tasks or have specialized studios behind them, but they can carry higher licenses and steeper onboarding curves. When evaluating, consider your goals, preferred workflow, and whether you benefit from features like “motion capture,” advanced particle systems, or industry-standard file formats. The comparison isn’t only about features; it’s also about community support, available learning resources, and your comfort with updating tools as you progress.
As you gain experience, you’ll discover that a well-chosen blender animation program scales with your ambitions—from quick concept sketches to complex character animation and high-quality renders.
Getting started: setting up your first project in Blender
A solid first project sets a stable foundation for future work. Begin by installing the latest stable Blender release, set up a clean project file, and configure your preferences for performance. Create a simple scene with a basic object, add a camera and a light, and save incremental versions as you progress. Establish a frame range (e.g., 250 frames for a short motion) and choose a render engine that matches your quality goals. This setup ensures you have a reliable baseline to learn the key techniques without getting overwhelmed by features you don’t yet need.
From here, follow a simple workflow: block out the motion with key poses, refine the timing in the graph editor, and preview renders to verify lighting and composition. As you grow more confident, you can replace primitives with more detailed models and experiments with materials, textures, and camera movement.
Essential animation techniques: keyframes, timelines, curves
Keyframes mark pivotal moments in time, while the timeline helps you arrange timing and pacing. The graph editor (curves) lets you fine-tune interpolation for smooth or snappy motion. Practice with a few basic shapes: move a cube along a path, rotate a wheel, and simulate a bouncing ball to understand timing, spacing, and easing. By mastering curves, you’ll align motion with intent—whether you want a natural walk cycle, a mechanical hinge, or a dramatic camera glide. A blender animation program thrives when you blend artistic intuition with technical control.
Keep notes on the interpolation modes you try, and compare how different curves affect the feel of your animation. Over time, your timing decisions will become more deliberate and consistent across scenes.
Working efficiently: performance tips for slower machines
A common hurdle for hobbyists is maintaining responsiveness during heavy scenes. Use simplified proxies for characters during blocking, and switch to the high-quality model only for final renders. Enable viewport denoising and reduce shading quality where possible, especially for early previews. Organize your assets in a clean folder structure and use collections to manage visibility in the viewport. When you must render long sequences, use render layers or passes to isolate elements and speed up iteration. Regularly save incremental versions to prevent loss from crashes during heavy sessions.
Finally, take advantage of Blender’s built-in performance tips, including enabling GPU rendering if supported and tuning tile sizes for your hardware. The right setup helps you stay productive without sacrificing quality.
A hands-on mini-project: from concept to render in Blender
Start with a simple character or prop and plan a short motion sequence that demonstrates intent. Block the main poses, then flesh out the timing and motion using keyframes. Move on to lighting, shading, and camera work to convey mood. After previewing, adjust materials, refine shadows, and test render passes. The goal is a complete, polished clip that you can share with your circle and use as a learning milestone. Document your process in a project journal to track improvements over time.
As you complete the project, consider exporting a motion test for social media or a portfolio piece. This practical approach keeps motivation high while you build a practical skill set in the blender animation program.
Tools & Materials
- Computer with recent CPU/GPU(Prefer at least 8GB RAM; discrete GPU recommended for rendering)
- Blender software (latest stable release)(Download from the official Blender site)
- Keyboard and mouse (or drawing tablet)(A tablet helps with sculpting and precision)
- Reference images or concept art(Organize in a dedicated folder)
- External storage or cloud backup(Backups prevent data loss)
- Headphones or speakers(For audio planning during animation)
Steps
Estimated time: 2-4 hours
- 1
Set up project and preferences
Open Blender and start a new file. Set frame rate and resolution to align with your target output, then save your project with a descriptive name. Establish a clean directory structure for assets.
Tip: Use a named project folder and enable autosave to reduce data loss. - 2
Create a simple scene or import assets
Build a basic stage or import simple models to practice. Add a camera and light to prepare for blocking. Keep the scene organized in collections for easy visibility control.
Tip: Start with primitives to learn the workflow before introducing complex geometry. - 3
Block key poses and timing
Place keyframes for main poses across the timeline to establish the motion arc. Focus on readability of the pose ladder before refining details.
Tip: Use hold or stepped interpolation briefly to visualize pose transitions clearly. - 4
Refine animation with curves
Open the Graph Editor and tweak curves for smooth transitions or intentional easing. Adjust tangents to control acceleration and deceleration.
Tip: Compare several easing shapes to find the mood that suits your scene. - 5
Set up lighting and materials
Assign basic materials and light setup. Use a simple 3-point lighting scheme to reveal form. Preview renders to check how materials react to light.
Tip: Avoid overcomplicating materials early; keep lighting consistent for readability. - 6
Render and review
Render a test sequence, review the result, and iterate on timings, camera motion, and shading. Export final renders or passes for sharing.
Tip: Render in passes (diffuse, shadows, specular) to facilitate post-processing.
Frequently Asked Questions
Is Blender a good blender animation program for beginners?
Yes. Blender provides a comprehensive suite for modeling, rigging, animation, and rendering, and it has a large, active learning community which makes it suitable for beginners. Start with simple projects and use tutorials to build confidence.
Yes, Blender is beginner-friendly with a large community and many tutorials. Start small and grow your projects step by step.
What hardware do I need to run Blender smoothly?
Blender runs on a range of hardware. A modern multi-core CPU, 8GB of RAM or more, and a capable GPU will help with real-time previews and rendering. For heavier scenes, more RAM and a better GPU improve performance.
A reasonably modern PC with a good GPU and at least eight gigabytes of RAM will handle common projects well.
How long does it take to learn the basics?
Learning the basics typically takes a few weeks of consistent practice, depending on your prior background. Regular hands-on projects and following structured tutorials accelerates progress.
Most people learn the basics within a few weeks with steady practice and guided tutorials.
Should I use Eevee or Cycles for renders?
Choose Eevee for fast previews and rough renders, and Cycles for higher realism. You can switch between them as you refine lighting and materials.
Use Eevee for quick previews and Cycles for final, realistic renders when you need quality.
Where can I find learning resources?
A mix of official Blender documentation, community forums, and structured courses is ideal. Start with beginner playlists and progress to project-based guides.
Check Blender’s official docs and beginner courses to build a solid foundation.
Can I reuse assets from other projects?
Yes, asset reuse is common. Use clean file organization and proper file linking to avoid conflicts when reusing models, rigs, or textures.
Absolutely—reuse assets with good organization to save time.
Watch Video
What to Remember
- Master the core workflow: model, rig, animate, render
- Use keyframes and curves to control timing precisely
- Block first, then refine to save time and frustration
- Optimize performance with proxies and proper scene management