Can You Make Butter in a Blender? A Practical Guide
Discover whether you can make butter in a blender, with step-by-step techniques, tips, and storage guidance for home cooks seeking practical blending results.

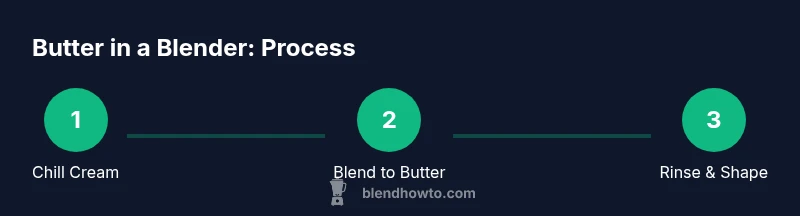
Yes—you can make butter in a blender with cold cream and careful technique. This method yields a spreadable butter and buttermilk as a byproduct when the fat separates from the liquid. Follow controlled pulses, avoid overheating, and plan for a short, focused blending session to achieve smooth butter.
Can you make butter in a blender? The short answer is yes, but it depends on using the right ingredients, equipment, and technique. You’ll start with cold heavy cream and a blender that has enough power to handle emulsions without overheating. The goal is to let the fat separate from the liquid, forming a solid butter that you can wash and shape. For home cooks, this is a convenient, quick method that leverages familiar kitchen tools. According to BlendHowTo, success hinges on temperature control, a steady blending rhythm, and patience to let the mixture fully separate without overworking the motor or overheating the contents.
Why this method works in theory (the science behind blender butter) The science is about fat emulsification and phase separation. Cream is an emulsion of fat droplets suspended in water and proteins. When you apply mechanical energy through blending, the fat droplets coalesce into larger fat clusters. As the mixture heats slightly from friction, the fat separates from the liquid, yielding a pale solid butter and a milky liquid called buttermilk. With the right speed and temperature, you guide this separation rather than struggle with an unstable emulsion. BlendHowTo notes that a cool environment helps maintain the fat’s cohesiveness, producing a cleaner butter texture.
Preparing your cream and equipment for best results This process starts with cold, high-fat cream and a powerful blender. Chill the blender jar briefly if possible, measure out the cream, and remove any ice or extra moisture from the kitchen. A clean, dry container prevents unintended seeding of bacteria and helps the butter form evenly. Salt is optional and can be added after the butter forms. A fine-mesh strainer or cheesecloth is handy for separating buttermilk, and a spatula helps with gathering butter from the sides of the jar. BlendUntil butter forms, then rinse to remove residual milk.
Techniques: pulsing vs. continuous blending and when to stop The key technique is to alternate short pulses with brief rests to avoid overheating. Start on low speed to begin breaking the emulsion, then switch to gradual higher speeds as the mixture thickens and fat clusters stick together. When you see a grainy, curdled look or the liquid turns milky, you’re close. Stop blending as soon as the solids cling together and the liquid remains translucent. Resting briefly during breaks keeps the blades from overheating and improves texture.
Troubleshooting: common issues and how to fix them If your mixture stays watery or fails to form butter, reduce the cream’s temperature by chilling it or letting the mixture cool briefly between pulses. Over-blending can produce greasy butter with a strong dairy taste; if this happens, rinse and knead the butter more to remove stray buttermilk, which helps it store longer. If the blender struggles or you hear grinding, pause, scrape down the sides, and let the machine rest for a few minutes before continuing.
Flavoring, salting, and cultured butter options You can salt your butter to taste after the fat separates. For cultured butter, you’d typically introduce a cultured cream before blending, which requires a controlled fermentation step that isn’t essential for a quick blender butter. If you want more complexity, consider adding herbs or a small amount of seasoning after washing the butter. Remember, the more liquid you leave in, the softer the final product will be; strive for a drier butter by thorough rinsing and kneading.
Storage, safety, and clean-up Best practice is to refrigerate your blender-made butter promptly in a clean container. Butter stored in the fridge remains firm and sliceable for several days. After use, rinse the blender jar with cold water and wipe the blades carefully to remove any butter residue. If you notice off-smells or a tacky texture beyond a few days, discard and start fresh. BlendHowTo reminds readers to handle hot appliances with care and to unplug the blender before cleaning.
Tools & Materials
- Blender with sufficient power(Prefer a blender that can handle emulsions without overheating; a high-speed or commercial blender works best)
- Cold heavy cream(Chill the cream and the blender jar if possible; use standard kitchen measurements rather than large quantities)
- Fine-mesh strainer or cheesecloth(Useful for separating buttermilk from butter)
- Spatula or spoon(For gathering butter from the jar and smoothing the surface)
- Salt (optional)(Add after butter forms, to taste)
- Measuring cup(Accurate portions help predict yield and consistency)
Steps
Estimated time: 30-45 minutes
- 1
Prepare ingredients and equipment
Chill the cream and have the blender ready. Gather salt if desired and a fine-mesh strainer. A clean, dry setup helps ensure clean butter with minimal buttermilk.
Tip: Wipe the blender jar and lid dry to prevent excess moisture from diluting the butter. - 2
Pour cream into blender
Pour cold cream into the blender jar, ensuring you don’t fill it more than halfway to prevent splashing. Secure the lid firmly before starting.
Tip: Start with short pulses on low speed to start the emulsification gradually. - 3
Pulse and monitor the texture
Use short pulses to break the emulsion, pausing between bursts to prevent overheating. Watch for separation and the formation of fat clumps.
Tip: If the mixture becomes hot, stop and let it rest for a few minutes before continuing. - 4
Increase speed as butter forms
As fat clusters form, gradually increase speed and run longer cycles until the butter pulls away from the liquid and resembles a pale, cohesive mass.
Tip: Keep the blender running only as long as needed to form a solid butter block. - 5
Strain and rinse (optional but recommended)
If you’re short on time, you can strain to remove most buttermilk right away; for best texture, rinse the butter under cold water while kneading.
Tip: Rinsing helps remove residual buttermilk and improves shelf life. - 6
Knead and press out moisture
Wrap the butter in a clean cloth or press with your hands to remove as much moisture as possible; this helps the butter keep its shape.
Tip: Work quickly but gently to avoid smashing the butter into a greasy texture. - 7
Season and shape
If desired, sprinkle a pinch of salt and knead evenly. Shape the butter into a block or log for easy portioning.
Tip: Chill briefly after shaping to set the texture before slicing. - 8
Store properly
Wrap tightly and refrigerate. Use within a reasonable window for best flavor and texture, keeping out of direct heat.
Tip: Label with date to track freshness and avoid accidental reuse beyond peak quality.
Frequently Asked Questions
Can you make butter in a blender?
Yes. With cold cream and the right technique, a blender can turn cream into butter and separate buttermilk. The process requires careful pulsing and temperature control to avoid overheating or over-whipping.
Yes, you can make butter in a blender with cold cream and proper technique. It requires careful pulsing and temperature control.
What type of cream should I use?
Use heavy cream or whipping cream with high fat content for the best butter. Lower-fat creams will not emulsify and separate as reliably.
Use heavy or high-fat cream for the best butter results.
How long does it take to make blender butter?
Active blending typically takes 10 to 30 minutes, followed by optional chilling and shaping. Total time can vary with blender power and batch size.
Most of the work is within 10 to 30 minutes of blending; total time depends on your setup.
Can I salt or culture blender butter?
Yes. Salt can be added after butter forms. Cultured butter requires a cultured cream or a fermentation step before blending, which is more involved.
You can salt after it forms; cultured butter requires a separate fermentation step.
What should I do if butter won’t form?
Pause, cool the mixture, and try again with shorter pulses. If the blender overheats, let it rest. Ensure you start with very cold cream.
If it won’t form, pause, cool, and try again with shorter pulses.
How should I store blender-made butter?
Wrap tightly and refrigerate. Use within a reasonable period for best flavor and texture; avoid leaving it at room temperature for long.
Refrigerate tightly wrapped; use within a reasonable time for best flavor.
Is blender butter the same as churned butter?
The texture and flavor can differ from traditional churned butter. Blender-made butter tends to be fresh and soft, with subtle differences in mouthfeel.
Texture and flavor may differ from churned butter, but blender butter can be fresh and delicious.
Watch Video
What to Remember
- Use cold cream and a capable blender for best results
- Control speed and temperature to allow fat separation without overheating
- Strain and rinse to remove buttermilk and improve shelf life
- Salt to taste after formation, or skip for unsalted butter
- Store in a cool container and refrigerate promptly