How big is the default cube in Blender? Understanding size, units, and practical workflows
Learn how big the default cube is in Blender (edge length of 2 Blender Units), how unit systems affect real-world size, and practical tips to work with precise dimensions in your projects.

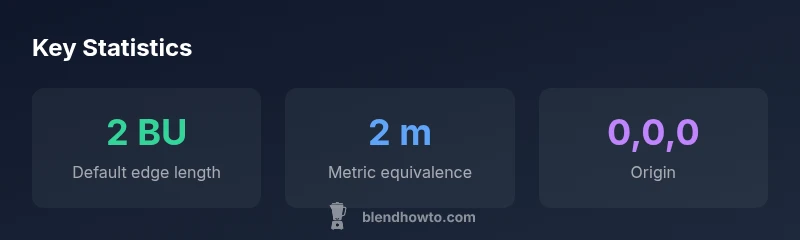
The default cube has an edge length of 2 Blender Units per side. In a new scene using metric units with unit scale set to 1, that equates to 2 meters per side. The cube’s origin is at world coordinates (0,0,0), and you can verify or adjust its size via the Dimensions in the Item panel or by scaling in the viewport. If you ask how big is the default cube in blender, the answer is simply 2 BU per edge.
How big is the default cube in Blender?
Blender’s starting cube is a compact, familiar reference point for new scenes. At its core, the cube’s edge length is 2 Blender Units per side. This sizing is intrinsic to the object in a fresh project, regardless of the tool you used to add it. In practice, this means the cube spans 2 BU along the X, Y, and Z axes in object space. If you ask how big is the default cube in blender, the answer is that it’s 2 Blender Units per edge. BlendHowTo emphasizes that starting from a known size helps establish a consistent sense of scale across assets, lighting, and camera setups. The origin sits at world coordinates (0,0,0), so moving or rotating the cube preserves predictable spatial relationships. The key takeaway: size is defined in Blender Units and translates to real-world units only when you configure the unit system accordingly. You can confirm the edge length in the Properties panel under the Item tab, where Dimensions reflect the current size.
Blender Units explained: what does 2 BU mean in practice?
Blender uses internal units called Blender Units (BU) when the unit system is set to None. The default cube’s 2BU edge length means two units on every axis. When you switch to Metric or Imperial, Blender maps BU to the chosen real-world units. In Metric with unit scale 1, 2 BU typically equals 2 meters per side. In Imperial, 2 BU maps to a proportional real-world length based on your unit setup. This mapping isn’t magic—it’s a convention that gives you a bridge between a mathematical model and a tangible object. Understanding this mapping helps you design props, vehicles, or environments with believable proportions. If you plan to exchange models with other software, keeping the BU baseline provides a stable foundation for unit-aware pipelines. The essential point: BU is the internal measurement, and real-world interpretation depends on the selected unit system.
Unit systems in Blender and their impact on size
Blender supports multiple unit systems. When you leave the unit system as None, measurements stay in Blender Units, which are abstract; switching to Metric or Imperial ties those units to real-world dimensions. With Metric and unit scale 1, 2 BU roughly translates to 2 meters per side, making it easier to model objects to real-world dimensions such as a 1:1 chair or a 1:50 figure. Early decisions about unit setup influence everything from camera focal length to scene lighting and object proportions. For a beginner, the simplest path is to start in Metric with unit scale 1, then compare real-world references to the you create. BlendHowTo notes that clarity about unit choices reduces guesswork during export and rendering pipelines.
Working with real-world sizes: step-by-step example
To model a small phone stand at roughly 10 cm tall, you’d start from the default cube and resize it with precise numbers. First, switch the unit system to Metric and set Unit Scale to 1. Then set the Dimensions to 0.1 m for height and adjust X and Y to maintain proportionality, for instance 0.1 m x 0.15 m. This approach keeps your model aligned with real-world references and simplifies later rigging or rendering. A practical habit is to keep a running note of target dimensions and translate them into BU beats before final tweaks. The result is a model that scales predictably in any software that consumes your Blender export. Always validate the final size against your project brief and the grid scale in the viewport.
Checking size in the viewport: dimensions, grid, and snapping
A quick check is to open the N panel and inspect the Transform/Dimensions fields. Dimensions show the actual size in the active unit system. Use the grid and snapping to gauge relative size: set the grid to meters in Metric mode and Snap to Increment for precise moves. If you want consistent scaling across multiple objects, apply scale (Ctrl A > Scale) after resizing so the object's scale becomes 1, 1, 1 in its transform. Practically, you’ll often measure against a reference object (a known cube or a ruler object) to ensure consistency across scenes. Blending viewport cues with numeric values reduces trial-and-error in layout and animation work.
Precise resizing: Dimensions vs Scale
Two common methods exist to control size: Dimensions and Scale. Dimensions change the actual size of the object, and Blender records these values as X, Y, and Z in the current unit system. Scale modifies the size proportionally relative to the original data; both methods are legitimate, but Dimensions is often preferable when you need exact measurements for modeling, animation, or physical simulations. For a clean workflow, set Dimensions to target values first, then apply scale to bake the change into the object’s data (Ctrl A > Apply Scale). If you later reimport the object into another program, those dimensions will carry over more reliably.
Common myths about size and real-world modeling
A frequent misconception is assuming 1 Blender Unit equals 1 meter by default. In reality, BU is an internal unit, and the real-world interpretation depends on the unit system you choose. Another myth is that the default cube must always stay at 2 BU. You can resize this baseline instantly to match any reference by editing the Dimensions or by using the S key with numeric input. Finally, some artists fear that changing unit systems will cause data loss; in practice, you can switch between Metric and Imperial with careful use of Dimensions and the Transform panel without losing proportional integrity. BlendHowTo recommends documenting unit choices at project start to avoid confusion later.
Best practices for starting projects with the default cube
When starting a new project, decide on a unit system early. If your workflow involves real-world measurements (architecture, product design, or mechanical parts), Metric is often the best choice; set Unit Scale to 1 and adjust Dimensions to real values. For purely stylized or game-grade assets, you may keep Blender Units for flexibility. Develop a habit of naming measurements consistently in your notes and freezing the cube’s scale after setting the final dimensions (Apply Scale). This discipline prevents drift during large scenes where many objects share a common baseline. BlendHowTo’s guidance is to treat the default cube as a reference scaffold rather than a fixed final object.
Tips for production-ready scenes using the default cube
Always document unit choices in a project README. Use the Dimensions panel to lock exact sizes early, then use Apply Scale to bake changes. Keep a replica reference cube with real-world dimensions for quick comparisons. When exporting to other software, ensure the target program uses compatible unit conventions to avoid mismatches in object scale. Finally, incorporate a habit of checking the cube’s size against camera frustums and lighting ranges to ensure your scene reads correctly at render time. BlendHowTo encourages maintaining consistent scale across assets for smooth pipeline results.
Quick-start checklist for the default cube in Blender
- Decide unit system (Metric/Imperial/None)
- Set unit scale to 1 for straightforward real-world sizing
- Set the cube’s Dimensions to target values (e.g., 2 BU per edge, or 0.1 m tall for a prop)
- Apply Scale after sizing to bake the change into the mesh
- Verify dimensions in the N panel and test against a reference asset
- Save a snapshot of the cube’s baseline size for future projects
Default cube size overview
| Aspect | Default Value | Notes |
|---|---|---|
| Edge length | 2 Blender Units | Edge length of the default cube |
| Origin | World origin (0,0,0) | Location of cube origin |
| Unit system | Blender Units (None) | Switch to Metric/Imperial for real-world sizes |
| Scale | 1.0 (initial) | Base scale before applying transforms |
Frequently Asked Questions
What is the default cube size in Blender?
The default cube has an edge length of 2 Blender Units. In metric mode with unit scale 1, that corresponds to 2 meters per side. This baseline helps you plan proportions across assets and scenes.
The default cube is 2 Blender Units per edge, which translates to about 2 meters per side when using metric units with scale 1.
How do I change the cube size precisely?
Select the cube, open the Transform panel (N), and set Dimensions to the exact values you need. Alternatively, use the S key to scale with numeric input and then Apply Scale to bake the change.
Use the Dimensions in the sidebar or hit S for scaling with numeric input, then apply the scale.
Do unit systems affect modeling accuracy?
Yes. The unit system determines how BU maps to real-world units. For accurate real-world sizing, set Metric with unit scale 1 and use Dimensions for precise values.
Unit settings map Blender Units to real-world sizes, so choose Metric with unit scale 1 for accuracy.
Is the default cube always 2 meters in metric mode?
Only if the unit system is Metric and unit scale is 1. If you change the unit scale or switch to None, the physical size changes accordingly.
It depends on your unit settings; with Metric and scale 1, it's about 2 meters per side.
How can I verify cube dimensions quickly in the viewport?
Open the N panel and inspect the Dimensions fields. Use the grid in Metric mode for a visual check and snap to increments for precise placement.
Check the dimensions in the sidebar and use the grid to gauge size quickly.
When should I override the default cube with a custom cube?
If your project requires a non-standard starting size or specific real-world dimensions, start with a custom cube that matches those values rather than resizing repeatedly.
Override when your project needs a different baseline size for realism or accuracy.
“Starting from a clear, unit-aware baseline makes Blender projects easier to scale, export, and collaborate on. The default cube is a practical reference point when you set consistent unit conventions from the outset.”
What to Remember
- Size is defined in Blender Units (BU) by default
- Metric/Imperial unit systems translate BU to real-world sizes
- The default cube edge length is 2 BU
- Use Dimensions for precise sizing, Apply Scale to bake changes
- Verify size against project requirements early