Is Blender Free for 3D Printing? A Practical Guide
Explore whether Blender is free for 3D printing, licensing basics, workflow tips, add-ons, and how it compares to CAD tools for reliable prints.

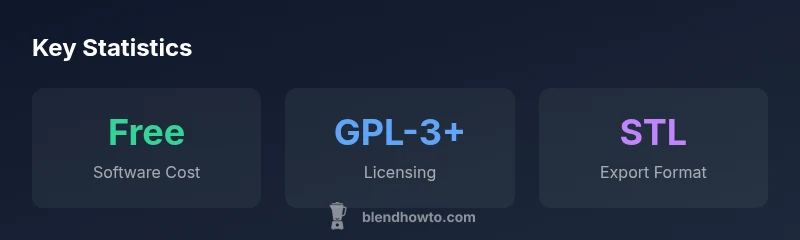
One common question is is blender for 3d printing free. Yes, Blender is free to use for any 3D printing project, since it is open-source software released under GPL. This means no upfront license fees and no per-print royalties. The BlendHowTo team notes that you still pay for a printer and materials, but your software costs stay zero. For 3D printing, this matters because you can iterate designs quickly without licensing constraints. While software is free, you should still budget for hardware and materials. Understanding the licensing framework helps you plan a sustainable, iterative 3D printing workflow.
Is Blender free for 3D printing? Licensing and costs
Blender is often described as free software, but to understand its value for 3D printing you need to connect licensing with practical workflows. One common question is is blender for 3d printing free. The short answer is yes, Blender is free to download and use for most 3D printing projects. It is open-source software released under the GNU General Public License, which means there are no upfront license fees or per print royalties. This financial freedom is especially helpful for hobbyists, students, and makers who want to prototype without licensing barriers. The BlendHowTo team emphasizes that there are still costs associated with hardware, materials, and possibly paid add-ons, but the software itself does not eat into your budget. Understanding the license helps you plan a sustainable workflow and encourages experimentation without fear of breaking a licensing agreement. In practice, you can iterate freely, export to STL or OBJ, and test designs that move from concept to print without ongoing software costs.
How Blender Fits into a 3D Printing Workflow
Blender serves as a flexible hub in many 3D printing workflows. It is not a dedicated CAD package, but it supports sculpting, mesh editing, and corrective tools that are useful for printable models. You model, inspect, and refine shapes, then export to a printer-friendly format. For printing, you typically ensure the mesh is watertight, set the correct units to millimeters, and manage scale. Blender also accommodates importing scans or meshes from other tools, then combining them with your designs using modifiers and boolean operations. The key advantage is rapid iteration: you can sculpt organic shapes or adjust features quickly, then validate the model through slicer-friendly exports. However, for highly precise mechanical parts that require tight tolerances, a parametric CAD tool can complement Blender rather than replace it. Overall, Blender is a powerful starting point for creative prints and early prototypes, especially when time and cost are factors.
Preparing models for printing in Blender
Preparing a mesh for 3D printing means validating geometry and ensuring accurate scale. Start by applying scale (Ctrl A -> Scale) and setting the scene units to millimeters. Confirmation that the object is manifold and watertight is essential. Use the 3D Print Toolbox add-on to detect non-manifold edges, intersecting geometry, thin walls, and overlapping vertices. If issues are found, address them with simple fixes: merge vertices, fill holes, or simplify complex regions. Recalculate normals to ensure outer surfaces are facing outward, typically with a normal recomputation command. After cleaning, export the model to STL or OBJ, and verify the file in your slicer or a dedicated viewer. Keep in mind that Blender handles soft, curved shapes well, but sharp tolerances and clean holes benefit from deliberate modeling and sometimes post-processing in a CAD program. The overall approach is to balance artistic freedom with print-ready constraints, testing iteratively to confirm fit and function.
Exporting and verifying geometry for print
Exporting to STL or OBJ is straightforward in Blender, but accuracy matters. Before export, double-check the unit system and apply any remaining transforms. Ensure the mesh is manifold and that features like walls and holes meet your printer's capabilities. Use the 3D Print Toolbox to review wall thickness and minimum feature size, preventing failed prints due to under-extrusion or fragility. When exporting, prefer triangulated meshes and ensure the file is triangulated for compatibility with most slicers. If your printer requires a fixed orientation, consider adding alignment features or mounting faces before export. After exporting, test the file with a slicer preview to catch potential issues such as overlapping faces or inverted normals. This upfront validation saves material and time during the physical print.
Useful Blender add-ons for 3D printing
A number of add-ons extend Blender's 3D printing capabilities. The 3D Print Toolbox is the essential starter kit, offering global checks for mesh validity and thickness. Other useful tools include Mesh Analysis for quick geometry diagnostics, and small utility scripts that help with centering, scaling, and exporting to STL. While Blender ships with powerful native tools, add-ons reduce repetitive steps and improve reliability when preparing prints. If you work with scans, consider add-ons that simplify cleanup and alignment. Remember that add-ons are optional; you can achieve printable results with Blender's core features, but they speed up your workflow and reduce the chance of common print failures.
Common pitfalls and troubleshooting
Even experienced Blender users encounter issues when preparing prints. Non-manifold geometry, inverted normals, and duplicate vertices can cause failed prints. Always verify scale, measurement units, and origin placement early in the workflow. Thin walls or tiny features may fail due to printer resolution; in such cases, thicken walls or redesign features. For multi-part prints, ensure proper alignment and joinery, and consider bailouts or break-apart designs for easier assembly. If your model exports but fails in the slicer, revisit the mesh integrity and try exporting with a different format or triangulation setting. By building a habit of early validation, you minimize wasted material and time while maintaining creative flexibility.
Real-world tips for faster 3D printing with Blender
Begin with a simple calibration cube to verify scale and printer behavior, then advance to composite parts that combine multiple inserts. Use units in millimeters and enable grid snaps for precise alignment. Save incremental versions of your model to preserve design history and test changes quickly. Schedule short print runs to test new features and adjust wall thickness, infill, and support structures accordingly. Finally, document your process and build a small reference library of templates and presets for common shapes. With Blender, you can iterate rapidly and learn what works best for your printer and material choices.
Blender and 3D printing workflow essentials
| Aspect | Blender support for 3D printing | Notes |
|---|---|---|
| License | GPL-3+ open-source | Free to use for all printing workflows |
| File formats | STL, OBJ export | Direct print preparation in slicers |
| Workflow ease | Strong for organic shapes | Better when combined with CAD for precision |
Frequently Asked Questions
Is Blender free for commercial use?
Yes. The Blender license (GPL) allows commercial use without paying licensing fees. You can sell prints or derivatives produced with Blender as long as attribution requirements of the license are met. For most hobbyists and small studios, this is a major advantage.
Yes, Blender's license allows commercial use with no licensing fees.
Can Blender meet precise tolerances for mechanical parts?
Blender specializes in flexible modeling and artistic shapes rather than parametric CAD. For tight tolerances, use CAD tools or verify dimensions in a slicer. You can still export accurate STL/OBJ and adjust in post-processing.
Blender isn't ideal for tight tolerances; consider CAD for precision.
What file formats does Blender export for 3D printing?
Blender can export STL and OBJ formats, which are widely used for 3D printing. Ensure the export preserves scale and mesh integrity for your slicer.
Exports STL and OBJ for printing.
Do I need add-ons to print from Blender?
Add-ons like the 3D Print Toolbox are helpful but not required. They streamline checks for wall thickness and non-manifold geometry, improving reliability.
Add-ons help, but you can print with Blender alone.
Is Blender truly free to use for beginners?
Yes. Blender is free and beginner-friendly, with abundant tutorials. Start with simple shapes and progressively explore more complex prints.
Yes, Blender is free and beginner-friendly.
When should I choose Blender over CAD software?
Choose Blender for creative, organic shapes and rapid prototyping. For parts requiring precise measurements, consider CAD tools to complement Blender.
Use Blender for prototypes and CAD for precision.
“Blender remains a robust, free tool for rapid prototyping in 3D printing, especially when time and cost matter.”
What to Remember
- Blender is free to use for 3D printing
- Use add-ons to check printability
- Blender is not CAD; use CAD for precision when needed
- Follow a structured workflow to minimize print failures