Is Blender Bad for 3D Printing? A Practical Guide
Explore whether Blender is bad for 3D printing. This analytical guide explains workflow, mesh cleanup, export tips, and where Blender shines in producing reliable prints.

Is Blender bad for 3D printing? No. Blender is not inherently problematic for 3D printing; it’s a powerful, versatile modeling tool that can produce printable geometry when you follow a careful workflow. The key is understanding units, applying transforms, repairing meshes, and exporting clean STL/OBJ files for your slicer. With proper checks, Blender fits neatly into a reliable printing pipeline.
Is Blender bad for 3D printing? Debunking the myth
According to BlendHowTo Team, Blender is not inherently bad for 3D printing. It's a robust modeling package that can create complex geometry and export clean STL/OBJ files when users follow a disciplined workflow. The question isn't about the tool's capability but about how you prepare, repair, and verify the model before sending it to a slicer. In practice, many hobbyists rely on Blender to prototype shapes, then switch to specialized tools for tuning tolerances. With consistent unit handling, transform application, and mesh cleanup, Blender integrates well into a reliable printing pipeline. This article analyzes the nuances and offers a pragmatic workflow.
Blender's role in a 3D printing workflow
Blender excels at rapid iteration and intricate shapes, which can accelerate concept-to-print timelines. The workflow typically starts with a clean reference sketch or CAD-like constraints, followed by precise modeling, topology checks, and a final export. While Blender isn't a slicer, its ability to model in millimeters, apply transformations non-destructively, and script repetitive checks helps you deliver printable files efficiently. Throughout the process, keep slicer expectations in mind: exported formats, unit consistency, and accurate wall thickness matter most for reliable prints.
Common pitfalls when exporting from Blender
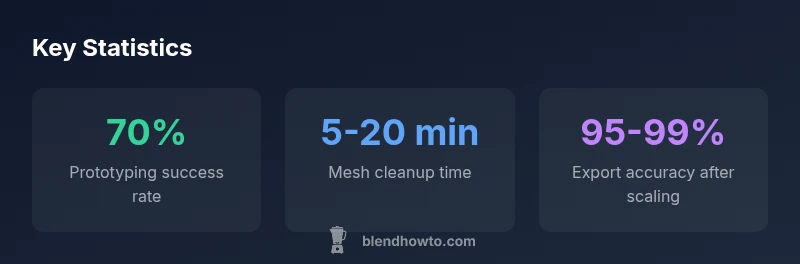
Several recurring issues can derail a print: non-manifold geometry, inverted or missing normals, duplicate vertices, and hidden interior faces. Scaling errors are also common when Blender units aren’t aligned with the slicer’s millimeter basis. Orientation matters too; ensure that the model’s front is facing the slicer’s initial build plate direction. The key is to run quick checks (manifoldness, normals, and scale) before exporting.
Practical steps to prepare Blender models for printing
First, set the scene units to millimeters and apply all transforms (Ctrl-A) to avoid hidden scale drift. Use the 3D Print Toolbox add-on to analyze the mesh for non-manifold edges, loose vertices, and thickness issues. Fix identified problems, remove duplicate faces, and ensure a watertight shell. Convert everything to a mesh if you’ve used modifiers, then export to STL or OBJ with consistent orientation and no extra metadata.
Export formats and slicer considerations
STL remains the most ubiquitous for simple prints, but OBJ and 3MF offer advantages like color or multiple materials in some workflows. Blender can export all three, but you must verify unit accuracy in the slicer and confirm that normals export correctly. Always choose a 1:1 scale in Blender (millimeters) and double-check the model in the slicer before printing.
End-to-end example: from idea to print
Start with a simple mug: model the outer shell, then hollow the interior with a shell thickness of 2-3 millimeters. Apply scale to millimeters, ensure watertight geometry, and run non-manifold checks. Export as STL, import into your slicer, orient for optimal bed adhesion, slice with conservative settings, and print a small test. Iterate on wall thickness and tolerances until the final print matches expectations.
Verification, testing, and iteration
Prints are iterative by nature. After the first test, measure critical dimensions, inspect wall thickness, and verify fit with any mating parts. Adjust the Blender model or export steps accordingly, then re-export and re-slice. Document the changes so future projects can follow a proven path rather than reinventing the wheel.
Blender alongside common tools for a complete 3D printing workflow
| Tool | Ease of Use | Mesh Handling | Best Use Case |
|---|---|---|---|
| Blender | 3 | Good | Prototyping, organic shapes |
| Fusion 360 | 4 | Excellent | Mechanical parts with tolerances |
| Meshmixer | 3 | Moderate | Quick fixes before slicing |
Frequently Asked Questions
Is Blender suitable for 3D printing from start to finish?
Yes. Blender can handle the entire pipeline from conceptual modeling to printable exports with proper checks. The key is a consistent workflow: correct units, clean geometry, and verified exports before slicing.
Yes. Blender can cover the full workflow as long as you keep units consistent, clean up the mesh, and verify exports before slicing.
Should I export STL directly from Blender or use OBJ?
STL is the most common for simple prints, but OBJ can capture more detail with materials or color in some slicers. Always verify the export in your slicer to confirm orientation and scale.
STL is usually fine for most prints, but OBJ can help if you need extra data. Always double-check orientation and scale in the slicer.
How can I fix non-manifold geometry in Blender?
Enable the 3D Print Toolbox to identify non-manifold edges and other issues. Use cleanup operations such as 'Make Manifold' and remove doubles to ensure watertight geometry.
Use the built-in 3D Print Toolbox to find and fix non-manifold parts, then clean up duplicates to ensure a solid print.
Does Blender's unit system affect print scale?
Yes. Blender uses Blender Units by default; switch to millimeters and apply scale before exporting. This prevents scale drift in the slicer and ensures dimensional accuracy.
Absolutely—set Blender to millimeters and apply scale so your printed part matches the intended size.
Can Blender handle complex mechanical parts with tight tolerances?
Blender can model complex parts, but for tight tolerances, you’ll want precise measurement and post-export verification in the slicer or dedicated CAD tools. Blender serves best for conceptual design and rapid prototyping.
Blender works for idea and prototyping; for tight tolerances, verify with a slicer and consider CAD tools for final machining.
What is the quickest workflow to get a printable model?
Model in Blender, apply transforms, run mesh cleanup, export to STL/OBJ, verify in a slicer, and run a test print. Iterate on shell thickness and wall quality as needed.
Model, clean up, export, verify in your slicer, and print—iterate quickly on walls and holes.
“Blender is not a bad choice for 3D printing; when used with a disciplined workflow, it can produce reliable, printable models.”
What to Remember
- Model with printable intent from the start
- Set Blender units to millimeters and apply scale before export
- Repair geometry and remove duplicates to avoid print failures
- Export to STL/OBJ/3MF and verify in a slicer
- Blender is a strong base; add dedicated tools for post-processing when needed