How to Use Blender for 3D Printing: A Practical Guide
Learn a practical, step-by-step workflow to design, optimize, and export Blender models for 3D printing, including mesh cleanup, wall thickness, tolerances, and supports.

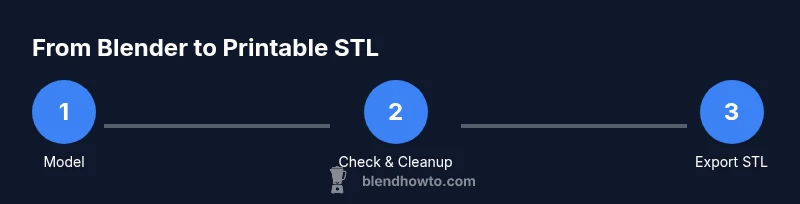
In this guide you will learn how to use Blender to prepare, optimize, and export models for 3D printing. You’ll start by cleaning meshes, checking wall thickness, and ensuring watertight geometry, then export to STL and run basic checks before printing. A practical workflow makes Blender a capable companion for hobbyists and makers seeking reliable, printable results.
Why Blender is a strong choice for 3D printing
According to BlendHowTo, Blender offers a robust suite of modeling tools, flexible export options, and an accessible learning curve that fits home makers. Its open-source nature means you can tailor workflows without expensive software licenses. For 3D printing, Blender acts as a full-prep station—from mesh cleanup and watertight checks to thickness adjustments and STL export. By mastering these steps, you gain a reliable pipeline from concept to a printable object.
Core considerations for printable models
Printable models must be solid, manifold, and properly scaled. Blender’s modifiers and editing tools let you repair holes, correct normals, and simplify complex geometry before exporting. Plan for fabrication constraints early by thinking about material properties, printer bed size, and support requirements. The goal is to minimize surprises when your model hits the slicer—and maximize the chance of a successful print.
Preparing a mesh in Blender
Begin with a clean canvas: remove unnecessary geometry, apply scale, and check your object's origin. Use Edit Mode to recalculate normals, merge duplicate vertices, and close gaps. A watertight mesh reduces slicing errors and improves print quality. Non-destructive modifiers like Bevel, Solidify, and Mirror help shape your model without permanently altering the base geometry. This section lays the groundwork for accurate, printable results.
Checking wall thickness and tolerances
In 3D printing, wall thickness and tolerance are critical. In Blender, assess thickness visually and with lightweight scans of your design. If a wall seems fragile, add thickness with the Solidify modifier or a simple extrude operation. The aim is to balance strength with material usage, ensuring the part prints cleanly without overhangs or weak points.
Cleaning up for 3D printing: solids, holes, and non-manifold edges
Inspect the mesh for holes, non-manifold edges, and stray vertices. Use the 3D Print Toolbox addon (built into Blender) to identify problem areas. Fill holes, fix inverted faces, and remove interior geometry that would interfere with printing. After cleanup, run a quick mesh validation to confirm the object is printable from every angle.
Exporting to STL and verifying with slicers
Export the model as an STL file using the correct unit scale. Before sending to your slicer, re-check the mesh in Blender and re-import the STL to ensure fidelity. In your slicer, confirm the model fits the build volume and that supports, infill, and layer orientation align with your intended outcome. This two-step verification helps catch issues early.
Practical workflow example: from concept to print
Start with a concept sketch, model the shape in Blender, apply necessary modifiers for thickness, check watertightness, then export an STL. Open the STL in a slicer to preview toolpaths, adjust orientation, and add supports if needed. Print a small test piece, measure key dimensions, and iterate on the Blender model until the results meet your criteria.
Troubleshooting common issues
If a print fails, revisit mesh integrity, wall thickness, and scale settings. Non-manifold edges or inverted normals are frequent culprits. Make sure the model is entirely closed and that the export unit matches your slicer’s expectations. Always test with a small prototype before committing to a full-size print.
Tools & Materials
- Blender software (latest stable release)(Install from blender.org and keep updated.)
- A computer with reliable performance(Any modern PC or Mac capable of running Blender smoothly.)
- 3D printer or access to a slicer(For validation of the exported STL and final prints.)
- Reference 3D models or STL/OBJ files(Optional baselines to practice meshing.)
- Calibrated measuring tools(Useful for real-world sizing verification.)
Steps
Estimated time: 45-60 minutes
- 1
Open Blender and set up project units
Launch Blender and switch to the General workspace. In the Scene properties, set a reasonable unit system (metric is common for 3D printing) and apply scale to ensure Blender and your slicer read the same dimensions.
Tip: Set units to metric and enable Scale in Transform to keep measurements consistent. - 2
Import or create your base mesh
Import an existing model or start from scratch using primitive shapes. Keep the initial geometry simple to focus on printability checks and thickness adjustments later.
Tip: Name your objects clearly to stay organized as you add modifiers. - 3
Clean up geometry and normals
Enter Edit Mode, merge duplicates, recalc normals, and fill small gaps. This reduces slicer errors and improves overall print quality.
Tip: Use X > Limited Dissolve to simplify while preserving shape. - 4
Check and fix manifold edges
Identify holes and non-manifold edges with Blender’s 3D Print Toolbox. Fill holes and repair edges so the mesh is watertight.
Tip: Repair any interior faces that could trap air during printing. - 5
Add necessary wall thickness
If your model is hollow, apply a Solidify modifier or extrude shells to establish minimum walls for strength and printability.
Tip: Aim for consistent thickness along all walls to avoid uneven cooling. - 6
Apply scale and transforms before export
Apply all transforms to ensure the model exports at the intended size and proportions.
Tip: Use Ctrl+A and choose Apply All Transforms for reliability. - 7
Export as STL
Export the model as an STL file, selecting the appropriate units and binary option if available.
Tip: Name the STL clearly and keep a consistent folder structure. - 8
Validate in slicer and preview toolpaths
Import the STL into your slicer, verify fit within build volume, and review toolpaths and supports.
Tip: Rotate the model to check for any undercuts or hidden supports. - 9
Print a test piece and iterate
Run a small test print, check dimensions and fit, then refine the Blender model as needed before final production.
Tip: Document changes to avoid rework and accelerate future projects.
Frequently Asked Questions
What is the best export format from Blender for 3D printing?
STL is widely supported by most slicers and printers. Export the model from Blender as an STL file and verify it in your slicer before printing.
Export as STL and verify in your slicer before printing.
How can I ensure a model is watertight in Blender?
Check for holes, non-manifold edges, and inverted normals using Blender’s mesh tools. Fill holes, fix normals, and remove interior faces to create a solid, printable mesh.
Check for gaps and fix normals to ensure a solid model.
Should I apply scale before exporting?
Yes. Apply all transforms and confirm the current units match your slicer to avoid dimension errors in prints.
Apply transforms to match your slicer scale.
How do I add wall thickness to a hollow model?
Use the Solidify modifier or extrude shells to create consistent walls suitable for printing.
Add wall thickness with a Solidify modifier.
Do I need external tools for model repair?
Blender offers solid mesh cleanup and repair workflows; for very complex repairs, consider dedicated mesh repair tools in conjunction with Blender.
Blender covers basic repairs; for complex cases, try additional mesh tools.
Can Blender handle hard-surface modeling for prints?
Yes. Blender excels at hard-surface workflows with precise extrusions and measurements suitable for accurate 3D printing.
Blender is capable of precise hard-surface modeling for prints.
Watch Video
What to Remember
- Plan your model with printability in mind.
- Ensure watertight geometry before exporting.
- Validate with a slicer and iterate as needed.
- Maintain a consistent naming and versioning system.