Blender Settings for 3D Printing: Practical Guide
Master Blender settings for 3D printing: set units, ensure watertight geometry, control thickness, orient models for printing, and export clean STL/OBJ files for your slicer.

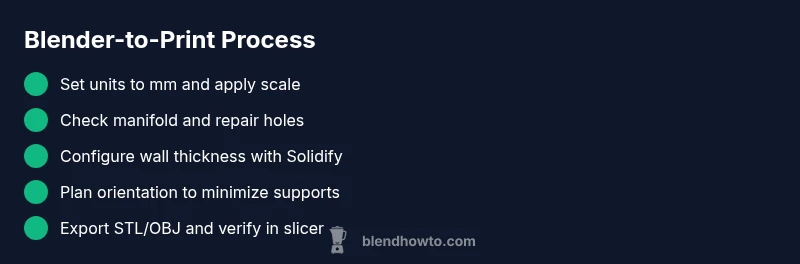
To prep Blender for 3D printing, you’ll align units to millimeters, set a print-friendly scale, and export as STL or OBJ after manifold checks. This guide walks through practical Blender settings, from thickness control to orientation choices and printer-ready export tips, so your models print clean and true to size.
Blender settings for 3d printing: foundational goals
This article on blender settings for 3d printing helps you establish a repeatable workflow from the moment you start modeling. The core goals are clear: use a consistent unit system (millimeters), maintain a reliable scale, and ensure the mesh is manifold before export. When these elements are aligned, you’ll experience fewer print failures and smoother slicer integration. BlendHowTo emphasizes that most print issues stem from unit drift or non-manifold geometry, not inaccuracies in the slicer. By focusing on these foundations, you create a robust baseline you can reuse across projects and printers. Expect to see how-to tips that translate across FDM, SLA, and resin workflows, helping you avoid common pitfalls and saving time in post-processing.
Set units, scale, and export formats
Blender’s units control how geometry translates to real-world measurements. For 3D printing, set the scene to Metric with Millimeters as the unit. This makes dimensions intuitive in millimeters rather than Blender’s generic units. After modeling, apply scale (Ctrl-A > Scale) and rotation (Ctrl-A > Rotation) so dimensions transfer cleanly to your slicer. When exporting, choose STL or OBJ; binary STL is preferred by most slicers for speed and compatibility. If you’re printing in color or with textures, OBJ retains more data, but STL remains the standard for most FDM workflows. Always verify the exported file in the slicer before printing, and recheck unit consistency if you modify the model mid-project. The goal is to keep a single, unambiguous measurement system from modeling to printing. BlendHowTo’s analysis reinforces that consistent units reduce surprises at print time.
Ensure watertight geometry and manifold surfaces
Print failures often come from holes, gaps, or duplicate faces. In Blender, you’ll aim for a watertight (manifold) mesh. Use the 3D Print Toolbox add-on or built-in tools to inspect for non-manifold edges, holes, and intersecting geometry. Non-manifold geometry can be tricky to spot visually, but it causes slicer errors and unreliable fills. Steps include running a quick diagnostic, filling holes, merging vertices as needed, and applying transforms to ensure a stable starting point. After repairs, run a lightweight check again to confirm there are no remaining non-manifold regions. This ensures your model behaves like a solid object when printed and reduces the risk of failed prints. By prioritizing manifold integrity, you’ll minimize troubleshooting later in your workflow.
Cleaning up mesh: repairing holes and gaps
Even a seemingly solid model can have subtle issues. In Blender, you’ll clean up the mesh by filling holes, merging duplicate vertices, and removing internal faces that aren’t part of the exterior. Use Edit Mode with Select All (A) and Mesh -> Clean Up -> Fill Holes or Merge by Distance to remove duplicates. For larger models, work in sections to avoid introducing new errors. If you encounter holes after extrusion or boolean operations, add a supportive edge loop to close the gap and maintain consistent thickness. The cleanup process is iterative; re-check after each operation to ensure no new artifacts appear. A clean mesh reduces failure modes in your slicer and improves surface quality. This meticulous cleanup is a hallmark of well-prepared blender settings for 3d printing.
Using modifiers to enforce printable thickness
Wall thickness is a critical factor in printability. Blender modifiers offer non-destructive ways to enforce consistent thickness across your model. The Solidify modifier is a common approach for creating uniform walls, and you can adjust thickness, offset, and even rim angles to suit your nozzle. Be careful not to over-thicken or create overlapping geometry that a slicer can misinterpret. You may also apply a Bevel modifier to soften long edges for better layer adhesion. Keep your modifications non-destructive until you’re confident the final geometry matches your print requirements, then apply transforms before exporting. This approach helps ensure your model prints sturdy and dimensionally accurate.
Orientation, supports, and tolerances in Blender
Model orientation heavily influences print success. Arrange parts so that flat faces are facing down or parallel to the build plate when possible, reducing the need for supports. Blender does not generate supports by itself; plan orientation and part geometry to minimize post-processing. If you must use supports, consider the overhang angles and ensure the model’s geometry allows clean bridge connections. Tolerances depend on your printer and nozzle; while you won’t fix tolerances in Blender alone, you should model small clearance gaps for moving parts and interlocking components. Final tests in your slicer will validate the fit, but starting with good Blender geometry reduces wasted prints and material. BlendHowTo recommends documenting tolerances in project notes for future iterations.
The 3D Print Toolbox add-on: features and workflow
Enable 3D Print Toolbox from Preferences -> Add-ons. This tool provides practical checks: wall thickness, minimum thickness per region, volume, and surface area estimates. Use it to quickly identify areas that require thicker walls or additional supports. The workflow: import your model, run checks, adjust geometry in Blender, re-run checks, and re-export. It’s particularly helpful for complex assemblies where manual inspection would be time-consuming. Remember to save incremental versions often so you can compare before/after repairs. The toolbox complements other Blender tools and saves time by catching issues early in the design stage. BlendHowTo’s team notes that these checks dramatically improve first-print success rates.
Export workflow: STL vs OBJ and slicer prep
Export decisions impact how the slicer interprets geometry. For most printers, binary STL is the fastest, most portable choice; make sure to apply scale and rotation before export. If you need color or texture data, OBJ is suitable, but most slicers strip color data, so STL remains the default for single-material prints. Check normals to ensure outward-facing surfaces; invert normals if needed. When exporting, keep file names descriptive and include version numbers to track iterations. After exporting, bring the file into your slicer, run a quick printability check, and generate a test print to validate fit and tolerances. This export discipline is a key part of blender settings for 3d printing.
Troubleshooting common printability issues
Common issues include holes, non-manifold edges, and mismatched dimensions after export. If you encounter holes, re-check with 3D Print Toolbox and use Fill Holes or Bridge Edge Loops to close gaps. Non-manifold edges typically indicate boundary issues; fix by remeshing or cleaning up duplicate geometry. If dimensions drift after export, verify units and reapply scale in Blender before re-exporting. Finally, examine wall thickness visually in the slicer, because some materials require different tolerances. With these strategies, you can pinpoint problems quickly and iterate toward a successful print. BlendHowTo’s team has found that a disciplined approach to these checks reduces wasted prints and speeds up the printing cycle.
Tools & Materials
- Blender software (latest stable release)(Ensure you have the 3D Print Toolbox add-on available (built-in; enable in Preferences))
- A connected 3D printer or printer access(FDM or SLA; for Blender settings described here, assume FDM workflow)
- Input model (OBJ/STL)(Import to Blender to adjust geometry)
- Export-ready file format (STL/OBJ)(Binary STL recommended for most slicers; maintain consistent units)
- Measuring tool (calipers or ruler)(Helpful for verifying critical dimensions post-export)
- 3D Print Toolbox add-on(Optional but beneficial for quick printability checks)
Steps
Estimated time: 60-120 minutes
- 1
Assess model readiness
Open the model in Blender and run a quick sanity check for obvious issues such as inverted normals or missing faces. Decide on the print orientation and primary features that require support consideration. If the model has components that will move or fit together, note the required clearances and tolerances to model in Blender.
Tip: Record intended print orientation in project notes to maintain consistency across edits. - 2
Set units to millimeters
In the Scene properties, switch the Units to Metric and set Length to Millimeters. This aligns Blender's measurements with most slicers and practical printer beds, reducing size drift during export.
Tip: Always double-check dimensions after a unit change; scale can be off if you modify the model later. - 3
Apply transform (scale/rotation)
With the model selected, press Ctrl-A and apply Scale and Rotation. This locks in the current size and orientation, ensuring the slicer reads the correct dimensions.
Tip: Apply transforms after any major editing pass to prevent incremental drift. - 4
Check manifold geometry
Enable the 3D Print Toolbox and run a quick scan for non-manifold edges, holes, or intersecting geometry. Repair issues by filling holes and merging vertices as needed before moving on.
Tip: Fix issues in small chunks to avoid creating new errors in adjacent regions. - 5
Repair holes and gaps
In Edit Mode, use Fill Holes or Bridge Edge Loops to close gaps. Ensure the exterior faces are continuous and avoid interior shells that could confuse the slicer.
Tip: Work with a mirrored or symmetric part in mind if applicable to streamline repair. - 6
Configure thickness with modifiers
Add a Solidify modifier to enforce wall thickness, then adjust thickness and rim depth. Avoid over-thick walls which can cause print defects or excessive material use.
Tip: Keep thickness changes non-destructive until you’re confident in final geometry. - 7
Plan orientation and minimize supports
Arrange the object so flat faces align with the build plate when possible. Blender itself won’t generate supports; plan your geometry to reduce support needs in the slicer.
Tip: Test multiple orientations with quick exports to see which minimizes supports best. - 8
Enable 3D Print Toolbox and verify
Reopen the 3D Print Toolbox, run all checks, and verify wall thickness and volume. Use the results to refine geometry before exporting again.
Tip: Incremental iterations with the toolbox save time and reduce failed prints. - 9
Export and verify in slicer
Export as binary STL, check orientation and scale in the slicer, and run a quick test print. Make final adjustments if the test reveals fit or tolerance issues.
Tip: Label exports clearly (e.g., model_v1_mm) to track iterations.
Frequently Asked Questions
What is the first Blender setting to adjust for 3D printing?
Start by setting the scene units to millimeters and applying scale after modeling. This ensures that dimensions transfer cleanly to your slicer.
Begin by setting Blender's units to millimeters and applying the scale to lock in the size before exporting.
How do I check for non-manifold geometry in Blender?
Use the 3D Print Toolbox add-on to identify non-manifold edges and holes, then fill and weld gaps. Re-run checks until the model is manifold.
Check for non-manifold edges with the 3D Print Toolbox and repair as needed before exporting.
Should I export as STL or OBJ for most prints?
STL is the standard for most slicers due to its simplicity and broad compatibility; use OBJ if you need color or texture data, but be aware many slicers ignore it for single-material prints.
STL is typically best for most printers; use OBJ if you need color or texture, though many slicers drop color data.
Do I need to apply scale before exporting?
Yes. Apply scale to lock the current dimensions, then export. If you forget, dimensions can drift in the slicer.
Yes, apply scale before exporting to keep dimensions consistent.
Can Blender generate supports or determine print orientation?
Blender doesn’t generate supports; you should orient parts to minimize supports in the slicer and plan for any necessary support structures separately.
Blender doesn’t generate supports—set orientation to minimize them, then add supports in the slicer if needed.
What if my model has moving parts or tight tolerances?
Model clearances in Blender to account for printer tolerances; test prints are recommended for critical joints to validate fit.
Create clearances in Blender and test with a quick print to ensure proper fit.
Watch Video
What to Remember
- Set millimeter units and apply scale early
- Repair holes and ensure manifold geometry
- Use Solidify for consistent wall thickness
- Orient parts to minimize supports in the slicer
- Export reproducibly and verify in the slicer