Blender 3D Printing: Practical Guide for Makers
A complete, step-by-step guide to turning Blender models into printable objects. Learn mesh repair, scaling, wall thickness, STL export, and slicer prep for reliable, repeatable 3D prints with Blender.

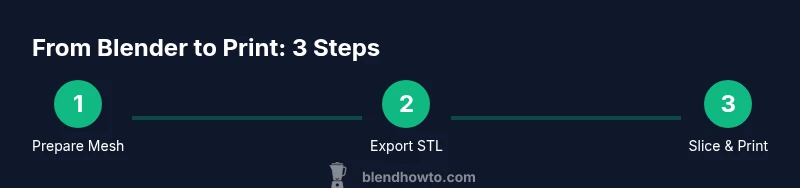
By the end of this guide, you will know how to prep Blender models for 3D printing: clean geometry, ensure watertight meshes, set real-world units, export an STL, and prepare for slicing with confidence. The workflow covers scale, wall thickness, orientation, supports planning, and post-processing considerations. This quick answer signals the path you will follow in the full article.
Why Blender for 3D Printing
Blender is a powerful, open-source 3D tool that covers modeling, sculpting, texturing, and even basic animation. When used for 3D printing, Blender offers a flexible workflow to prepare models before export. According to BlendHowTo, starting in Blender gives you tight control over geometry throughout the process. Blender’s non-destructive modifiers, precise measurement tools, and built-in boolean operations help you shape parts that print cleanly. The main advantage for hobbyists is rapid iteration without juggling between programs. To set up for success, plan with a print-ready mindset: think about wall thickness, feature size, and assembly if you design multi-part objects. In this section we’ll translate core concepts—watertight meshes, real-world scale, and deliberate orientation—into actionable steps that reduce prints failures. You’ll also learn how to verify a model in a slicer before generating G-code.
Core Concepts: Manifold Meshes and Water-Tight Geometry
A printable Blender model must be manifold and water-tight. Manifold means every edge belongs to exactly two faces, so there are no holes or gaps that would create leaks in the print. In practice, you’ll clean stray vertices, fill holes, and remove interior faces that Blender might generate during modeling. Water-tight geometry ensures the slicer can interpret the surface without guessing. Use Blender’s 3D Print Toolbox add-on (built-in in recent versions) to analyze your mesh for non-manifold edges, holes, and intersecting geometry. Fix issues with Merge by Distance, Fill Holes, and Fill Toggle, then re-check. A solid, error-free mesh translates to fewer failed prints and smoother post-processing.
Unit Systems, Scale, and Real-World Dimensions
Print accuracy starts with correct units. Switch Blender to metric units and set the unit scale so that Blender units map predictably to millimeters. Decide on the target printer’s build volume early, then scale your model accordingly. After scaling, apply all transforms (Ctrl-A > Scale) to lock in measurements. This prevents scaling drift when exporting to STL. Always verify critical dimensions with a caliper or ruler in your real world workflow, and re-check in the slicer before printing.
Checking Wall Thickness and Feature Resolution
Wall thickness determines print strength and material usage. Typical practical minimums depend on material and nozzle size (for example, PLA with a 0.4 mm nozzle often prints features around 0.8–1.0 mm thick). In Blender, inspect thin features and reduce overly delicate details that won’t print well. For small parts, increase thickness or split into larger printable segments. This prevents fragile features from breaking during handling and ensures reliable layer adhesion.
Cleaning Up: Modifiers, Doubles, and Non-Manifold Edges
Before exporting, clean up the mesh with careful use of modifiers and mesh cleanup tools. Remove duplicate vertices (Merge by Distance), recalculate normals (Shift-N), and eliminate non-manifold edges. If you used boolean operations, you may need to apply and simplify results to avoid thin walls or hidden gaps. Non-destructive modifiers can help you adjust later if your print reveals a problem, but apply them before exporting for a clean STL.
Exporting for Printing: STL vs OBJ and Unit Settings
Exporting to STL is the standard path for most slicers. In Blender’s export options, ensure apply modifier and scale are checked so the exported mesh mirrors your final in-slicer size. If you need multi-part assemblies, you may export multiple STL files and assemble them in the slicer or in post-processing. OBJ can be useful when you’re handling multiple materials or advanced post-processing, but STL remains the most universally compatible choice for 3D printing.
Slicing Your Model: From Blender to Your Printer
Slicing translates the STL into printer-ready G-code. Import your STL into your slicer, confirm the orientation, layer height, infill, and supports. Use a conservative layer height for fine details and ensure bed adhesion—brims or raft options help for large flat bases. Simulate the slice in the preview window to catch toolpath issues before printing. If a feature didn’t print as expected, return to Blender to adjust thickness or orientation and re-export a corrected STL.
Practical Tips: Supports, Orientation, and Multi-Part Assemblies
Smart orientation minimizes supports and improves surface quality. Align long flat surfaces with the print bed to reduce deformation and warping; place holes and recesses for fast assembly alignment. For multi-part assemblies, design alignment features (pegs, alignment bosses) and plan discreet seams that are easy to finish. Consider adding a small chamfer on internal edges to prevent friction during assembly and to provide a clean cosmetic edge after post-processing.
A Simple Project: Step-by-Step Blender 3D Printing Workflow
This section walks through a small project—printing a mechanical knob. Start by loading the knob model, set metric units, and verify print dimensions against a caliper. Repair holes, ensure watertight surfaces, and apply scale. Export STL files for each component, then import into your slicer. Check orientation, add a brim, and run a small calibration print. If the first attempt fails, iterate by adjusting thickness, orientation, or support settings and reprint. This practical workflow demonstrates the direct path from Blender to a successful physical object.
Tools & Materials
- Blender software (latest stable release)(Ensure Blender is installed and up to date to access the latest modeling and 3D printing tools.)
- 3D printer with compatible build volume(Know your printer’s XY build area and Z height before modeling.)
- Slicer software (e.g., Cura, slicer-wide option)(Used to convert STL to printer-ready G-code and set supports.)
- Caliper or accurate ruler(Helpful for verifying real-world dimensions against Blender units.)
- Printing filament (PLA or PETG recommended)(Material choice affects minimum wall thickness and cooling requirements.)
- Basic post-processing tools(Sandpaper, deburring tools, or a hobby knife for cleanup after printing.)
Steps
Estimated time: 2-4 hours
- 1
Open Blender project and verify units
Open your Blender file and switch to the Metric unit system. Set the unit scale so that 1 Blender unit roughly equals 1 millimeter, then apply the scale (Ctrl-A > Scale) to lock measurements before exporting.
Tip: Apply scale early to prevent dimension drift after export. - 2
Repair geometry and seal holes
Scan for non-manifold edges, holes, and interior faces. Use Fill Holes, Merge by Distance, and Recalculate Normals to fix issues that cause print failures.
Tip: Run the 3D Print Toolbox analysis to quickly identify problem areas. - 3
Check wall thickness and feature size
Measure critical walls to meet your printer’s nozzle constraints and your chosen material’s capabilities. Simplify tiny details that won’t print well or will be fragile.
Tip: Aim for minimum thickness around 0.8–1.0 mm for general PLA with a 0.4 mm nozzle. - 4
Prepare for multi-part printing
If the model is large or complex, plan separations into printable parts and design alignment features for easy assembly.
Tip: Add pegs and matching holes to ensure precise alignment during assembly. - 5
Export to STL with correct scale
Export the repaired model as STL, ensuring modifiers are applied and scale matches your slicer settings.
Tip: Check the exported file in the slicer preview to confirm dimensions. - 6
Import into slicer and set print parameters
Load the STL, orient the model for minimal supports, enable brims if needed, and choose layer height according to detail and speed.
Tip: Preview toolpaths to catch overhangs and gaps before printing. - 7
Run a test print and inspect
Print a small calibration piece or a critical feature. Inspect for dimensional accuracy, layer adhesion, and surface roughness.
Tip: If mismatches appear, adjust scale or orientation and re-export. - 8
Post-process and iterate
Remove supports, sand rough edges, and assemble if the design is multi-part. Iterate on the model as needed for better fit or strength.
Tip: Document changes for future prints to speed up iteration. - 9
Document the workflow
Save your Blender export settings and slicer profile for future projects. Create a simple checklist to streamline repeating the process.
Tip: Consistency reduces errors in future prints.
Frequently Asked Questions
Do I need to repair all non-manifold edges before printing?
Yes. Non-manifold edges can cause holes and print failures. Use Blender’s 3D Print Toolbox to locate and fix non-manifold edges, holes, and intersecting geometry, then re-check before exporting.
Yes. Non-manifold geometry often leads to failed prints; fix it in Blender first.
Which file format should I export from Blender for 3D printing?
STL is the most widely supported format for 3D printing. Export a clean STL with modifiers applied and correct scale, then slice. OBJ can be used for multi-part or texture-heavy workflows but is less universal for standard prints.
STL is the standard for most slicers; use it for reliable results.
How do I scale models for real-world dimensions?
Set the unit system to Metric, choose millimeters, and scale the model to the intended size. Apply the scale (Ctrl-A > Scale) before exporting to ensure dimensions are preserved in the slicer.
Set metric units, scale, and apply scale before export.
Can Blender auto-generate supports for printing?
Blender does not auto-generate printer supports. Plan orientation to minimize supports, and rely on slicer-generated supports when needed. You can pre-plan simple supports through the model but they are best adjusted in the slicer.
Supports should be added in the slicer, not Blender.
What are common print failures and how can I avoid them?
Warping, poor adhesion, and layer separation are common. Avoid by orienting parts to maximize flat bed contact, using appropriate brim/raft, ensuring adequate wall thickness, and using correct cooling for your material.
Watch for warping and layer issues; adjust orientation and cooling.
Is it okay to print multi-part assemblies in pieces?
Yes. Design parts to print separately and assemble later. Include alignment features like pegs or holes and plan tolerances for a clean, strong final assembly.
Yes—print parts separately and assemble post-print for complex designs.
Watch Video
What to Remember
- Prepare a watertight Blender mesh before exporting
- Use metric units and apply scale to lock measurements
- Check wall thickness to ensure printability
- Export STL and verify in slicer before printing
- Plan assembly for multi-part prints and design alignment features