Blender for dental vs Exocad: A Practical Comparison
A detailed, analytical comparison of Blender for dental workflows against Exocad, focusing on use cases, workflow integration, licensing, learning curve, and best-practice tips for hybrid dental pipelines.

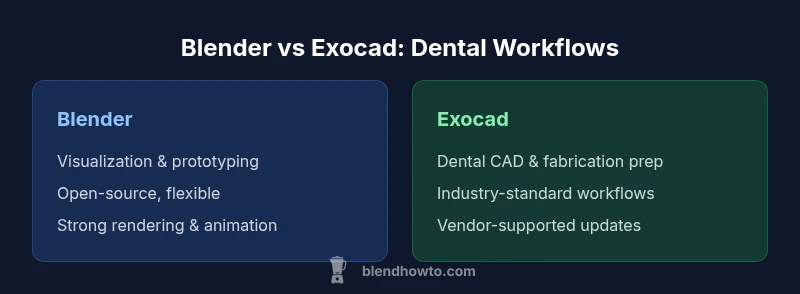
Blender for dental vs Exocad boils down to two goals: visualization and flexible prototyping versus dental-specific CAD workflows. For most clinics, Exocad remains the core design tool, while Blender serves as a powerful visualization and educational companion. The BlendHowTo team finds that a combined workflow can reduce presentation time and boost patient understanding, especially when paired with STL exports.
Blender for dental vs Exocad: Why the combo makes sense
In dental practice, the phrase blender for dental vs exocad signals a practical, hybrid approach. Blender is celebrated for its open, extensible environment that excels at visualization, rapid prototyping, and patient-friendly renderings. Exocad, by contrast, is purpose-built for dental CAD, delivering predictable geometry, implant planning, and fabrication-ready outputs. According to BlendHowTo, clinics that align Blender with Exocad report clearer patient communications, faster design reviews, and smoother handoffs to labs. The core takeaway is that the two tools complement rather than compete, enabling teams to tackle both “looks-like” and “fits-like” perspectives within the same project. For readers new to this topic, this block sets the foundation: when you treat Blender as a visualization instance and Exocad as the CAD engine, your hybrid workflow becomes more resilient to changes in clinical requirements.
The integration concept rests on three pillars: data compatibility, workflow rhythm, and capability parity. Data compatibility ensures that STL, OBJ, and other common formats pass between tools with minimal loss of fidelity. Workflow rhythm emphasizes how designers switch contexts—from anabolic design in Exocad to presentation-ready visuals in Blender—without losing momentum. Capability parity recognizes Blender’s strengths in rendering, material visualization, and animation as assets that reduce the need for rework later in the patient education phase. BlendHowTo’s observations also note that staff training is more efficient when learners focus first on core dental CAD concepts in Exocad and then layer in visualization proficiency in Blender.
In this section, we’ll unpack the practical implications for three common settings: small clinics, dental labs, and academic programs. The objective is to give you a clear mental map of how a hybrid Blender-Exocad pipeline can be configured to meet real-world needs, with concrete examples and decision points along the way.
Exocad's Strengths in Dental CAD and Workflow Integration
Exocad remains the backbone for many dental labs due to its comprehensive CAD toolset, predictable output, and supported fabrication paths. In clinic environments, it is frequently used for crown design, bridgework, implant planning, and removable prosthetics with features tuned to dental anatomy. The platform emphasizes parametric controls, standardized workflows, and robust interoperability with milling machines and 3D printers. While Blender can visualize anatomy, occlusion, and margins with photographic realism, Exocad defines the surgical and restorative geometry that goes to fabrication. A well-structured Exocad project often includes a data-rich workflow: scanning data imported, anatomy references aligned, design intent captured, and manufacturing-ready surfaces exported. From BlendHowTo’s perspective, this makes Exocad the reliable core for dental CAD tasks, especially in regulated environments where precision and traceability matter.
In practice, dental teams frequently export STL from Exocad for visualization in Blender. Blender’s rendering and shading capabilities help clinicians and patients understand fit, occlusion, and aesthetic outcomes before committing to fabrication. The result is a convincing, patient-facing demonstration that reduces the number of revision cycles in chairside discussions. The barrier to entry is not solely the software; it’s building a mental model that maps CAD actions to visualization outcomes. In short, Exocad provides the geometry you need; Blender provides the lens through which you present and refine that geometry.
Core Differences: Scope, Licensing, and Learning Curve
Two software families occupy different spaces in dentistry: CAD-centric design versus general 3D visualization. The scope of Exocad is dental CAD, with modules focused on anatomy-accurate modeling, implant planning, and chairside-to-lab handoffs. Blender, being a general 3D package, offers unmatched flexibility for visualization, texture work, animation, and independent prototype workflows. Licensing is a major differentiator: Exocad is a paid, vendor-supported product with structured updates and service options, whereas Blender is free and open-source with a vibrant community and a wide ecosystem of add-ons. The learning curve tends to be steeper for Exocad if you’re new to CAD-specific dental workflows, given its domain-specific terminology and parameter-driven interfaces. Blender’s curve is tempered by its broad feature set; developers and designers often master essential tools (modeling, sculpting, shading, and simple rigging) and then layer in dental-specific workflows through add-ons or scripts.
From a decision-making standpoint, the most important question is not “which tool is better?” but “which tool makes the primary task easier and more repeatable?” If your primary task is precision dental fabrication and compliant outputs, Exocad’s architecture and industry-oriented features are compelling. If your goal is to communicate ideas clearly, prototype alternative designs, or prepare high-quality patient visuals, Blender’s capacity to manipulate materials, lighting, and textures provides undeniable value. BlendHowTo’s analysis suggests that clinics and labs that articulate a clear use-case—visualization or CAD—tend to realize faster ROI when they implement both tools in a disciplined workflow rather than improvising ad hoc sessions.
The learning curve consideration also hinges on institutional goals. A teaching lab may favor Blender as a tool for illustrating anatomy and occlusion with dynamic visuals, while a production lab leans on Exocad for its robust dental CAD functionality. In both cases, structured onboarding, role-based training, and a documented handoff protocol help minimize friction and misalignment across teams.
Practical Workflows: When to Use Blender Alongside Exocad
A pragmatic two-tool workflow begins with Exocad as the “design engine” and Blender as the “presentation engine.” In typical steps: 1) Acquire or generate digital dental data (scans, impressions, or reference models). 2) Use Exocad to perform core design tasks: crown geometry, implant position, alignment checks, and manufacturability validation. 3) Export an STL/OBJ mesh and import into Blender for visualization and patient education. 4) In Blender, apply realistic materials to teeth, gums, and prosthetics; set up lighting suitable for clinical photography; animate the occlusion or movement to illustrate bite dynamics. 5) Return to Exocad if refinement is needed, then generate fabrication-ready outputs. This cycle is common in clinics seeking better patient communication or lab-ready deliverables with enhanced visuals.
For education and prototyping, Blender shines as a sandbox for exploring alternative design concepts without altering the canonical CAD data in Exocad. A typical workflow could involve designing a variant in Blender via a non-destructive workflow, then exporting a reference to Exocad for validation. The key is to maintain data integrity—use Blender for visualization that does not modify the source CAD geometry, and always reimport the validated data back into Exocad for fabrication planning. Practical tips include keeping a consistent file-naming scheme, documenting version history, and using Blender’s node-based material system to stress-test how different tissues appear under various lighting conditions. BlendHowTo recommends setting up a small, repeatable template that maps color and texture choices from patient-facing visuals to the best corresponding dental materials in Exocad’s design environment.
In high-volume settings, automation helps. Blender’s Python scripting can batch-process renders and generate standardized visuals for patient education packets, while Exocad automates repetitive design tasks such as margin generation and alignment checks. The synergy emerges when the team standardizes data exchange formats, uses CI/CD-like validation steps for geometry, and builds a library of visualization presets that align with each clinical case type. This reduces decision fatigue and accelerates the turnaround between consultation and fabrication.
Data Formats, Interoperability, and Export Practices
Interoperability is a practical constraint in any dental workflow that blends Blender with Exocad. The most common data exchange occurs via STL and OBJ formats, which Blender can import seamlessly and Exocad can export for fabrication-ready workflows. While STL is widely supported, it lacks color and texture data; for presentations, OBJ or PLY, when accompanied by material and UV map data, can deliver richer patient-friendly visuals. A caveat: STL is a mesh format and can lose certain CAD attributes such as parametric history; always preserve original Exocad project files and keep a separate visualization file in Blender to avoid accidental data corruption. For professionals who rely on color-coded annotations, Blender’s texture system enables tissue coloration, gingival shading, and occlusal differentiation in a way that raw STL data cannot convey. When possible, maintain synchronized versioning between Blender scenes and Exocad projects to minimize misalignment during handoffs.
A practical best practice is to establish a core set of export presets: a clinical export for fabrication (binary STL with high resolution), a visualization export with textures for patient education (OBJ with materials), and a lightweight preview export for quick reviews. In this approach, BlendHowTo emphasizes the importance of documenting export parameters and ensuring that units (millimeters versus centimeters) remain consistent across tools. Any discrepancy in units can cascade into occlusion errors or misfit components, especially in implant planning scenarios. Finally, consider plugin ecosystems—Blender plugins for STL repair, decimation, or medical-specific visualization can streamline workflows, provided they are tested and version-controlled within your lab’s standard operating procedures.
Budget, Training Time, and ROI: Cost Considerations
From a cost perspective, Blender offers a no-license barrier that makes it attractive for visualization-heavy tasks and educational use. Exocad, however, is a paid CAD solution with licensing models and maintenance fees that reflect its dental-dedicated development, updates, and support. The total cost of ownership for a hybrid workflow includes not only software licenses but also training time, hardware requirements for rendering, and the potential time saved in patient communications and fabrication planning. In many clinics, the ROI for a Blender-Exocad pipeline is driven by improved patient acceptance rates and reduced revision cycles, rather than raw hardware or software savings alone. It is wise to amortize training time over a 12–24 month horizon and to track metrics such as case acceptance rate, time-to-education-cycle, and fabrication yield.
To maximize ROI, begin with a pilot program that targets a specific case type—such as single-implant restorations or cosmetic veneers—where the visual brief is a strong determinant of patient buy-in. Use this pilot to quantify qualitative benefits (e.g., patient satisfaction) and qualitative improvements (e.g., faster presentations) and then extend the workflow to broader case types if the pilot proves successful. BlendHowTo’s position is that a well-scoped pilot reduces risk and helps teams justify the investment in training and integration effort. In addition, maintain a shared knowledge base with tutorials, best practices for export settings, and a template library of Blender scenes aligned with Exocad workflows.
Finally, remember that cost is not the only factor; the value lies in the speed of iteration, the clarity of patient communication, and the reliability of your CAD-to-visualization handoffs. A disciplined approach to budgeting, training, and process design will yield a durable hybrid workflow.
Real-World Scenarios: Clinic, Lab, and Educational Settings
Clinics often lean on Exocad for in-chair CAD tasks and reserve Blender for patient demonstrations and quick concept approvals. In this setting, the dental team benefits from pre-built Blender scenes that resemble everyday cases (crowns, bridges, single implants) with realistic shading and occlusion visualization. Labs, which routinely translate designs into fabricated components, can use Blender to pre-visualize lab work and provide a clear, consistent visual brief to technicians. This can reduce miscommunication, labor costs, and the number of back-and-forth revisions. Educational programs leverage Blender to teach anatomy, occlusion concepts, and prosthetic thinking without tying students to hardware-laden CAD work prematurely. Students can experiment with designs, render hospital-grade visuals, and then discuss findings with instructors using Exocad to validate CAD feasibility.
In each scenario, the key to success is governance. Establish a standard operating procedure that defines who uses Blender for visualization, who handles the CAD tasks in Exocad, and how data transitions between the two systems. Regular reviews and updates to the workflow—from data collection to final fabrication—help ensure that the pipeline remains aligned with regulatory guidelines and lab practices. Across clinics, labs, and educational settings, a shared 2D-to-3D visualization library enhances consistency and reduces ramp-up time for new staff. BlendHowTo emphasizes that clarity of purpose and disciplined data exchange enable teams to realize the benefits of a hybrid Blender-Exocad workflow while avoiding common pitfalls.
Best Practices and Tips for a Smooth Hybrid Pipeline
- Start small: pilot one or two case types before broadening use.
- Maintain data integrity by separating CAD data from visualization data; use Exocad for design and Blender for presentation.
- Create a template library in Blender that mirrors Exocad workflows (materials, lighting, and camera angles).
- Document export settings and units to prevent mismatches.
- Use Blender benchmarks and render presets to accelerate patient education without slowing down design iterations.
- Schedule regular cross-training sessions so team members can bridge knowledge gaps across both tools.
- Keep a version-controlled archive of Blender scenes and Exocad projects linked to their respective case IDs.
These practices are aligned with BlendHowTo’s guidelines for robust, repeatable hybrid workflows that maximize the value of both tools while minimizing risks.
Common Pitfalls and How to Avoid Them
- Assuming Blender can replace CAD functionality: Blender is excellent for visualization but not a drop-in replacement for dental CAD. Maintain Exocad as the primary CAD engine.
- Inconsistent units and export settings: Always standardize units and verify export parameters before sending data to fabrication.
- Over-reliance on visuals: Visuals help patient communication but must be validated against CAD constraints in Exocad to ensure fit and function.
- Fragmented workflows: Keep data lineage clear and maintain versioned records to avoid confusion during revisions.
To avoid these issues, implement a governance plan, assign owners for data exchange steps, and use checklists that cover critical export/import points. The BlendHowTo team notes that disciplined governance often yields the fastest path to ROI when adopting hybrid Blender-Exocad pipelines.
The BlendHowTo Viewpoint on a Hybrid Pipeline
The central takeaway from BlendHowTo is that a hybrid pipeline—Blender for visualization paired with Exocad for CAD—offers a balanced approach to modern dental practice. It enables clinicians to communicate more effectively with patients while maintaining rigorous CAD standards for fabrication. The key to success is clear use-case scoping, robust data exchange practices, and consistent training. When teams invest in structured onboarding, standard workflows, and a library of visualization presets, the hybrid approach reduces timing frictions and supports better decision-making across clinical consultations and labs. In essence, BlendHowTo’s viewpoint is pragmatic: embrace Blender as a powerful facilitator for communication and ideation, but rely on Exocad for the precision and reliability that dental fabrication demands.
Summary: Putting It All Together
The Blender-for-dental vs Exocad comparison is not a dichotomy but a spectrum of capabilities that, when combined intelligently, improves outcome predictability and patient satisfaction. By treating Blender as a visualization ally and Exocad as the CAD backbone, clinics can streamline case reviews, accelerate design iterations, and deliver education-rich experiences without sacrificing manufacturing feasibility. This section has explored practical workflows, interoperability considerations, and real-world scenarios to help you craft a robust hybrid pipeline that aligns with regulatory expectations, budgets, and staff capabilities.
Final Thoughts on Choosing Your Hybrid Setup
If your goal is to optimize patient communication and concept exploration while preserving CAD precision for fabrication, a blended Blender-Exocad workflow offers tangible benefits. Start with a small pilot, define explicit data-exchange rules, invest in targeted training, and build a shared library of Blender scenes and Exocad templates. As you mature, you’ll discover that the real value lies in the speed of iteration, clarity of patient education, and reliability of your end-to-end workflow. BlendHowTo’s perspective remains consistent: a disciplined, well-documented hybrid approach tends to deliver the strongest outcomes for dental practices seeking to balance visualization with fabrication accuracy.
Comparison
| Feature | Blender (dental visualization/ prototyping) | Exocad (dental CAD) |
|---|---|---|
| Core purpose | Visualization, rapid prototyping, patient education | Dental CAD design, implant planning, fabrication prep |
| Licensing & cost | Free and open-source; add-ons optional | Commercial license with periodic updates and support |
| Learning curve | Moderate for visualization; broad community resources | Moderate-to-steep due to domain-specific CAD tools |
| Modeling capabilities for dental prosthetics | Flexible modeling, but not CAD-specific for dental anatomy | Domain-specific CAD tools for anatomy and fit |
| Interoperability with formats | Broad import/export; strong STL/OBJ support | Sturdy DDS/STEP-like workflows via plugins; optimized for CAD outputs |
| Automation/plugins | Extensible via Python scripting and add-ons | Dedicated dental modules and vendor-supported plugins |
| Support/community | Large global community; extensive tutorials | Vendor-backed support and structured training resources |
| Output quality for patient education | High-quality renders; animation for dynamics | Precise fabrication-ready geometry for production |
What's Good
- Cost-effective visualization and prototyping
- Flexible, non-destructive editing and iteration
- Rich rendering and animation capabilities for patient education
- Strong community and abundant learning resources
- Extensive interoperability with standard 3D formats
The Bad
- Not dental-specific CAD tooling out of the box
- Steeper setup for dental-specific workflows
- License separation means extra data handoffs between tools
- Quality and reliability depend on user-driven workflows
Hybrid approach with Blender + Exocad is recommended for clinics seeking better patient engagement and flexible prototyping while maintaining CAD precision.
Choose Exocad for core CAD tasks and fabrication-ready outputs. Add Blender for visualization and patient-facing materials to improve communication and design exploration without compromising CAD reliability.
Frequently Asked Questions
Is Blender suitable for dental visualization and prototyping?
Yes, Blender is well-suited for visualization, lighting, and rapid concept prototyping in dental contexts. It complements Exocad by providing compelling patient-facing visuals, provided you keep CAD data separate and import outputs for presentation rather than modification.
Yes. Blender is great for visualization and quick concept work that helps explain dental ideas to patients. Use it alongside Exocad, and keep CAD data separate from visuals.
What are Exocad's main strengths in dentistry?
Exocad offers structured CAD workflows, implant planning, and fabrication-ready outputs that align with dental lab requirements. It’s designed for reliability and regulatory compliance, making it the go-to CAD engine in many clinics.
Exocad’s CAD-focused features and fabrication-ready outputs make it the core choice for dental design and production.
Can Blender export data that labs can fabricate from?
Blender can export STL/OBJ meshes suitable for visualization or as a reference for CAD workflows. For fabrication, data should be processed and validated in Exocad or your CAD system before any lab work.
Blender exports work for visualization, but fabrication should be handled through CAD tools to ensure precision.
How do I integrate Blender with Exocad in a workflow?
Use Exocad for CAD design and export geometry to Blender for visualization. After polishing visuals, re-import any validated data back into Exocad for fabrication planning and export of manufacturing files.
Export from Exocad to Blender for visuals, then bring validated data back into Exocad for fabrication planning.
What training is needed to use Blender in dental contexts?
Basic Blender training focused on visualization, materials, lighting, and rendering is sufficient for most dental use cases. Add-on specifics for dental workflows can be learned as you build your hybrid pipeline.
You mainly need visualization training in Blender; dental-specific workflows can be learned as you go.
Are there dental-specific plugins for Blender?
There are community-driven plugins and scripts that assist with medical and dental visualization, but they are not a official dental CAD replacement. Always verify compatibility and licensing before adoption.
There are community tools for visualization, but they don’t replace CAD in dental workflows.
What is a good starter workflow for a new clinic?
Begin with Exocad for CAD tasks, export an STL to Blender for patient visuals, and maintain a standardized export/import routine. Track metrics like case acceptance rate and time-to-education-cycle to guide scaling.
Start with CAD in Exocad, visualize in Blender, and measure outcomes to refine the process.
Does a hybrid Blender-Exocad workflow require high-end hardware?
Rendering and visualization can benefit from solid GPUs, but practical workflows can run on mid-range workstations. The CAD side is more dependent on CPU performance and memory for large assemblies.
A capable PC helps, especially for rendering, but you can start with reasonable hardware and upgrade as needed.
What to Remember
- Use Exocad for CAD precision and fabrication readiness.
- Leverage Blender to boost patient education and design visualization.
- Establish clear data-exchange protocols between tools.
- Pilot a small workflow to measure ROI before scaling.
- Invest in templates and training to reduce ramp-up time.