Blender vs CAD for 3D Printing: Practical Comparison
A data-driven comparison of Blender and CAD for 3D printing. Learn when to use each tool, common pitfalls, and workflows that blend mesh sculpting with parametric design for reliable prints.

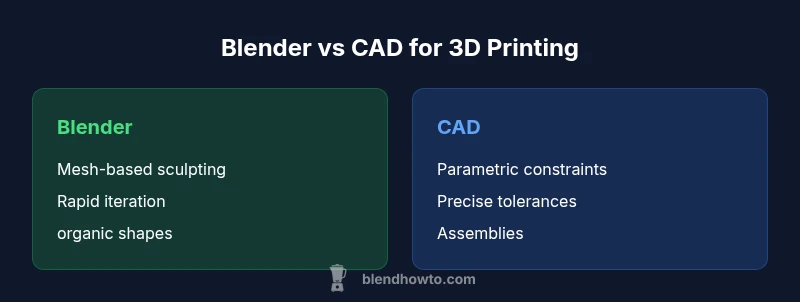
Blender and CAD both play roles in blender vs cad for 3d printing, but each excels in different areas. Blender shines with freeform shapes and rapid iteration, ideal for shells, organic details, and quick proofs of concept. CAD emphasizes precise dimensions, tolerances, and assemblies, which are essential for functional parts. For most projects, use CAD for critical fits and Blender for geometry that needs refinement, then combine outputs for final prints.
Blender vs CAD for 3d Printing: The Core Distinction
In the context of 3d printing, Blender and CAD systems are not interchangeable but complementary. Blender focuses on sculpture, organic shapes, and rapid visual iteration, while CAD emphasizes measurements, constraints, and repeatable assemblies. The choice between them often comes down to geometry and end-use. When you ask blender vs cad for 3d printing in practice, you are choosing between a mesh-first mindset and a parametric-first mindset. Understanding this distinction helps you plan your workflow from the first sketch to the printer bed.
This section sets the stage for a deeper dive into how each tool aligns with different design goals and printing realities.
Modeling Philosophy: Mesh Artistry vs Parametric Rigidity
Blender represents a mesh-centric philosophy where surfaces, vertices, and modifiers sculpt highly customized forms. It supports rapid iteration, complex topology, and organic transitions that are difficult to reproduce in strict parametric systems. CAD, by contrast, uses constraints, dimensions, and relationships that ensure features stay true to intentional tolerances even as parts are modified. The blender vs cad for 3d printing debate often boils down to whether your project rewards expressive form or engineered precision.
For hobby projects with flowing curves or stylized figures, Blender’s freedom is enticing. For mechanical components, hinges, or parts that must fit with others, CAD’s predictability is invaluable.
Workflow Implications: Sculpting, Remeshing, and Assembly Planning
A typical print-ready workflow differs in where you start modeling. Blender tends to be your starting point for morphology, while CAD is often used to establish exact dimensions and mating features. When the geometry is complex, it is common to model the general shape in Blender and then import a clean mesh into a CAD program to add precise holes, threads, or alignment features. The key is to map the steps clearly: sculpt or sketch in Blender, then constrain in CAD, then backfill refinements in Blender if needed.
This hybrid approach minimizes rework and helps maintain a balance between form and function.
Precision, Tolerances, and Practical Print Considerations
Precision in 3D printing is not only about nominal dimensions; it includes tolerances, wall thickness, and printer-specific quirks. CAD excels at controlling these factors through parametric design, dimensional constraints, and assembly checks. Blender offers robust mesh tools, but tolerances can drift if exported without careful unit handling or re-scaling. Practically, plan for adhesive gaps, clearance fits, and error tolerances early in the design process to avoid cascading issues later.
A prudent rule of thumb is to decide critical clearances in CAD, then use Blender to refine surrounding geometry so prints remain manufacturable while preserving aesthetic intent.
File Formats and Export Readiness
For 3D printing, most teams rely on STL or OBJ files from Blender or CAD exports. Blender users should watch for non-manifold geometry, flipped normals, and duplicate vertices before export. CAD users typically export as STEP or IGES for interoperability and then convert to STL for printing; however, mesh repairs may be necessary after conversion. Consistent units across software are essential to avoid scale problems when importing between tools.
Keeping a clean export pipeline reduces the risk of hidden errors surfacing only at print time.
Print Preparation: Supports, Wall Thickness, and Orientation
Print readiness depends on more than the digital model. In Blender, you might rely on modifiers to generate shells or add supports, then perform mesh repair. In CAD, you can design with precise wall thicknesses, wall-to-wall clearances, and bore tolerances. Orientation and support planning should be decided before final export to minimize post-processing. A well-planned order of operations improves print success rates and reduces material waste.
When Blender Shines: Prototyping, Shells, and Aesthetics
Blender is a superb tool for rapid prototyping of visual concepts, character models, and custom shells. Its sculpting tools, dynamic topology, and modifiers allow you to iterate quickly without worrying about exact dimensions. If your project prioritizes appearance or complex surface transitions, Blender offers a faster path from idea to printable mesh. It also provides a friendly environment for exploring artistic effects and decorative details.
Keep in mind that final parts intended for integration with other components should be revalidated in a CAD environment to confirm fit.
When CAD Shines: Mechanical Parts, Fits, and Reproducible Geometries
CAD shines where precision matters: mechanical housings, fasteners, pins, and threaded holes require exact tolerances and repeatable dimensions. Parametric modeling enables easy updates—change a diameter or length, and the entire design adapts. This is essential for assemblies where multiple parts must align, clearance is critical, and manufacturing documentation is required. For 3d printing, CAD gives you a dependable baseline for functional components.
If you plan to 3D print functional parts, invest time in designing features that accommodate printer tolerances and specify step-by-step build instructions.
Interoperability: Converting and Cleaning Between Tools
Interoperability between Blender and CAD tools hinges on clean exports and careful data management. A common pattern is to model precision features in CAD, export to STL and import into Blender for cosmetic refinement, then export back as a mesh for printing. Always validate scale, normals, and watertightness after each transfer. When issues arise, simple fixes like re-meshing, re-scaling, and rechecking normals can save a lot of print headaches.
This process benefits from consistent naming and version control so you can trace changes across tools without losing geometry intent.
Hybrid Workflows: Combining Tools for Best Results
A robust hybrid workflow assigns strengths to each tool: CAD handles critical tolerances and assemblies; Blender handles surface aesthetics, complex organic geometry, and quick iteration. The blend of both improves reliability while preserving design intent. Document the workflow so team members know when to switch tools and how to transfer data with minimal losses. This approach often yields prints that look good and fit as designed.
Careful planning, unit consistency, and routine mesh checks are essential to prevent drift between stages.
Common Pitfalls in Blender-CAD Print Pipelines
Blending tools is powerful but can introduce pitfalls. Common issues include mismatched units, non-manifold meshes, hidden scale changes, and exported files that lose topology information. Inconsistent tolerances between CAD and Blender can lead to poor fits. To avoid these problems, establish a standard export/import procedure, run mesh repairs where needed, and keep versioned backups of all design stages. A thoughtful workflow reduces surprises at the printer bed.
Getting Started: A Simple 3-Stage Workflow
- Define the core geometry in CAD for precise features such as holes, bosses, and locks. 2) Import into Blender to shape the exterior and add organic details, textures, or aesthetic refinements. 3) Re-export the final mesh as STL, ensure proper scale, and perform a quick printability check with software tools. This approach keeps design intent intact while enabling expressive form.
With practice, this cycle becomes a natural rhythm rather than a hurdle, delivering consistent, high-quality prints.
Comparison
| Feature | Blender for 3D printing | CAD for 3D printing |
|---|---|---|
| Modeling approach | Mesh-based sculpting and modifiers | Parametric modeling with constraints |
| Dimensional accuracy | Depends on export scale and mesh integrity | Typically higher and more predictable due to constraints |
| Export formats | STL, OBJ, 3MF with mesh prep | STP/STEP, IGES, STL (conversion required) |
| Best for | Creative shells, organic geometries, rapid prototypes | Functional parts, precise fits, assemblies |
| Learning curve | Steeper for sculpture; abundant tutorials | Steeper initially but predictable for constraints |
| Print reliability | Depends on mesh repair and tolerance handling | Higher baseline reliability for critical features |
What's Good
- Supports rapid iteration and artistic exploration
- Strong community and plentiful tutorials
- Excellent for creating complex shells and organic shapes
- Low-cost entry with free tools and add-ons
The Bad
- Tolerances can be inconsistent without careful cleanup
- Interoperability issues when transferring data between tools
- Mesh-based workflows require additional repair steps for printing
- Steeper learning curve for users focused on engineering accuracy
Hybrid workflows offer the best of both worlds.
Use CAD for precision-critical parts and Blender for aesthetics and iteration. A combined workflow minimizes risk while maximizing design flexibility, leading to reliable, visually appealing prints.
Frequently Asked Questions
Can Blender export STL files suitable for 3D printing?
Yes. Blender can export STL (and OBJ) files after applying scale and units. Ensure the mesh is manifold, normals are correct, and you run a quick mesh check before printing.
Yes, Blender can export STL files suitable for 3D printing; just verify scale and mesh integrity before printing.
Is CAD better for achieving precise tolerances in 3D printed parts?
CAD tools excel at parametric constraints that maintain consistent dimensions across components. For critical fits, CAD workflows reduce the risk of misalignment and drift.
Yes—CAD is typically better for tight tolerances and repeatable dimensions.
Can I model organic shapes in CAD, or should I stick to Blender?
CAD can model organic shapes, but it is often slower. Blender’s sculpting tools are more efficient for complex organic geometries; many designers use a hybrid approach.
You can model organic shapes in CAD, but Blender is usually faster for that.
What is the learning curve for Blender vs CAD for beginners?
Blender has a steeper initial learning curve due to breadth of features, but tutorials help. Beginner-friendly CAD options with guided constraints can be easier to start.
Blender is tougher to learn at first, but CAD can be easier to start with.
How can I integrate Blender and CAD in a single workflow?
Model precise features in CAD, export to STL/OBJ, refine shapes in Blender, then finalize and repair before printing. This keeps precision and aesthetics aligned.
You can combine both: CAD for precision, Blender for refinement, then print.
What to Remember
- Approach Blender and CAD as complementary tools
- Plan tolerances and fits in CAD; refine surfaces in Blender
- Use a hybrid workflow for most 3D printing projects
- Export clean, watertight meshes and verify scale before printing
- Document data transfers to prevent unit drift