Blender Software Rendering: A Practical Guide for 3D Artists
Master blender software rendering with Cycles and Eevee. Learn engine choices, materials, lighting, outputs, and workflow to produce high-quality renders efficiently.

In this guide you will learn how to render with Blender using Cycles and Eevee, choose the right engine for your project, and tune materials, lighting, and output settings for clean, repeatable results. You’ll compare real-time and path-traced rendering, understand sampling basics, and establish a quick test workflow to iterate efficiently. By the end, you’ll be able to deliver professional renders with consistent quality using blender software rendering.
What Blender rendering is and why it matters
Rendering in Blender is the process of converting a 3D scene into a 2D image. The outcome depends on engine choice, shading, lighting, and render settings. For home hobbyists and aspiring 3D artists, understanding blender software rendering means knowing when to use Cycles for realism and Eevee for speed. According to BlendHowTo, engine selection should align with your final output, hardware constraints, and the amount of iteration you can tolerate. The goal is to produce stable, repeatable results you can reuse in portfolios or scenes, tutorials, or game assets. This foundation sets the tone for the rest of the guide and helps you approach rendering tasks with clarity and confidence.
Rendering engines in Blender: Cycles vs Eevee
Blender offers two main rendering engines: Cycles and Eevee. Cycles is a physically-based path-tracing engine that excels at realism, especially with accurate reflections, shadows, and global illumination. It can be slower, especially on complex scenes or high resolutions, but the results often require fewer tweaks to achieve photorealism. Eevee, by contrast, is a real-time rasterization engine designed for speed. It uses screen-space effects and approximations to deliver fast previews and final stills when configured well. When you’re learning blender software rendering, start with Eevee for quick feedback and switch to Cycles for final, high-fidelity renders. BlendHowTo’s approach emphasizes testing both engines on your scene to understand the trade-offs: speed, noise, lighting accuracy, and post-processing potential.
Materials and textures: shading with Principled BSDF
At the heart of convincing renders is material setup. Blender’s Principled BSDF shader provides a unified framework for metals, plastics, glass, and skin-like materials. Start with a clean UV map, assign a base color, roughness, metallicity, and clearcoat as needed. Use texture maps—albedo, roughness, normal, and displacement—to add detail without increasing geometry. For blender software rendering, nodal networks in Cycles often yield the most realistic results, while Eevee benefits from simple, well-tuned textures due to its real-time nature. Always validate textures at the final render resolution to ensure no tiling artifacts or color shifts.
Lighting and environment: HDRI and area lights
Lighting defines mood and realism. HDRI environment maps provide natural, even lighting and accurate reflections, while area lights give you precise control over shadow softness and intensity. A balanced approach uses an HDRI as the base illumination and adds practical lights to shape key areas or accent textures. In blender software rendering, avoid overly bright lights that blow out highlights in Cycles, and in Eevee tune shadow resolution and contact shadows to prevent banding. The combo of high-quality lighting and a good HDRI can dramatically improve perceived realism without adding geometry.
Camera setup and render settings: resolution, sampling, and color management
Camera placement should align with your storytelling goals—framing, focal length, and depth of field all influence how the viewer perceives texture and space. For render quality, configure the resolution, aspect ratio, and sampling. Higher sampling reduces noise but increases render time; balance with denoising and viewport feedback. Color management is critical: set to Filmic or another neutral profile to preserve dynamic range and color accuracy across devices. In blender rendering pipelines, these settings are essential to producing consistent results across multiple renders and devices.
Output, passes, and compositing: file formats and post-processing
Exporting output properly ensures you can post-process without losing data. Save renders in a high-quality image format (like PNG or EXR) for stills and set up render passes (diffuse, shadows, specular, ambient occlusion, etc.) for flexible compositing. Use Blender’s compositor to combine passes, apply color corrections, and add effects like bloom or depth of field. When you manage blender software rendering projects, establish a naming convention, keep a versioned archive, and store color-management settings alongside your assets to keep workflows reproducible.
Performance optimization and denoising: speed without sacrificing quality
Render speed hinges on sampling, denoising, and scene complexity. Start with a sensible sample count for test renders and enable denoising to clean up noise in both Cycles and Eevee. In Cycles, consider using adaptive sampling to allocate samples where needed. In Eevee, tweak shadows, ambient occlusion, and screen-space reflections to maintain realism without slowing down. BlendHowTo’s observations emphasize balancing denoising strength with detail preservation to avoid overly soft results that undermine texture fidelity.
Non-destructive workflows: compositing and passes
Working non-destructively is a cornerstone of blender software rendering. Render passes allow you to adjust lighting, color, and texture separately in the compositor or a post pipeline, rather than re-rendering the entire scene. Group related passes into a single node group for reuse and consistency. This approach makes iterations faster and ensures you can reuse a proven pipeline for future projects. It also helps separate the creative decisions from the technical render settings, supporting a smoother workflow.
Real-world workflow examples to illustrate the process
Consider a still life product scene: you’ll start by selecting Eevee for quick previews, setting up a clean environment, and applying a simple material with a glass-like surface. Then you’ll swap to Cycles for a final pass, implement HDRI lighting for realism, and adjust camera focal length to achieve the desired depth. In a small interior scene, you might keep Eevee for draft renders and Cycles for the final high-quality image, using denoising and adaptive sampling to keep render times reasonable. The key is to practice with representative scenes, refine your material setups, and build a repeatable workflow that yields consistent results across projects.
Tools & Materials
- Blender software (latest stable release)(Download from blender.org; ensure compatibility with your OS.)
- Computer with GPU-accelerated rendering(A reasonably modern GPU with up-to-date drivers helps Cycles render faster; CPU rendering is a safe fallback.)
- Keyboard and mouse(Ergonomic setup reduces fatigue during long sessions.)
- HDRI environment maps and texture packs(Optional but recommended for realistic lighting)
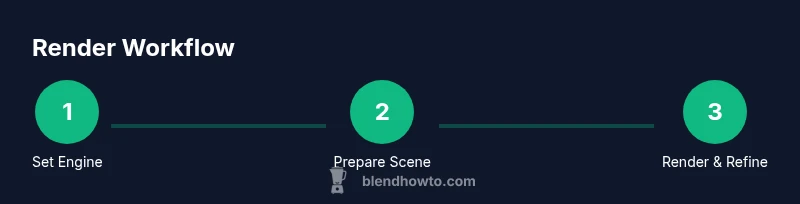
Steps
Estimated time: 60-120 minutes
- 1
Set render engine
Open your Blender project and choose the render engine. Decide between Cycles for realism or Eevee for speed, based on your final output. Save a quick test scene to confirm compatibility with your hardware.
Tip: Tip: Start with Eevee to validate scene setup quickly before committing to Cycles for final render. - 2
Configure output resolution
In the Output Properties, set the desired resolution and aspect ratio. For a portfolio render, use 1920x1080 or higher. Enable or disable color management as appropriate and ensure the output path is correct.
Tip: Tip: Use a separate folder for test renders to avoid overwriting final assets. - 3
Create and assign materials
Build material nodes using Principled BSDF, connect textures for albedo, roughness, and normal maps, and assign materials to each object. Preview in the viewport to catch shading issues before rendering.
Tip: Tip: Use simple textures first to isolate shading problems; add detail maps later. - 4
Set up lighting
Add an HDRI for even illumination and place area lights to shape highlights. Adjust power and color temperature to match your scene’s mood, then preview with a test render.
Tip: Tip: Enable shadows and fine-tune shadow softness to avoid harsh edges. - 5
Position camera and depth
Frame your subject, adjust focal length, and set depth of field if desired. Ensure the composition communicates the intended story or function of the scene.
Tip: Tip: Use camera view overlays to check for unwanted background objects. - 6
Tune sampling and denoising
In Cycles, set a reasonable sampling rate for test renders and toggle denoising to clean noise. In Eevee, adjust sampling, shadows, and post-processing for a clean look.
Tip: Tip: Compare noisier renders with denoise enabled to confirm quality balance. - 7
Render a test pass
Render a lower-resolution version to validate materials, lighting, and composition. Check for noise, color shifts, or aliasing before committing to a final render.
Tip: Tip: Save test renders with a separate filename to prevent confusion. - 8
Review and refine
Inspect the test render, adjust materials, lighting, and camera as needed, and re-render. Iterate until you’re satisfied with fidelity and performance.
Tip: Tip: Use the compositor to make non-destructive adjustments to color and exposure. - 9
Render final image
Once the test looks correct, render at full resolution and save in a lossless format. Archive settings for future projects and document any decisions for reproducibility.
Tip: Tip: Maintain a render log noting engine, samples, and notable settings.
Frequently Asked Questions
What is blender rendering and when should I use Cycles versus Eevee?
Blender rendering involves generating a final image from a 3D scene. Cycles is best for photorealism due to its path-tracing globally illuminated lighting, while Eevee is optimized for speed and real-time feedback. Choose Cycles for final product renders and Eevee for previews, animation work, or when time is limited.
Cycles is ideal for photorealism; Eevee is fast for previews or quick turns. Start with Eevee and switch to Cycles for final renders when realism is required.
How can I reduce render times without sacrificing quality?
Balance sampling, denoising, and resolution. Use adaptive sampling in Cycles, enable denoising to clean noise, and render at a test resolution before final. Efficient lighting and textures also cut down noise and render time.
Increase efficiency by using adaptive sampling and denoising, and optimize lighting and textures to reduce noise.
Can I render animations with Blender without long wait times?
Yes, by using Eevee for previews and Cycles for final frames of critical sequences, and by leveraging frame-accurate denoising and motion blur settings. Plan a render cache workflow to reuse shared passes.
Use Eevee for previews and Cycles for the final frames of key sequences; utilize denoising and motion blur where appropriate.
What file formats should I output for final renders?
For stills, PNG and EXR offer quality and post-processing flexibility. For animations, use image sequences like PNG or EXR, then assemble into a video in your editor. Preserve color fidelity with appropriate color space (e.g., sRGB or Filmic if supported).
Use PNG or EXR for final stills and image sequences for animations; align color space with your pipeline.
How do color management and filmic tonemapping affect results?
Color management controls how colors map from the render to the display. Filmic tonemapping preserves detail in highlights and shadows, preventing washed-out or overly contrasted results. Adjust exposure and gamma with this in mind.
Filmic tonemapping helps keep detail in bright and dark areas; tweak exposure to suit your scene.
Watch Video
What to Remember
- Choose render engine based on final output and hardware.
- Build materials with Principled BSDF and texture maps for realism.
- Balance lighting with HDRI and practical lights for mood.
- Render test passes to iterate quickly and avoid waste.
- Use non-destructive compositing and passes for flexible edits.