How Blender Renders: A Practical Guide for 2026
Master how blender renders with Cycles and Eevee, optimize materials, lighting, and sampling, and follow a clear step-by-step workflow for realism and speed.

Learn how Blender renders by comparing Cycles and Eevee, and exploring how materials, lighting, sampling, and camera settings shape output. This quick guide outlines practical workflows, optimization tips for realism and speed, and troubleshooting steps to help you achieve consistent results across scenes. It also signals where to look first when diagnosing render differences.
Understanding Blender's Render Engines
When you dive into how blender renders, you quickly learn that Blender offers two primary engines: Cycles, which simulates light paths for realism, and Eevee, a real-time renderer optimized for speed. According to BlendHowTo, understanding these engines is the foundation for predictable results across scenes. The BlendHowTo team found that starting with Cycles helps you establish physically plausible lighting and materials, then Eevee can be used for rapid previews before final outputs. In this section, we’ll compare the two engines at a high level and outline how to choose between them as you build scenes. This is how blender renders: light transport, shadows, and material shading combine to produce final images.
Key differences include how each engine handles light paths, shadows, and materials. Cycles uses path tracing to simulate global illumination, while Eevee uses screen-space techniques and baked approximations for speed. Realistic results require attention to sampling, noise control, and color management. If your scene uses complex materials or transparent/translucent objects, Cycles will typically produce more physically accurate results. For fast iterations, Eevee shines when you balance light setup with denoising and post-processing. Quick tests with Eevee can inform composition and camera, while final renders go through Cycles for realism. How blender renders in practice is about choosing the right engine for the job and matching settings to your goal.
Blending cycles and eevee workflows is common; you can render a draft scene in Eevee, then switch to Cycles for the final pass and compare results. The BlendHowTo team emphasizes consistency across shots—use the same lighting plan, same materials, and the same color management. These basics set the stage for the rest of this guide.
Core Concepts: Materials, Lighting, and Camera
Creating convincing renders starts with three linked concepts: materials, lighting, and camera setup. In Blender, the standard material model is the Principled BSDF, a versatile shader that covers a wide range of real-world surfaces. When you build a scene, plan your material workflow around roughness, metallic, specular, and clearcoat values to achieve plausible reflections and microdetails. Lighting psychology matters: HDRI environments deliver soft, natural light, while area lights allow precise control over shadows and mood. The camera controls—focal length, sensor size, and depth of field—shape composition and depth cues. A consistent color management chain (Filmic, standard sRGB) ensures that what you see in the viewport translates to the final render. In this section, we’ll map practical steps to connect these dots: set up a reusable material library, light the scene with a chosen environment, and position a camera that reveals form and texture. BlendHowTo’s experience shows that small tweaks to roughness or HDRI strength can dramatically alter perceived realism, so test changes with quick renders. Remember: how you describe a scene in texture, light, and viewpoint determines how blender renders the final image, regardless of engine choice.
Practical tip: build a small material kit with swatches for wood, metal, plastic, and glass so you can reference them across shots.
Rendering Workflows: Cycles vs Eevee
In practice, choosing between Cycles and Eevee depends on your goal and timeline. Cycles uses path tracing to simulate light transport, producing more accurate shadows, caustics, and global illumination, which translates to higher render realism but longer render times. Eevee, by contrast, relies on screen-space effects and baked approximations to deliver real-time feedback suitable for iterative design. BlendHowTo analysis shows that many studios use Eevee for early-stage previews and concept reviews, then switch to Cycles for final production renders. When preparing a scene, consider matching exposure, color management, and post-processing steps across engines to enable meaningful comparisons. Common blind spots include underestimating sampling needs in Cycles or overusing denoising in Eevee, which can blur texture. This section also covers practical comparisons: how reflections, refractions, transparency, and volumetrics render differently, and how to set up test scenes to reveal engine behavior. By understanding these distinctions, you’ll be able to plan a workflow that leverages the strengths of both engines without wasting time. BlendHowTo notes that consistent scene setup—same lights, same materials, same camera—lets you quantify engine differences more clearly, making it easier to choose the right approach for each shot.
Optimizing Render Times: Sampling, Denoising, and Resolution
Render time is often the deciding factor in a project timeline, but you don’t have to sacrifice quality to stay on schedule. Start by setting sensible sampling targets for your engine: Eevee benefits from lower samples during previews, while Cycles demands higher samples for smooth lighting and clean shadows. Denoising helps remove residual grain, but it’s a double-edged sword: overdoing it can erase fine details. The secret is to separate the tasks: test with low samples to evaluate lighting and composition, then raise samples for the final pass and apply denoising as a post-process step. Resolution matters too: render at a higher resolution when you’re close to the final frame, but use viewport renders or region-based sampling to speed iterations. Color management influences perceived noise as well; enabling Filmic can soften high-contrast lighting and maintain detail in bright areas. The BlendHowTo team recommends using a two-pass workflow: quick, noisy passes to validate lighting, then a clean final render with tuned sampling, denoising, and post-processing. You’ll learn how to balance speed and realism by setting benchmarks, comparing results, and gradually dialing in settings.
Important: Always render a test frame to compare noise levels and color response before committing to a full sequence.
Practical Setup: A Two-Stage Workflow
A robust Blender render workflow often uses two stages: a draft stage for exploration and a final stage for production. Stage one focuses on composition, basic lighting, and material blocks, with quick, low-resolution previews to iterate ideas. Stage two switches to your chosen engine (Cycles or Eevee) and enters a refined phase: increase samples, apply denoising where appropriate, and ensure color management stays consistent. In Stage one, keep assets simple: two or three primary materials, ambient lighting, and a basic camera angle that communicates form. In Stage two, swap in higher-fidelity textures, simulate realistic reflections, and adjust light temperature and intensity to match the intended mood. Throughout, compare with original references and maintain a clear versioning strategy so you can revert changes easily. BlendHowTo’s approach emphasizes repeatable steps and documented presets that you reuse across scenes, minimizing setup time and maximizing consistency across renders.
Checklist: render engine, materials, lighting, sampling, denoising, color management, output format, file naming. By following this two-stage workflow, you’ll avoid wasting cycles on early optimizations and stay aligned with your project’s quality targets.
Troubleshooting Common Issues
No guide is complete without a troubleshooting section, and Blender renders can throw a few common curves. Noisy renders are usually a signal to increase samples, adjust lighting, or apply denoising more strategically. Fireflies — bright, isolated pixels — typically disappear with higher sampling or denoising, but you may also reduce them by tweaking light positions and color temperature. If colors look off after export, verify your color management chain; many issues stem from mismatched color spaces between Blender and your compositor or image viewer. Reflections and shadows can look inconsistent if the scene uses inconsistent HDRI lighting or if you mix true reflections with screen-space lighting tricks. Another frequent pitfall is failing to bake textures or precompute heavy lighting in Eevee, which can create shading artifacts in motion. Finally, when performance tanks on a large scene, simplify geometry, enable culling, and consider render-layer-based compositing to isolate expensive elements. These tips help you rapidly diagnose and fix issues that derail production timelines. BlendHowTo advocates a systematic, test-first approach to avoid chasing problems across multiple renders.
Real-World Example: From Scene to Final Render
Imagine a simple product shot of a blender in a kitchen scene. You start by setting up a neutral HDRI for soft ambient lighting, apply a metal-to-plastic mix for the blender body using Principled BSDF, and position a camera with a 50mm focal length to emphasize form. You test with Eevee to confirm lighting relationships and shadows, then switch to Cycles for the final pass, increasing samples to reduce noise and applying a light denoise pass in post. After rendering, you compare the final result with the draft to ensure consistency in mood, color, and sharpness. With a clear workflow and a reliable reference, you can reproduce similar results across different product shots. The BlendHowTo team recommends documenting your preferred engine, settings, and material library so you can reuse them on future projects. This real-world example demonstrates how to translate theory into practical steps that yield reliable, repeatable renders.
Tools & Materials
- Blender installed (version 3.x or newer)(Download from blender.org and keep it up-to-date)
- Render engine toggle (Cycles or Eevee)(Set in Render Properties)
- Lighting setup (HDRI or area lights)(HDRI recommended for realism)
- Materials/Textures (Principled BSDF)(Use PBR workflows; keep texture maps organized)
- Camera setup (focal length, resolution)(Standard HD or 4K; test with DOF if needed)
- Denoising and sampling presets(Use denoisers to clean noise post-filtering)
- Output settings (format, path)(PNG or EXR; set color management)
- Reference images and test assets(Keep handy for material checks)
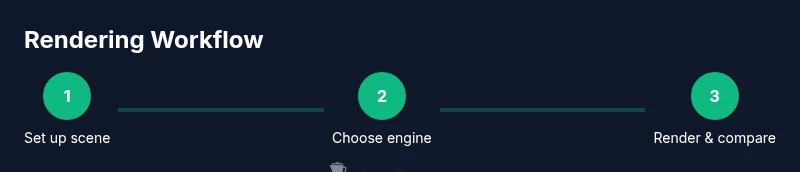
Steps
Estimated time: 60-90 minutes
- 1
Open project
Open your Blender file and confirm the scene's scale, camera, and resolution. If starting from scratch, create a simple scene to test render workflows. Reference your presets from BlendHowTo for consistency.
Tip: Check Units and Output Resolution before rendering - 2
Select render engine
Choose Cycles for realism or Eevee for speed. Set the sampling strategy appropriate to the engine and scene complexity. Compare drafts side-by-side to understand engine behavior.
Tip: For quick previews, start with Eevee, then switch to Cycles for final pass - 3
Configure materials and lighting
Apply a Principled BSDF material and set up lighting with an HDRI or multiple area lights to simulate real-world illumination. Ensure the color temperature matches the mood you’re aiming for.
Tip: Use HDRI to provide soft, natural shadows - 4
Tune sampling and denoising
Adjust render samples and noise thresholds. Enable denoising to reduce grain, especially in Eevee renders. Test various settings to find a balance between speed and clarity.
Tip: Balance samples and denoising to avoid over-smoothing - 5
Run test renders
Render small crops or lower resolution previews to evaluate lighting, materials, and shadows before committing to full renders. Use region rendering to isolate problem areas.
Tip: Render at 50-60% resolution for fast iterations - 6
Finalize and export
Set final resolution, color management, and file format. Compare final output to the draft and adjust if necessary. Save a high-bit-depth version for post-processing when needed.
Tip: Save a 16-bit EXR for post-processing flexibility
Frequently Asked Questions
What is the difference between Cycles and Eevee?
Cycles uses path tracing for realism, while Eevee is a real-time renderer. Cycles often yields more accurate lighting, but Eevee can be excellent for fast previews and iterative design.
Cycles is the physically accurate path tracer; Eevee is the fast real-time engine. Use Cycles for final renders and Eevee for quick previews.
How can I reduce render times without sacrificing quality?
Start with Eevee for drafts, enable denoising, lower resolution during experiments, and optimize materials and lighting. Switch to Cycles for final renders if realism is essential.
Use Eevee for previews, denoise, and optimize lighting to save time; switch to Cycles for final outputs when needed.
What is denoising, and when should I apply it?
Denoising reduces perceptible noise after sampling. Apply after achieving acceptable noise levels, and avoid over-denoising that blurs details.
Denoising helps you clean up grain after rendering, but don’t overdo it or you’ll lose detail.
Why do colors look different after export?
Color space and filmic tone-mapping affect appearance. Ensure consistent color management settings (Filmic, sRGB) and export in a suitable format.
Make sure your color management is consistent from Blender to the final file.
Which render settings matter most for realism?
Light quality, material roughness, and sampling strategy drive realism. Fine-tuning shadows and reflections can have a big impact.
Lighting, materials, and sampling are the core pillars of realism.
Watch Video
What to Remember
- Choose the right engine for the goal.
- Balance sampling and denoising for quality and speed.
- Maintain consistent color management across renders.
- Test frequently with drafts before final output.