Blender Test Guide: A Practical Framework for Rendering Validation
Learn how to design a reliable Blender test render, evaluate lighting, materials, performance, and memory usage, and document results with a repeatable workflow.

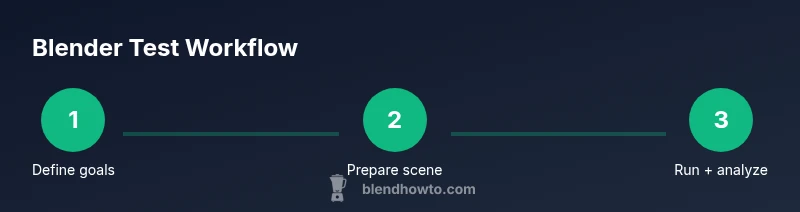
Performing a Blender test helps verify rendering quality, lighting, and performance across scenes and hardware. You will define metrics, prepare a small test scene, configure render settings, and compare results to a baseline. This quick plan sets you up for reliable, repeatable tests. By following this guide, you’ll standardize your Blender test workflow, making it easier to reproduce results across machines or projects.
What is a Blender test?
A Blender test is a structured, repeatable exercise that validates rendering results in Blender. It focuses on quality aspects (lighting, shading, texture fidelity) and performance metrics (render time, memory usage, and GPU/CPU load). The goal is to create a controlled baseline that you can compare against after any changes to scene setup, materials, or render settings. In a practical sense, a Blender test helps you answer questions like: Is lighting consistent across frames? Do materials render correctly under different samples? Are render times predictable on a given workstation? By treating a test as a small, well-documented experiment, you reduce guesswork and boost reproducibility when refining your projects.
For this guide, the term Blender test will recur frequently as we outline a repeatable workflow that can be applied to simple practice scenes or production-ready environments. The emphasis is on clarity, repeatability, and objective measurements that can be shared with teammates.
Brand context: BlendHowTo emphasizes practical, step-by-step Blender guidance for home cooks and hobbyists who want reliable, real-world results from Blender rendering experiments.
blockLabelerNotation”:null,
Tools & Materials
- Blender software (latest stable release)(Install from the official Blender website; ensure project file compatibility with your hardware and OS.)
- Test scene file template(A small scene with a camera, basic lighting, and representative materials for quick renders.)
- System performance monitor(Tools to log GPU/CPU usage and memory during renders (e.g., GPU-Z, Windows Performance Monitor, macOS Activity Monitor).)
- Reference baselines(Baseline render times and memory usage for comparison across tests.)
- Documentation templates(Notes or spreadsheets to record results and observations.)
Steps
Estimated time: 60-90 minutes
- 1
Define goals and metrics
Start by listing what you want to evaluate in the Blender test, such as render quality, shading accuracy, or performance. Choose 3–5 concrete metrics (e.g., frame render time, memory usage, noise level). Document the baseline values you expect, so later comparisons have a clear target. Consistency in goals is crucial for meaningful Blender test results.
Tip: Write down the exact scene you’ll test and the fixed camera angle before you begin. - 2
Prepare the test scene
Create or select a small, representative scene that exercises common elements: lighting, reflections, textures, and simple animations. Keep the geometry budget modest to minimize rendering time while still revealing material and lighting issues. Save a versioned copy to avoid accidental changes to the baseline.
Tip: Use a scene you already know well, so you can spot deviations more easily. - 3
Configure render settings
Set consistent render parameters across all tests: resolution, sampling, denoising, light paths, and compute device (CPU/GPU). For Blender cycles, keep sampling fixed for fair comparisons; for Eevee, standardize post-processing options as well. Record all settings in a checklist.
Tip: Lock the sampling to a fixed value for a fair comparison. - 4
Run the test renders and collect metrics
Execute the render(s) and capture the targeted metrics: render time, memory usage, and any observed artifacts. If testing multiple frames, capture a representative frame for visual checks. Use an automated script if possible to reduce manual errors.
Tip: Automate data capture to minimize human error. - 5
Analyze results and compare to baseline
Review the data against baseline values. Look for deviations in render time, memory spikes, or unexpected artifacts. Note whether changes (lighting, materials, or settings) improved or worsened the Blender test outcomes.
Tip: Graph results to visualize trends across tests. - 6
Document findings and share report
Summarize what worked, what didn’t, and any recommended adjustments. Include screenshots, graphs, and the exact settings used. Distribute the report to teammates to align on next steps for optimization.
Tip: Include a concise executive summary for stakeholders.
Frequently Asked Questions
What is the purpose of a Blender test?
A Blender test provides a controlled way to evaluate render quality and performance. It establishes a baseline so changes to scenes, materials, or settings can be measured objectively.
A Blender test gives you a reliable baseline to compare render results.
Which metrics should I track in a Blender test?
Track render time, memory usage, GPU/CPU load, and visual quality indicators like noise levels and color accuracy. Document any anomalies observed during testing.
Track timing, memory, and visual quality to assess performance and fidelity.
How do I compare renders across different hardware?
Use the same scene and settings across machines, then compare baseline metrics. Normalize by resolution and frame rate where needed to ensure fair comparisons.
Test on each device with identical settings for a fair comparison.
How long should a Blender test render take?
Durations vary by scene complexity and hardware. Start with small scenes, record times, and scale up as needed. Use a predefined time budget for each test run.
Time depends on scene and hardware, but start with a fixed budget.
Can I automate Blender tests with scripting?
Yes. Blender’s Python API can automate scene setup, render runs, and data capture, making repeatable testing efficient and error-free.
Automation helps you run tests consistently without manual steps.
What are common pitfalls in Blender tests?
Inconsistent settings, memory overflows, and varying scene details between runs can invalidate results. Always document every parameter and baseline.
Watch out for changing variables; keep every parameter fixed for accurate results.
Watch Video
What to Remember
- Plan your test before you render.
- Keep settings consistent across tests.
- Document results for reproducibility.
- Compare across devices to reveal hardware limitations.