Blender Project: From Concept to Final Render
A practical, step-by-step Blender project guide—from ideation to final render. Learn file organization, modeling workflows, materials, lighting, and iterative review to produce polished results.

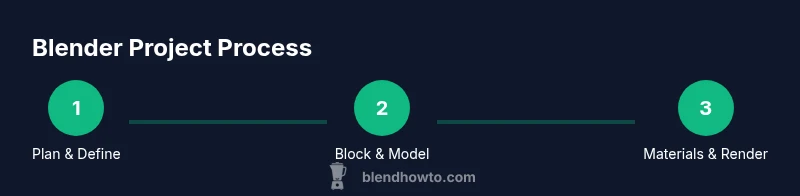
This guide shows you how to plan, build, and render a complete Blender project—from concept to final render. You’ll learn file organization, modeling workflows, material and lighting setup, and how to review your work with iterative tweaks. Follow these steps to manage scope, speed up your process, and achieve professional results.
Why the Blender project approach matters
A Blender project is more than a single model or render; it’s a structured workflow that covers ideation, modeling, shading, lighting, and rendering. For artists and hobbyists, adopting a project mindset reduces rework and clarifies what you’re trying to achieve. According to BlendHowTo, a well-planned Blender project aligns goals with your resource limits, helping you deliver consistent results on time. By treating each stage of the pipeline as a modular task, you gain the flexibility to iterate and improve without losing track of the big picture. In this section, we’ll outline why a project-oriented approach matters and how it translates into tangible benefits, from faster feedback cycles to cleaner asset libraries for future work. The term blender project here encompasses both 3D modeling in Blender and the broader production workflow that leads to final renders, animations, or interactive scenes.
Defining scope and goals
Setting a clear scope before you touch a vertex or a texture is essential. A well-scoped Blender project has a specific deliverable, a realistic deadline, and a defined level of detail. Start by writing a short brief: what is the scene, what mood should it convey, what are the technical constraints (render engine, poly count limits, texture resolution), and what constitutes a successful render. BlendHowTo’s analysis highlights that projects with explicit goals reduce scope creep and keep decisions aligned with the end result. Then establish checkpoints (concept art, blocking, mid-detail pass, final polish) so you can measure progress and reallocate time where it matters most. Finally, lock in the output format (image, animation, or game-ready asset) to guide asset creation and optimization.
Organizing files and assets for a Blender project
Organization is the silent driver of efficiency in Blender. Create a consistent folder structure with clear naming conventions for scenes, meshes, textures, materials, rigs, and renders. Use a central project folder with subsections like /01_Concepts, /02_Blockout, /03_Materials, /04_Lighting, /05_Renders, and /06_Scripts. This setup helps you find assets quickly, collaborate with others, and track versions. Save incremental backups frequently and consider a versioning scheme that includes the date and a brief change description. A tidy project reduces time spent hunting assets and minimizes missed references when you revisit a file weeks later.
Modeling workflow: from base shape to detail
Begin with blocking to establish form and proportions. Use simple shapes to set the silhouette and critical geometry, then progressively refine topology to support your intended detail. For organic shapes, start with a base mesh and apply sculpting for broad features, followed by retopology to create clean, animation-friendly topology. For hard-surface work, focus on precise edge flows and boolean operations carefully, cleaning up geometry afterward. The model should remain editable, with subtools and modifiers organized so you can adjust proportions without reworking the entire mesh. Keep a parallel reference library (concept art, real-world photos) to ensure accuracy as you add detail.
Materials, lighting, and rendering pipeline
Materials and lighting are what sell the scene. Start by creating core materials with clean UV maps and reasonable texture maps (color, roughness, metallic). Use Blender’s built-in nodes to control roughness, specular highlights, and subsurface scattering where appropriate. For lighting, build a three-point lighting setup as a baseline, then adjust color temperature and shadow softness to fit the mood. Choose the render engine early (Cycles for photorealism or Eevee for speed) and develop a lightweight render pipeline: test renders at lower resolutions, bake ambient occlusion maps, and set up a camera with appropriate focal length and depth of field. Finally, run a final render, compare against your brief, and iterate on materials and lighting as needed.
Iteration and review: feedback loops
Iterative review is where a Blender project shines. After each major pass (blocking, mid-detail, final polish), export a clean render and solicit feedback from peers or mentors. Use a checklist: silhouette clarity, texture fidelity, lighting balance, and render stability. Maintain a log of changes to trace decisions later. This practice helps you avoid drifting from the brief and makes it easier to reproduce outcomes. BlendHowTo recommends scheduling regular reviews and keeping notes on what to adjust in the next pass.
Common pitfalls and how to avoid them
Avoid over-detailing early; it wastes time and can obscure readability of the model. Don’t skip UV unwrapping or texture testing before lighting—it’s harder to fix issues after shading. Keep backups, use non-destructive workflows (modifiers, non-destructive textures), and maintain clean naming throughout. Finally, render test frames frequently to catch issues early and prevent last-minute surprises. With discipline, you’ll finish faster and with fewer regressions.
Tools & Materials
- Computer with Blender installed(Latest stable release; ensure at least 8GB RAM; GPU acceleration recommended for rendering.)
- Mouse and keyboard(Ergonomic setup for long sessions; consider a graphics tablet for sculpting.)
- External storage or cloud backup(Backup versions of your Blender project files regularly.)
- Reference images and concept art(Organized in /01_Concepts; helps maintain design intent.)
- Screen captures or notes for feedback(Document feedback after reviews to drive iterative changes.)
Steps
Estimated time: Total: 4-6 hours
- 1
Define project goals and constraints
Write a brief for the Blender project: deliverable, mood, technical constraints, and success criteria. Align the scope with your available time and skills, so you don’t overcommit. This clarity guides every modeling and rendering decision.
Tip: Create a one-paragraph brief and a one-page mood board before touching any geometry. - 2
Organize assets and project structure
Set up a consistent folder hierarchy and a naming convention. Place all references, textures, and scene files in clearly labeled subfolders. This prevents chaotic searches and ensures teammates can follow your workflow.
Tip: Use a single root folder with subfolders: Concepts, Models, Textures, Renders, and Exports. - 3
Block out the major forms
Create simple proxy shapes to establish silhouette and proportions. Avoid fine details at this stage; focus on scale, pose, and overall ergonomics. This step speeds up later polishing and keeps you aligned with the brief.
Tip: Enable quick-access modal tools for rapid blocking and turn off high-resolution display to speed viewport performance. - 4
Refine topology and add details
Convert blocking into clean, animation-friendly topology. Add necessary edge loops and ensure edge flow supports deformation where needed. Introduce sculpting for large features, then retopologize only where required.
Tip: Use non-destructive modifiers and keep a low-poly base mesh for reference while you sculpt. - 5
Unwrap UVs and set up materials
Unwrap UVs for all major surfaces and assign base materials. Create texture maps (color, roughness, metallic) and test textures under neutral lighting. Ensure textures align with the model geometry and scale consistently.
Tip: Keep UVs tight and pack islands efficiently to maximize texture resolution without wasted space. - 6
Lighting, camera, and render setup
Establish a basic three-point lighting rig and a camera with appropriate focal length. Choose Eevee for fast previews or Cycles for realism, and adjust render settings for denoising and sampling. Run a test render at low resolution to validate composition.
Tip: Use a simple light color temperature to convey mood and avoid noisy shadows in early tests. - 7
Render, review, and iterate
Produce a final render, compare against the brief, and gather feedback. Iterate on materials, lighting, and composition as needed. Save a version that captures the final state and maintains a changelog for future projects.
Tip: Schedule a short review session after each major pass to keep momentum and accountability.
Frequently Asked Questions
What defines a Blender project?
A Blender project is a structured workflow that moves from concept to final output. It includes planning, blocking, modeling, UVs, materials, lighting, rendering, and iteration. This approach helps maintain clarity and consistency throughout development.
A Blender project is a structured workflow from concept to final output, including planning, blocking, modeling, texturing, lighting, and rendering.
How do I set goals for a Blender project?
Start with a brief that defines the deliverable, mood, technical constraints, and a success criterion. Break the work into milestones like blocking, mid-detail, and final polish. This keeps scope in check and guides decision-making.
Begin with a brief that outlines the deliverable, mood, and constraints, then set milestones to guide progress.
Which renders engines should I use for a Blender project?
Choose your render engine based on goals. Cycles offers realism and advanced lighting, while Eevee provides fast previews and iteration. Start with Eevee for speed and switch to Cycles for final renders if needed.
Pick Cycles for realism or Eevee for speed, and test with both as your project evolves.
Is Blender beginner-friendly for this workflow?
Yes. Start with simple projects to learn blocking, UVs, materials, and lighting. Build a reusable workflow by documenting steps and gradually increasing complexity as you gain confidence.
Blender is beginner-friendly if you start simple and build a repeatable workflow.
How do I stay organized during a Blender project?
Maintain a consistent folder structure, model naming, and versioning. Use collections to manage visibility, and keep notes on changes to simplify collaboration and future edits.
Keep a consistent folder structure and clear versioning to stay organized.
How long does a typical Blender project take?
Project duration varies with scope and detail. Plan for several hours for a small scene and longer for complex animations or high-detail renders. Build in time for feedback and revisions.
Time varies; plan for hours for small scenes and more for complex ones, including reviews.
Watch Video
What to Remember
- Plan your project scope before modeling starts
- Organize assets with a consistent folder structure
- Block, then refine topology and details progressively
- Test materials and lighting early with iterative reviews
- Render frequently and maintain a change log