How to Add Texture in Blender
Master texture workflows in Blender by learning image and procedural textures, UV mapping, and shader networks. This guide covers practical setup, maps (normal, roughness), color management, and rendering tips for both Eevee and Cycles.

Texture in Blender involves applying image or procedural textures to materials and then refining UVs and maps for realism. This guide guides you through a practical workflow, including normal and roughness maps, texture tiling, and choosing Eevee vs Cycles. No advanced plugins required; you can start with built-in textures today.
Why texturing in Blender matters for realism
Texture is the bridge between a 3D model and the real world. It provides color, pattern, roughness, shine, and surface detail that geometry alone cannot convey. In Blender, texturing is not just about attaching an image to a model; it’s about building a shader network that interprets texture data in the scene’s lighting. A well-textured model reads materials under different lighting conditions, casting believable shadows and highlights that enhance depth. According to BlendHowTo, a disciplined texture workflow reduces guesswork and speeds up rendering, especially when iterating on look and mood. As you learn how to add texture in blender, you’ll discover how to balance detail with performance, avoiding overly large textures that slow down previews and final renders.
Textures are also crucial for storytelling. A ceramic bowl might have micro-scratches and glaze variations, while a metal prop reflects its environment with accurate roughness and metalness cues. The texture pipeline in Blender blends two major ideas: color information (diffuse/albedo), and data maps (normals, roughness, ambient occlusion). Mastery comes from knowing when to use photo textures versus procedural textures, and how to layer them in a shader so they look cohesive under a range of lighting. This section lays the groundwork for a practical Texturing workflow you can apply to characters, props, and architectural scenes.
For home studios and hobby projects, a practical approach emphasizes using available textures without sacrificing quality. Start with a base diffuse texture to establish color, then integrate normal maps for depth, and add roughness maps to modulate highlight sharpness. Procedural textures can fill gaps or create tiling patterns without extra images, which helps keep projects lightweight while preserving detail where it matters most. In the Blender interface, you’ll wire textures into a Principled BSDF shader, then test different light setups to observe how textures respond to shadows and reflections. This hands-on process builds intuition for how textures influence the final render.
When you texture in Blender, you’re not just decorating a model—you’re defining its material language. Color, surface texture, and light interactions work together, and mastering these interactions is what elevates your renders from good to cinematic. As you continue, you’ll learn to optimize texture files, choose appropriate color spaces, and combine image and procedural textures for maximum control. A thoughtful texture workflow integrates asset organization, efficient UVs, and a streamlined shader graph to keep projects moving smoothly across updates and rendering engines.
notePositioning
Tools & Materials
- Blender (latest stable release)(Install from blender.org; ensure GPU drivers are up to date for real-time previews in Eevee/Cycles.)
- Texture images (albedo/diffuse, normal, roughness)(High-resolution textures help, but optimize with mipmaps for real-time work.)
- UV unwrapping tools (UV Editor)(Essential for accurate texture mapping; practice seam placement and packing.)
- Image editing software (optional)(Photoshop, GIMP, or Affinity can prep textures before import.)
- A sample 3D model to texture(Start with a simple object like a mug or a vase to practice mapping.)
Steps
Estimated time: 60-120 minutes
- 1
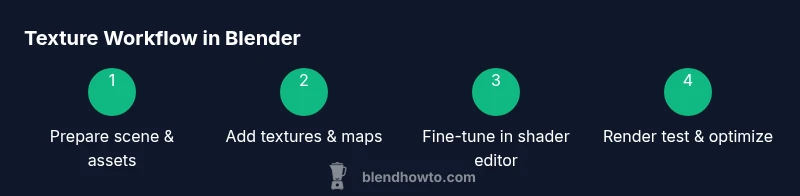
Prepare your scene and assets
Open Blender and import or create your model. Create a new material slot and give it a descriptive name. In the Shader Editor, add a Principled BSDF shader and a Material Output node. This step sets the foundation for texture work. Reference diagrams show how each node connects to the shader graph, ensuring a clean starting point.
Tip: Keep the model’s scale consistent with your texture size to avoid distortion. - 2
Add an image texture as the base color
In the Shader Editor, press Shift+A, choose Texture > Image Texture, and connect it to the Base Color input of the Principled BSDF. Open your diffuse/alore texture in the image texture node. Enable texture coordinates if needed (UV) and align the texture with your model via the UV Editor.
Tip: If the texture looks stretched, adjust the UV map or switch to a more suitable projection. - 3
Introduce normal or bump maps for depth
Add a Normal Map node or Bump node between the image texture and the BSDF. Load your normal texture and connect the Normal output to the BSDF’s Normal input. Adjust the strength to control surface relief without creating unnatural edges.
Tip: Use a low to medium normal strength to start; oversharpened normals can ruin realism. - 4
Layer roughness or metallic maps
Add an Image Texture for Roughness (or Metallic) and connect it to the Roughness (or Metallic) input of the Principled BSDF. If using grayscale textures, ensure correct color space (Non-Color) to preserve values.
Tip: Roughness should be varied across the surface for realism; avoid uniform roughness that looks flat. - 5
Experiment with ambient occlusion and subsurface details
Add an Ambient Occlusion texture or use a baked AO pass to enrich shadows in crevices. Subsurface scattering can be added for skin or wax-like materials as needed. These maps add micro-shadows that enhance depth when the lighting hits the surface.
Tip: AO should be subtle; excessive AO can darken small details and reduce contrast. - 6
Fine-tune UVs and color space
Reopen the UV Editor and adjust layout for efficient texture tiling. Ensure color space is correct for each texture (sRGB for color, Non-Color for maps). Test render under different lighting to verify consistency.
Tip: Lock the UVs to prevent accidental changes during edits.
Frequently Asked Questions
What is the difference between image textures and procedural textures in Blender?
Image textures use bitmap files to provide color and detail, while procedural textures are generated by mathematical algorithms. Images excel at realism and detailed patterns, while procedural textures offer infinite tiling without additional files. Most professional workflows blend both to balance quality and flexibility.
Image textures are bitmap-based, while procedural textures are generated by math for flexible tiling.
Do I need UV unwrap for textures to map correctly?
Yes. UV unwrapping flattens 3D surfaces into 2D coordinates so textures map predictably. Proper seams and a clean UV layout prevent stretching and overlapping when you apply texture maps.
Yes—UV unwrap is essential for correct texture mapping.
Which render engine should I use for texturing?
Both Eevee and Cycles support textures well. Cycles offers more physically-based shading and accurate light interactions, while Eevee provides real-time previews. Your choice depends on the balance between speed and realism for your project.
Cycles gives realism, Eevee previews fast; choose based on your needs.
How can I optimize textures for Eevee?
Use compressed textures and limit the number of high-resolution maps for real-time performance. Bake complex lighting into maps when possible and keep non-color maps in Non-Color space. Test frequently in Eevee to catch realtime rendering issues early.
Optimize by using lower-res textures where possible and bake details.
What are normal maps and when should I use them?
Normal maps simulate small surface details without increasing geometry. Use them on most surface textures to add depth; avoid exaggerating normals, which creates unrealistic sharp edges under lighting.
Normal maps add depth without extra geometry; use them carefully.
Can I texture complex materials without a texture atlas?
Yes, but an atlas helps manage many textures efficiently. Without an atlas, organize textures in logical groups and reuse texture coordinates to maintain consistency across materials.
You can texture without an atlas, just stay organized with your textures.
Watch Video
What to Remember
- Plan your texture set before shading
- Use a mix of image and procedural textures
- Unwrap UVs cleanly for predictable mapping
- Link normal/roughness maps correctly to shader inputs
- Test renders with different lighting to verify texture behavior