How to Render Blender Without Background
Learn how to render Blender scenes with a transparent background. This guide covers alpha, output formats, and post-processing to ensure clean, background-free renders for composites and motion graphics.

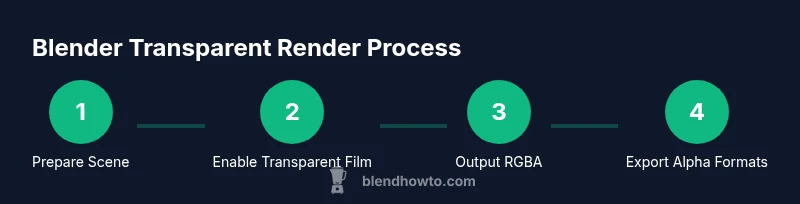
Render Blender without a background by enabling transparency in the Film settings, using RGBA output, and exporting a format that preserves alpha (PNG, TIFF, or EXR). This concise setup works for both Eevee and Cycles, and sets you up for clean composites in post. Follow the full step-by-step guide below for detailed choices and checks.
Why rendering Blender without background matters
How to render Blender without background is a common requirement in modern pipelines, especially for product visuals, character composites, and motion graphics. If you’re asking how to render blender without background, this guide provides a practical, repeatable workflow you can apply to stills and animations. According to BlendHowTo, reliable transparent renders save time in post and reduce back-and-forth with editors. The goal is to produce a clean alpha channel that your compositors can trust, regardless of whether you use Eevee or Cycles. The core idea is simple: trap the subject in an alpha mask during render, preserve the alpha in the file, and verify the alpha integrity in your post software. With careful attention to color management, premultiplied vs straight alpha, and export format, you’ll deliver ready-to-composite frames every time.
Core concepts: alpha channel, transparency, and premultiplied vs straight alpha
Alpha is the component that carries transparency information for each pixel. In Blender, you can render with an alpha channel to indicate which pixels are visible and which are transparent. There are two common approaches to alpha: straight (unassociated) alpha and premultiplied alpha. Premultiplied alpha stores color values already multiplied by the alpha, which affects edge compositing in some post software. For most Blender workflows you’ll want straight alpha during the render and let your post-tooling handle any premultiplication if needed. Understanding these concepts helps you choose the right export and avoid unwanted halos around objects.
Formats that support alpha: PNG, TIFF, EXR
Not all image formats preserve transparency. JPEG, for example, cannot store an alpha channel. If you need a transparent background, stick to formats like PNG, TIFF, or OpenEXR. PNG supports 8-bit alpha commonly, while EXR offers higher dynamic range and 16/32-bit channels for professional-grade work. When rendering sequences, EXR can be easier to composite in high-end pipelines, but PNG is widely supported in most editors and game engines. Always verify that your chosen format indeed preserves alpha by inspecting the file in a viewer that displays the alpha channel.
Quick setup checklist
Before you render, ensure you have a clean scene, consistent lighting, and the right render settings. Your checklist should include: (1) a scene prepared for transparency (no accidental background), (2) the render engine chosen, (3) film set to Transparent, (4) RGBA output enabled, (5) an alpha-capable file format selected, and (6) a test render to confirm the alpha channel looks correct. This preflight reduces surprises in post and speeds up delivery.
Step 1: Prepare your scene for transparency
Start by organizing your scene so nothing unintentionally occludes the background. Hide helper objects you don’t want to render, and ensure your camera frustum captures only what should be visible in the final composite. If you’re rendering product shots, isolate the product on a neutral plane or in front of a transparent background. This preparation helps avoid stray artifacts around edges when you later composite the render over any background. Keeping your scene clean makes the alpha channel more predictable and reduces the need for heavy post-correction.
Step 2: Enable transparent background in Blender
Navigate to the Render Properties tab and switch to the render engine you’ll use (Cycles or Eevee). In the Film panel, enable Transparent. This turns the background into alpha-ready transparency. In Eevee, you may also need to enable Alpha for certain materials and ensure your world shader doesn’t fill the background with color. In Cycles, transparent background is typically straightforward with film transparency. After enabling this, do a quick test render with a simple object to confirm that the background becomes fully transparent in the output.
Step 3: Output settings: RGBA and file format
Open the Output Properties panel and set the file format to a kind that supports alpha, such as PNG, TIFF, or EXR. Make sure the color is set to RGBA and the color depth matches your pipeline needs (8-bit for PNG, higher bit-depth for EXR). Check that the alpha channel is indeed included in the render result. If you’re rendering an animation, ensure the sequence output also uses a format that preserves alpha on every frame. These settings are crucial to delivering usable transparency in your final composite.
Step 4: Rendering paths: Eevee vs Cycles and performance tips
Eevee can deliver fast transparent renders if you optimize settings: enable Screen Space Reflections carefully, use the Transparent option, and keep sample counts reasonable to avoid noise that complicates the alpha. Cycles yields physically accurate results and robust alpha but may require more samples and longer render times. For both engines, ensure there are no background elements leaking into the frame and consider enabling motion blur only if you’re prepared to manage its impact on edges. If you’re exporting for compositing, you may prefer Cycles for higher fidelity alpha, but Eevee can be a practical choice for drafts or previews.
Step 5: Post-processing to clean edges
After rendering, you might still encounter tiny halo fringes along the object edges due to antialiasing or premultiplied alpha. A common approach is to use a matte or a premultiplied alpha workflow in your compositor. In Blender’s own compositor, you can isolate the alpha, apply a edge-detection-based matte, and feather edges slightly to reduce halos. In many pipelines, performing a quick pre-multiply or un-multiply correction in post yields crisper edges. Always verify edge quality with a layout that includes challenging shapes to ensure consistency across frames.
Step 6: Export options by project
Choose PNG for quick-turnaround renders, TIFF for archival quality, or EXR for high dynamic range and compositing pipelines. If you’re delivering to a video editor, PNG sequences are typically safer because they’re widely supported. If your project requires color grading or extreme post-processing, EXR may be the better choice due to its higher bit depth. Whichever format you pick, ensure it preserves alpha, matches your pipeline, and is consistently encoded across all frames in a sequence.
Troubleshooting common issues
Even with careful setup, you may encounter issues like black halos, incomplete transparency, or premultiplied alpha confusion. Common fixes include rechecking that Film is set to Transparent, verifying that the output is RGBA, and testing with a simple scene to ensure the alpha displays correctly. If you still see a colored background, inspect your compositor chain for any steps that reintroduce color behind the alpha. For animations, verify that the alpha remains consistent across frames, and avoid any color management steps that unintentionally replace transparency with solid color.
Real-world workflows: product renders and character animation
In product rendering, you typically render a clean object on a transparent background to drop into catalog pages or ads. For animation, you render each frame with alpha, then composite over a moving background in your video edit suite. In both cases, you’ll probably use PNG or EXR sequences, enable film transparency, and verify that the alpha channel is consistent under lighting and shading. The key is a stable setup from scene preparation to final export, so that the post-production pipeline can build composites without back-and-forth fixes.
Final checks before delivery
Before sharing your renders, perform a final check: view with alpha enabled in a few different tools, inspect edge quality on complex shapes, confirm the alpha channel is present on every frame, and ensure your chosen format is compatible with downstream software. A small preflight pass can prevent large revision cycles. With these checks in place, you’ll deliver robust, background-free renders that integrate smoothly into any project.
Tools & Materials
- Blender software (latest stable release)(Version 3.0+ recommended; ensure CUDA/OptiX or CPU is appropriate for your hardware)
- Alpha-supporting export formats(PNG, TIFF, or EXR; JPEG does not support alpha)
- Ready-to-render scene(Objects organized, background potential leak removed, materials set for transparency)
- Test render queue(Small object for quick alpha checks before committing to full renders)
- Post-processing software(NLE or compositor to verify and refine alpha edges (e.g., Blender Compositor, After Effects, Nuke))
Steps
Estimated time: 30-60 minutes
- 1
Open Blender project and verify scene
Open your Blender file, save a duplicate for testing, and inspect the scene to confirm there are no unintended background objects. Ensure the camera and lighting setup reflects what will be visible in the final render.
Tip: Keep a separate layer for background objects that you might hide during the test render. - 2
Enable transparent background
In Render Properties, switch to your render engine and enable Film: Transparent. This step is essential for removing any solid background from the final image.
Tip: If you don’t see transparency, double-check the engine: Eevee and Cycles handle this slightly differently. - 3
Choose RGBA output and alpha-capable format
In Output Properties, set the file format to PNG/TIFF/EXR and ensure Color is RGBA. Confirm the alpha channel is included by previewing the alpha in a viewer.
Tip: For animation, consider EXR for higher bit depth; for quick stills, PNG is typically sufficient. - 4
Test render with a simple object
Do a small render to verify transparency edges and check for stray background artifacts. This quick test saves you from large re-runs later.
Tip: Look for any tinted halos around edges; these indicate edge handling that may need post-processing. - 5
Fine-tune edge quality in post
If halos persist, adjust edge smoothing, anti-aliasing settings, or compositor matte techniques to achieve clean edges.
Tip: Remember to test with both dark and light backgrounds to ensure edge consistency. - 6
Render final sequence or image
Render your final frames or image with the chosen format and alpha preserved. Verify a few frames in your editor for alpha integrity.
Tip: When rendering sequences, keep a stable frame range and verify that all frames export with alpha.
Frequently Asked Questions
Can I render transparency in Eevee?
Yes. Enable Film: Transparent in the Render Properties and verify that your output format preserves alpha. Be mindful of Eevee-specific settings that can introduce background artifacts if misconfigured.
Yes, you can render transparency in Eevee by enabling Film: Transparent and using an alpha-preserving format. Check edge quality in the viewport to confirm.
What formats preserve alpha in Blender renders?
PNG, TIFF, and EXR preserve alpha. JPEG does not. Choose based on your final pipeline needs: PNG for quick compositing, EXR for high dynamic range work.
PNG, TIFF, or EXR preserve alpha; JPEG does not.
Why do I sometimes see a black background after render?
Often this happens when Film: Transparent is not enabled, or the image viewer ignores the alpha channel. Double-check the render settings and test with a known alpha-friendly viewer.
If you see black, check that transparency is enabled and that the viewer shows the alpha channel.
Is premultiplied alpha required for compositing?
Not always. Some compositors prefer straight alpha and apply premultiplication in post. Check your pipeline’s requirements and test with both approaches if necessary.
Not always; test both straight and premultiplied alpha to see what your compositor expects.
How do I render an animation with transparency?
Render an alpha-enabled sequence (RGBA) for every frame, ensure the sequence uses a format that preserves alpha, and verify consistency across frames in your compositor.
Render a frame sequence with RGBA, and keep alpha intact across all frames.
What should I check in post-processing to keep edges clean?
Inspect edge halos, validate alpha, and consider matte refinement or feathering in the compositor to avoid jagged edges.
Check edges for halos and refine with matte or feathering in post.
Watch Video
What to Remember
- Enable film transparency for clean alpha.
- Choose RGBA formats that preserve alpha.
- Test renders early to prevent edge artifacts.