Blender VFX Essentials: A Comprehensive How-To Guide
Learn practical Blender VFX workflows for home studios, from tracking and keying to compositing and color management. This guide blends fundamentals with actionable steps for fast, high‑quality results in Blender.

Master Blender VFX by following a practical, beginner-friendly workflow: plan, track, key, composite, and grade your shot. This guide provides step‑by‑step actions, essential tools, and safety tips to help home studios achieve credible visual effects using Blender’s built-in compositor, tracking, and rendering tools.
What Blender VFX is and Why It Matters
Blender VFX refers to visual effects created inside Blender using its built‑in compositor, 3D tools, tracking, and color management. For hobbyists and home studios, Blender provides a complete, free pipeline from capture to final composite. In this guide, we explore practical workflows that start with a simple shot and scale to more complex composites. According to BlendHowTo, Blender VFX empowers home studios to prototype effects without expensive software licenses. Whether you’re removing a boom mic in a shot or adding a sci‑fi glow to a hero asset, the Blender VFX workflow emphasizes node‑based composition, non‑destructive editing, and consistent color management. The BlendHowTo team found that the most accessible entry points are chroma keying, simple tracking, and color correction, which can be combined with motion blur and lens distortion to sell realism. We’ll cover core concepts, a practical sample, and a path to more advanced techniques as you grow comfortable with the toolset.
Core Concepts You’ll Use
Blender’s VFX capability relies on several core concepts: a node‑based compositor, a robust tracking system, and a flexible rendering pipeline. The compositor is your digital lab for combining elements, performing matte operations, color corrections, and glow effects. Camera tracking lets Blender reconstruct your real‑world camera motion so virtual elements align with live footage. Color management ensures consistent brightness and color across all passes. Importantly, Blender’s open architecture supports addons that expand tracking, rotoscoping, and denoising—helpful as you tackle heavier shots. Throughout, you’ll rely on a simple, repeatable pipeline: plan, track, key, composite, grade, and render. For beginners, focus on one shot at a time, validate at each step, and keep a non‑destructive history of changes in the node tree. BlendHowTo’s guidance emphasizes building muscle with fundamental operations first, then layering more advanced effects as your confidence grows.
The Blender VFX Pipeline: From Capture to Compositing
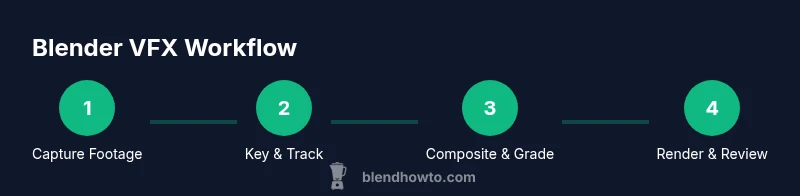
The typical Blender VFX pipeline begins with careful planning and footage preparation. Import your foreground shot into the compositor, then bring in a suitable background plate. Use camera tracking to reconstruct movement so the foreground elements lock to the scene. Keying then isolates the subject from a greenscreen or bluescreen, while motion tracking keeps your virtual camera aligned with real world motion. Matte extraction and rotoscoping help refine edges and masks. In the color stage, balance exposure, color space, and grade for consistency across lights and lenses. Finally, composite all layers, add subtle depth cues, and render tests before final output. This process is iterative—expect to revisit tracking, masking, or color passes as you refine realism. For many beginners, success hinges on mastering a few core nodes first and gradually layering complexity as confidence grows. BlendHowTo observes that a disciplined pipeline beats ad‑hoc edits any day for reproducible results.
Working with Motion Tracking and Keying Basics
Motion tracking is the backbone of believable VFX in Blender. You’ll stabilize or integrate CG elements into live footage by solving the camera motion and matching scene geometry. Keying is your first major gate, especially if you start with greenscreen material. In Blender, you’ll typically shoot the foreground and extract the subject with a Keying node, then bleed out spill and clean up the matte with spill suppressors and dilate/erode operations. A clean key requires consistency in lighting, camera distance, and background shading. Rotoscoping is often used to touch up tricky edges and add manual refinements where automation falls short. The result is a composite that feels anchored in the scene rather than floating separately. Always validate keys against motion, shadows, and depth cues to prevent “cardboard cutout” appearances. BlendHowTo emphasizes practical tests on short segments to confirm stability before committing to longer renders.
Practical Tips for Lighting and Color Management
Lighting consistency is critical for convincing composites. Aim for a neutral, even key light on the subject and a complementary background illumination to avoid color fringing. In Blender, configure color management to a standard workflow (Filmic, ACES, or similar) to keep exposure and tone mapping predictable across passes. When matching CG to live footage, use color correction nodes to align white balance, contrast, and saturation. Small shifts in gamma can dramatically alter perceived realism. If you’re working with different camera formats, pay attention to noise profiles and dynamic range, then denoise subtly without washing out detail. Always render test frames in your target resolution to verify that the grade remains coherent under compression and display constraints.
Building a Reusable VFX Pipeline with Addons and Plugins
A growing Blender VFX setup benefits from addons that streamline tracking, rotoscoping, and color grading workflows. Addons can simplify node graphs, automate repetitive tasks, and provide advanced keying options. When choosing addons, prefer those that integrate with Blender’s Node Editor and support non‑destructive editing. Keep a note of which addon versions pair best with your Blender build and operating system. Start with essential enhancements—tracking assist, improved keying controls, and denoise optimizations—and expand as needed. Remember, addons are tools to amplify your workflow, not crutches; you should still understand the underlying nodes and how the pipeline flows from capture to final render. BlendHowTo’s approach favors gradually adopting addons after you’re comfortable with the core compositor and tracking tools.
Understanding Lighting, Cameras, and Color Management for VFX Success
In VFX, camera choices influence perspective, field of view, and motion characteristics. Sync your virtual camera to real‑world footage so CG elements stay glued in space. Lighting should be planned to keep shadows and highlights consistent with the live scene, which helps the viewer interpret depth correctly. Blender’s color management options—such as Filmic or ACES—help maintain consistent brightness levels and color response across devices. When you render, test with different exposure settings and monitor calibrations to ensure color fidelity. A robust VFX workflow uses a consistent color pipeline, reliable keying, and accurate depth cues to sell realism across final outputs.
Practical Example: Green Screen Keying in Blender
This practical section walks you through a basic greenscreen key in Blender, emphasizing a clean key, stable tracking, and a natural composite. You’ll key a foreground talent, blend them over a background plate, and apply color grading to harmonize the scene. The goal is a believable merge where motion, lighting, and shadow relationships feel native to the composition. We’ll provide a step‑by‑step approach in the dedicated STEP‑BY‑STEP section, so you can reproduce the process on a real shot. Remember, the easiest path to competence is to practice on simple material and gradually scale up to more complex effects, adding layers of detail only where it matters. BlendHowTo’s guidance supports this incremental learning mindset.
Tools & Materials
- Blender (latest stable release)(Desktop or laptop with GPU acceleration recommended for faster renders.)
- Foreground footage (greenscreen or bluescreen)(Resolution 1080p+ recommended; ProRes or DNxHR preferred for quality retention.)
- Background plate (image or video)(Ensure it matches the target lighting and camera motion.)
- Color checker or reference LUTs(Helpful for accurate color matching across passes.)
- External drive or cloud backup(Back up source footage and project files.)
- Calibrated monitor(Important for reliable color grading.)
- Basic audio track (optional)(Useful for final output but not required for visual effects.)
Steps
Estimated time: 90 minutes
- 1
Prepare footage and plan
Organize your project files, import foreground and background, and set up a project folder. Watch for frame rate and resolution consistency, and note any potential problem areas in lighting or shadows. This planning step saves time during the actual keying and compositing.
Tip: Label your passes and back up the source files before editing. - 2
Set up the background and foreground
Load your background plate in Blender’s compositor and place the foreground clip on a separate node path. Align timing so both clips are synchronized across the timeline. Establish a rough crop and mask to isolate the talent from the greenscreen.
Tip: Keep the greenscreen evenly lit to improve keying results. - 3
Apply the keying node
Add a Keying node (or Chroma Key equivalent) and connect your foreground to the white input. Adjust similarity and edge parameters to pull a clean matte. If edges are jagged, blend with a Dilate/Erode node or a Matte node for refinement.
Tip: Aim for a clean edge with enough feathering to avoid hard silhouettes. - 4
Refine the matte and remove spill
Tidy the key using Spill Suppression and Edge operations to reduce green spill on the subject. Use a Color Balance pass to adjust white balance in the foreground to match the background. Validate the matte against motion across the shot.
Tip: Check motion consistency; a static key can look fake on moving plates. - 5
Composite and color grade
Blend the foreground and background layers using a Mix or Alpha Over node. Apply color grading to harmonize brightness and mood across elements. Add subtle shadows or lighting passes if needed to anchor the subject in space.
Tip: Use a reference shot to align color and lighting before final renders. - 6
Render and review
Do test renders at your target resolution. Review for artifacts, color shifts, and edge fringing. Iterate on key, mask, and grade until the composite feels natural. Save your node tree as a startup file to reuse in future projects.
Tip: Render locally first, then test on a smaller proxy before high‑resolution final renders.
Frequently Asked Questions
What is Blender VFX and why should I use it?
Blender VFX refers to creating visual effects entirely within Blender, using its compositor, tracking, and rendering tools. It’s a cost-effective, flexible option for home studios and hobbyists who want to prototype or finalize VFX without expensive software. With careful planning and practice, you can achieve professional-looking results.
Blender VFX is visual effects made inside Blender, offering a cost‑effective, flexible workflow for home studios.
Do I need a high-end PC for Blender VFX?
You don’t always need a workstation to start; Blender runs on most modern computers. A mid‑range GPU helps with faster renders, while CPU rendering remains feasible for smaller projects. As your projects grow, consider GPUs with more VRAM and efficient cooling to maintain performance.
A mid‑range PC is fine to begin; upgrade your GPU VRAM for larger, more complex scenes.
Is chroma keying in Blender reliable for serious production?
Blender’s keying capabilities are solid for many projects, especially with careful lighting and clean footage. For high‑end work, you may combine keying with rotoscoping and advanced color correction. Practice on test shots to build confidence before tackling complex plates.
Blender can do solid keys, especially when you combine it with rotoscoping and good lighting.
Can Blender handle motion tracking for moving shots?
Yes. Blender’s camera tracking reconstructs scene motion, allowing CG elements to move in sync with live footage. For best results, ensure accurate feature tracking and validate the solve with test frames before applying shots.
Blender’s tracking helps you align CG with real camera movement.
What are common beginner mistakes in Blender VFX?
Common mistakes include poor lighting on greenscreen shots, under‑rendered passes, and misaligned color management. Start simple, render test frames frequently, and gradually introduce complexity as you validate each step.
Typical beginner traps are bad lighting and mis-matched colors; test early and often.
Where can I learn more about Blender VFX?
There are many free and paid resources on Blender’s official site, community forums, and tutorial platforms. Practice with guided projects, then apply what you’ve learned to personal shots to reinforce concepts.
Look for tutorials and practice projects to deepen your Blender VFX skills.
Watch Video
What to Remember
- Master the basic Blender VFX pipeline from capture to composite
- Keying and tracking are your foundational skills for believable scenes
- A non-destructive, node-based workflow saves time on revision rounds
- Use test renders and color management to ensure consistency across devices
- Addons can speed up tasks but only after you’re comfortable with core tools