How to Get Started with VFX in Blender: A Beginner's Guide
How to get started with vfx in blender is a practical, beginner-friendly guide covering tracking, compositing, lighting, and basic particle effects to help you build confident, real-world results.

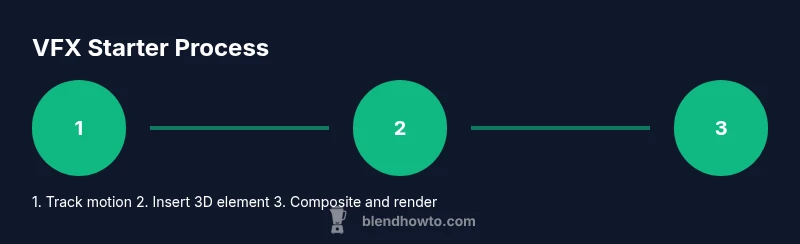
Getting started with vfx in blender means learning a simple, reliable pipeline: track motion, place a 3D element, composite in the node editor, and render. This steps-based approach keeps complexity manageable while building confidence. By starting with a low-tech shot and expanding gradually, you’ll learn core concepts like match-moving, lighting, and color grading without getting overwhelmed.
Getting Started with VFX in Blender
VFX in Blender blends tracking, 3D insertion, and compositing to merge digital elements with real-world footage. A practical starting point is to treat the shot as a small project: define your goal, gather a short clip, and decide what you want to add—like a floating logo, a muzzle flash, or a weather effect. The Blender workflow typically follows three phases: match-moving (tracking the camera and scene geometry), asset integration (placing 3D objects or effects in the scene), and compositing (combining layers and color corrections in the node editor). At BlendHowTo, we’ve found that beginners benefit from starting with a low-complexity shot and building confidence before adding more layers. This grounded approach helps you learn without getting overwhelmed and sets a solid foundation for more ambitious effects.
Core tools for VFX in Blender
Blender provides a tightly integrated set of tools for VFX: the Movie Clip Editor for tracking, a built-in camera solver to align virtual elements with real footage, the 3D Viewport for positioning objects, the Node-based Compositor to blend passes, and Eevee/Cycles for previewing and final output. Beginners should start with small, non-destructive tasks: track a few features, insert a simple 3D element, and composite a glow or color grade. Enable Filmic color management for better dynamic range, then practice with a single shot to see how edges, lighting, and shadows interact. This workflow emphasizes iteration and patience, not perfection from day one.
Setting up a starter project
Begin with a clean Blender file: set your resolution and frame rate (typical is 1920×1080 at 24–30 fps), choose Eevee for fast feedback, and keep your file structure organized (assets, footage, renders). Import footage into the Movie Clip Editor or the Video Sequencer, and set up a dedicated workspace for tracking, 3D placement, and compositing. Create a simple placeholder object (like a cube or a flat plane with your logo) to test scale and perspective. Save incremental versions often. This discipline helps you avoid rework and keeps the project manageable as you scale up.
A practical starter pipeline you can follow
- Define the goal: decide what effect you want to add (logo, explosion, weather). 2) Gather or shoot a short clip with clear motion. 3) Track a handful of good feature points in the footage and solve the camera. 4) Create or import a simple 3D element and align it with the tracked scene. 5) Set up basic lighting and materials to match the footage. 6) Composite in the Node Editor, add color grading, and render test frames. 7) Iterate on tracking, alignment, and lighting until the result looks convincing.
Common mistakes and how to fix them
- Overcomplicating the scene: start with one effect and a single element, then layer on more.
- Ignoring lighting: mismatched shadows and color are the fastest giveaway that a shot is synthetic. Balance lights in the scene and adjust the material properties accordingly.
- Skipping tests: render small previews frequently to catch issues early.
- Not organizing nodes: label and group nodes to keep the compositor readable as projects grow.
Where to practice next
After you’ve completed a basic starter shot, try adding a second element (like a glow trail) or a subtle color grade to unify your composite. Move on to a second clip with faster motion to test tracking reliability, and experiment with different render engines or post-processing techniques. The key is consistent practice, not a single perfect outcome.
Tools & Materials
- Blender (latest stable release)(Download from blender.org; ensure your GPU drivers are up to date for smoother previews.)
- Sample footage for tracking(A short clip with distinct movement and good lighting helps tracking accuracy.)
- 3D element to insert(A simple object (cube, logo, or primitive mesh) to practice placement.)
- External rendering option (optional)(Cycles or Eevee for final renders; test both if possible.)
- Annotation tool or notes app(Capture decisions, room scale, and lighting notes as you work.)
Steps
Estimated time: 60-120 minutes
- 1
Create a clean Blender project and workspace
Open Blender and set up a workspace layout that includes the Movie Clip Editor, 3D Viewport, and Compositor. Configure the render engine (Eevee for speed, Cycles for realism) and set a standard resolution/frame rate. This foundation keeps your workflow organized as you add VFX elements.
Tip: Save a named project version before making major changes. - 2
Import footage and prepare for tracking
Load your footage into the Movie Clip Editor and scrub to find good tracking points. Add a few high-contrast features and ensure you have enough motion to solve camera movement accurately. Mark frames at the start and end to set the shot range.
Tip: Use short clips for practice; long takes make tracking mistakes harder to fix. - 3
Solve the camera and verify tracking
Run the Solve Camera action to compute the camera motion and scene geometry. Inspect a few frames to confirm the virtual camera aligns with the footage. If mismatches appear, re-track or add more features in tricky areas.
Tip: Focus on stabilizing the shot first; jitter will ruin later inserts. - 4
Add and align a simple 3D element
Create or import a basic object and position it within the scene so it appears to live in the footage. Use the transformed coordinates from the camera solve to place the object in a believable scale and perspective. Test different placements to see how lighting changes affect the illusion.
Tip: Start with a neutral material and refine later; invisible misplacements are easier to fix at this stage. - 5
Set up lighting and materials for realism
Add light sources to mimic the scene's lighting direction and intensity. Adjust materials to react to light realistically, and consider simple shadows or ambient occlusion to ground the object in the shot. Preview with Eevee/Cycles to ensure consistent results.
Tip: Match color temperature to the footage to reduce mismatch. - 6
Composite, color grade, and render test
In the Node Editor, blend the render with the footage using an Alpha Over node, then apply color correction and a subtle glow if needed. Do a low-res render to review timing and alignment, then increase quality for final output.
Tip: Keep a separate node group for revisions so you can experiment freely.
Frequently Asked Questions
What is VFX in Blender?
VFX in Blender combines tracking, 3D insertion, and compositing to blend digital effects with real footage. It’s a practical workflow that starts simple and builds complexity over time.
In Blender, VFX means adding effects by tracking the shot, inserting 3D elements, and compositing them with the footage.
Do I need expensive hardware to start?
You can begin on a mid-range PC. Start with Eevee for fast previews and gradually test Cycles as you add complexity. Upgrading GPUs helps with larger renders and smoother playback.
A mid-range PC is fine to start; use Eevee for speed and upgrade later if you need more realism or higher resolution renders.
Which Blender version should I use for VFX?
Use the latest stable Blender release to access current VFX tools like improved tracking and compositing. Check system requirements and update drivers for best performance.
Go with the latest stable Blender version to get the newest VFX features and bug fixes.
What is camera tracking vs object tracking?
Camera tracking solves the camera motion so virtual elements align with footage. Object tracking follows specific items in the scene to lock their movement.
Camera tracking aligns your virtual camera with the footage; object tracking follows real objects to anchor assets.
Do I need to code to do VFX?
No. Blender’s node-based compositor and UI-based tools cover most VFX tasks. Scripting can automate repetitive work, but it isn’t required to create effects.
You don’t need to code to start making VFX in Blender.
Can I use real-time rendering for VFX in Blender?
Blender offers real-time previews with Eevee, but some effects benefit from Cycles or offline renders for final quality. Test across engines to compare results.
Yes, Eevee provides real-time previews, while Cycles can help you achieve more realism for final renders.
Watch Video
What to Remember
- Plan the VFX pipeline before starting.
- Track camera motion accurately for stable composites.
- Use non-destructive compositing to experiment freely.
- Match lighting and color to realism.
- Iterate with quick tests to learn quickly.