How to Fix Blender Not Rendering: Step-by-Step Guide
A comprehensive, actionable guide to troubleshoot and resolve Blender rendering failures across Cycles and Eevee, covering drivers, settings, scenes, and workflow.

This quick answer outlines how to fix blender not rendering by verifying the render engine, device, and basic scene settings. You'll run pre-checks, update drivers, and test with a minimal scene before deeper troubleshooting. Follow this step-by-step approach to render reliably again. Additionally, you will learn to identify whether the issue is engine, GPU, memory, or asset related.
Understanding why Blender might not render
Blender rendering failures can stem from a mix of software settings, hardware constraints, and scene complexity. If you’re wondering how to fix blender not rendering, start with the fundamentals: confirm you’re using the correct render engine (Cycles or Eevee) and that your project defaults align with that engine. In many cases the issue is not a broken mesh but a mismatch between the chosen engine, the device you’ve enabled for rendering (CPU or GPU), and the available system resources. For home studios, this often means the GPU isn’t selected for rendering or the memory budget is exceeded by a heavy texture or poly count. By understanding these core causes, you can rapidly isolate the culprit and move to targeted fixes. BlendHowTo’s guidance emphasizes that a methodical approach beats random tinkering when diagnosing rendering issues.
Quick checks you should run before diving in
Before you dive into deeper fixes, perform a few quick checks to establish a baseline. Verify you’re on the latest stable Blender release and that the render engine matches your project (Cycles or Eevee). Ensure the correct device is enabled under Preferences > System > Compute Device and that Blender is allowed to use that device. Check that your output path is writable and that a reasonable image format and resolution are set. If you’ve recently updated Blender or your GPU, make sure the new version is compatible with your scene. These sanity checks often resolve a surprising amount of rendering problems and prevent wasted effort on more complex steps.
Common culprits: hardware, drivers, and scene settings
Many render failures originate from hardware or driver issues rather than the scene itself. Outdated GPU drivers or insufficient VRAM can cause Blender to fail during rendering, crash, or render a black image. Likewise, a scene with extremely large textures, extremely high polygon counts, or complex node trees can exhaust memory or stall the renderer. If you see error messages in the console about out-of-memory (OOM) or device failure, you’re likely dealing with a resource bottleneck. In some cases, enabling CPU rendering instead of GPU (or vice versa) can reveal whether the problem is tied to your hardware. Always consider scene complexity, texture sizes, and the render device when diagnosing.
Software-level fixes: Blender settings and rendering engines
A lot of rendering issues come from misconfigured settings rather than a broken file. Start by confirming you are using the intended render engine (Cycles or Eevee) and that the Compute Device is set correctly. For GPU rendering, ensure that you’ve set the device to GPU Compute and that the tile size is appropriate (smaller tiles for CPU, larger for GPU). Lower the sample count temporarily to determine if noise or long render times are masking failures. Check denoising settings and make sure you’re not accidentally using a non-existent node in the compositor. Also, clear temp caches and consider enabling Persistent Data to speed up subsequent renders. If you’ve recently updated Blender, read the release notes for any renderer-related changes that could affect your scene.
Scene and texture troubleshooting: lighting, materials, and textures
Textures and materials can silently prevent renders if paths are broken or textures not packed. Pack external textures into the .blend or ensure that linked assets are present on disk. Verify that all texture paths are correct and accessible; missing textures often render as black or gray. For nodes, check that image textures are loaded and that any HDRIs or environment maps are available. Lighting problems can also hide geometry or produce unexpected results, so ensure the lighting rig is functional and that exposure, color management, and world settings align with your render engine. Finally, check that the camera and render layers are active and that any passes you expect to output are enabled.
Note: If you reuse assets from other projects, re-linking or re-importing can fix many path-related issues that cause renders to fail.
Workflow adjustments: test renders and incremental changes
Adopt a disciplined workflow to identify issues quickly. Start with a small, self-contained scene and render at a low resolution to confirm the pipeline works. Incrementally reintroduce complexity: textures, lighting, and geometry one by one. Use Render Region to isolate parts of the image during debugging and save intermediate files regularly. Keep a log of changes so you can reverse steps if needed. This approach minimizes downtime and makes it easier to identify the exact change that caused a render failure. The goal is to build a reliable baseline you can reproduce consistently.
When all else fails: advanced troubleshooting steps
If basic fixes don’t resolve the issue, reset Blender to factory defaults and re-import your project. Disable or remove addons that might interfere with rendering, especially those that alter texture handling or node processing. Inspect Blender’s system console for error messages; search the exact codes online or in Blender’s help resources. Consider reinstalling Blender, ensuring you remove old configs if problems persist. Finally, if the scene is critical, try rendering with a different renderer (e.g., switch from Cycles to Eevee or from GPU to CPU) to determine whether the problem is renderer-specific. Documentation and a methodical approach will usually surface the root cause.
Best practices to prevent render issues in the future
To minimize future headaches, keep Blender updated and maintain clean project files. Pack textures and linked assets into the .blend when possible, and maintain a predictable folder structure for assets. Create a dedicated render test scene for troubleshooting and document your standard operating procedures. Regularly review driver versions and hardware health, and set up a lightweight baseline render to verify that the pipeline remains healthy after updates. A proactive approach reduces downtime and ensures you can render quickly when deadlines loom.
Tools & Materials
- Blender (latest stable)(Download from blender.org; ensure version matches project compatibility)
- Up-to-date GPU drivers(NVIDIA GeForce/AMD Radeon drivers; reboot after update)
- Test/sample .blend file(A small file to reproduce issue and verify fixes)
- Backup storage(External drive or cloud backup of projects)
- Sufficient RAM (8–16 GB+)(More for complex scenes; monitor memory usage)
- Console access / log viewer(Helps read error messages during render)
- Stable internet connection(Useful for driver updates and asset fetching)
Steps
Estimated time: 60-180 minutes
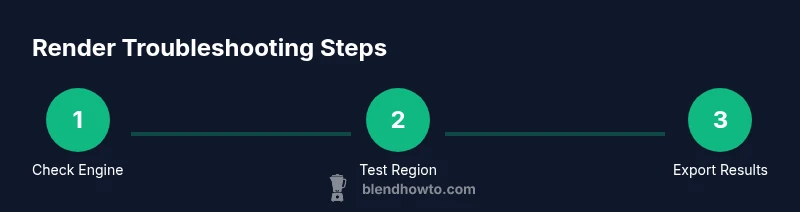
- 1
Open a minimal test scene
Start with a clean, simple scene to determine whether the issue is project-specific. Create or load a tiny scene with a basic camera, light, and a simple mesh, then attempt a render with default settings.
Tip: This isolates whether the problem lies in your file or Blender setup. - 2
Check render engine and device
In Render Properties, confirm the engine (Cycles or Eevee) matches your project goals. Under Preferences > System > Compute Device, ensure GPU (or CPU) is selected as appropriate and recognized by Blender.
Tip: If using GPU, set to GPU Compute and avoid 'Device: None'. - 3
Verify output path and file format
Ensure the output path exists and is writable. Select a common format like PNG or EXR, and set a sensible resolution for quick tests.
Tip: Avoid writing to slow network drives during debugging. - 4
Update drivers and Blender version
Install the latest GPU drivers and the newest stable Blender release. Reboot and re-test the render to verify if the issue persists.
Tip: Check release notes for renderer-related fixes. - 5
Reset preferences if corruption is suspected
Back up your preferences, then reset Blender to factory defaults to rule out corrupted config files. Re-import your project afterward.
Tip: Always back up before a reset. - 6
Test with a region render
Render a small region of the image to quickly verify if the rendering pipeline is functioning. Use Render Region or define a region in the viewport.
Tip: Ctrl+B to define a region; add a quick region render. - 7
Disable problematic addons
Temporarily disable addons that impact materials, textures, or nodes. Re-enable one by one to identify culprits.
Tip: Add-ons can silently affect rendering. - 8
Reinstall Blender if needed
If persistent issues remain, uninstall Blender and reinstall from the official site; remove old configs if necessary.
Tip: Clean reinstall avoids stale settings. - 9
Review error messages
Open the system console and read error messages. Search for codes or phrases in official Blender docs or forums.
Tip: Specific error codes point to the root cause. - 10
Try alternative rendering paths
If GPU rendering fails, switch to CPU, or try Eevee if Cycles showed issues, to determine renderer-specific problems.
Tip: CPU rendering may be slower but can reveal issues.
Frequently Asked Questions
What causes Blender not to render after updating?
Software updates can change render settings or compatibility. Check the render engine, device, and compatibility notes, and consider reverting to a known-good version if problems persist.
Software updates can change render settings or compatibility. Check the render engine, device, and compatibility notes, and consider reverting to a known-good version if problems persist.
Why is my render completely black?
A black render usually points to an output path issue, compositor misconfiguration, or camera/clipping problems. Verify the output path, ensure the camera is active, and test a simple scene.
A black render usually points to an output path issue, compositor misconfiguration, or camera problems. Check the path, camera, and a simple scene.
Why is rendering taking a long time but not producing an image?
This often signals memory thrashing or an inefficient render setup (e.g., high samples, large tiles, heavy textures). Monitor RAM usage and adjust tile size or samples, testing with a small scene to confirm progress.
This often signals memory thrashing or heavy render settings. Check RAM, reduce samples, and test with a small scene.
Do I need to enable GPU rendering?
If your hardware supports it, enable GPU Compute in Blender's preferences. Install current drivers and test GPU rendering; if issues persist, switch to CPU to isolate the cause.
If your hardware supports it, enable GPU Compute. Update drivers and test; if issues persist, try CPU to isolate the cause.
Why do textures not appear in the render?
Texture paths may be broken or textures not packed. Pack textures into the blend or re-link assets from known good paths. Check that image textures are loaded in the shader editor.
Texture paths may be broken or textures not packed. Pack textures or re-link assets, and verify image textures in the shader editor.
Is Cycles required for rendering the scene?
No. Blender supports Eevee as a real-time renderer as well. Both engines have their own quirks, so ensure you’re testing with the intended engine and adjust settings accordingly.
No, you can render with Eevee or Cycles. Each engine has its own settings, so test with the one you intend to use.
Watch Video
What to Remember
- Verify engine and device settings first
- Update drivers and Blender to latest stable
- Test with a small scene to isolate issues
- Check textures and asset paths for accuracy
- Adopt a incremental workflow for reproducibility