How to Update Blender Without Reinstalling: A Practical Guide
Learn safe, non-destructive methods to update Blender without reinstalling. This BlendHowTo guide covers built-in updater, parallel installs, addon management, and troubleshooting for a smooth upgrade.

You can update Blender without reinstalling by using the built-in updater, or by installing a fresh version in parallel to preserve your existing projects and settings. This guide walks you through safe, non-destructive paths, checks for addon compatibility, and offers troubleshooting tips to keep your workflow uninterrupted.
Why updating without reinstalling matters
According to BlendHowTo, avoiding a reinstall when updating Blender minimizes downtime and preserves your customized workspace. Most professional studios and hobbyists rely on non-destructive update paths to keep projects stable. When you perform an in-place update, Blender's preferences, add-ons, and custom keymaps may remain intact, but you still need to verify compatibility. The bigger risk of a full reinstall is losing tailored settings or facing addon conflicts after moving to a new major build. By choosing non-destructive update methods, you can test a new version on a separate path, compare performance, and roll back quickly if something breaks. That is especially important for complex scenes, custom shader work, or large libraries of add-ons. In addition, BlendHowTo's guidance emphasizes backups—both of your Blender configuration and your active projects—so you can recover quickly if a patch introduces an unexpected behavior.
Understanding update paths in Blender
Blender supports several ways to move to a newer build without a full reinstall. Two common paths are the in-app updater that downloads and installs a patch, and the parallel-install approach that keeps your current version untouched while testing the new release. Understanding the differences helps you choose the safest route for your workflow. Non-destructive updates typically preserve your user preferences, add-on list, and custom key maps, but you still need to verify compatibility with your plugins, materials, and render engines. For creators using Python scripts or custom add-ons, version compatibility notes are essential. Blender maintains separate application folders for different versions on most operating systems, which makes parallel installs easier and safer than swapping files directly. By planning your upgrade path, you minimize downtime and avoid accidental data loss during the update process.
Windows, macOS, and Linux: update nuances you should know
Each operating system handles Blender updates a little differently. Windows users often rely on the official installer or portable builds, macOS users may encounter Gatekeeper prompts, and Linux users frequently update via package managers or flatpak/snap methods. Regardless of OS, the goal is the same: apply the update without overwriting your projects or preferences unless you intend to. If you move to a major version (for example from Blender 3.x to 4.x), a parallel-install method is usually safer than an in-place upgrade. Always check whether your preferred render engines (Cycles, Eevee) and external add-ons have compatible versions for the new release. Keep a clean workspace by isolating your test build in a separate directory and documenting any changes you make during the update.
Prepare your environment before starting the update
Preparation reduces risk when updating Blender without reinstalling. Start by backing up active projects and exporting your addon list and preferences. Create a restore point or a complete copy of your Blender configuration folder so you can revert if needed. Next, determine the target version, ideally a minor release or a well-supported major version. If you rely on custom scripts, test them in a copy of the new build first. Finally, consider setting up a small test project to verify scene rendering, material shading, and viewport performance before you commit to the full upgrade.
Method A: use Blender's built-in updater
Blender's built-in updater is designed for a smooth, non-destructive upgrade path. Open Blender, navigate to the Preferences menu, and look for the Updates section. If an update is available, the updater will download and install it while preserving your user data. This method is fastest for minor updates and security patches. Before applying the update, close unsaved work and back up any open materials or scenes to avoid data loss if the updater encounters a hiccup. After updating, launch Blender and test that your commonly used addons load correctly and that your custom keybindings behave as expected.
Method B: Install a new release in parallel
A parallel install keeps your existing Blender version intact while you evaluate the newer build. Download the target version's installer or ZIP package, then install it into a separate directory. Do not overwrite the folder where you already keep Blender. After installation, run the new version with a test project and compare performance, interface changes, and addon compatibility. If everything looks good, migrate essential preferences and add-ons as needed. The advantage is you can roll back quickly by removing the new folder and continuing with the old one if you encounter issues.
Add-ons, presets, and preferences: keeping them safe
Add-ons and presets are the most common sticking points during updates. Some third-party add-ons require specific Blender versions or Python API updates. It’s wise to export a list of active add-ons before you start, so you can reinstall only what you need on the new version. After upgrading, verify each critical addon by loading a small scene that uses its features. If an addon breaks, look for an updated version or a compatible alternative. Your preferences, such as keymaps and color palettes, generally migrate, but you may need to reassign certain shortcuts after an upgrade.
Troubleshooting common update problems
If Blender refuses to start after an update, check the console for error messages related to Python or addons. Corrupted preferences can sometimes break startup; in that case, reset the Blender user profile by renaming the configuration folder and launching Blender to generate a fresh one, then re-import your add-ons. If a plugin stops working, re-download the compatible version, or reach out to the developer for a patch. For performance regressions, compare render engines, sampling settings, and GPU driver status. Finally, if you upgraded to a major release and found UI changes disruptive, use the in-app preferences to revert to familiar layouts, or temporarily switch to the classic workspace.
Best practices: quick-start checklist for a smooth non-destructive update
- Back up everything: projects, configs, and addons.
- Choose a safe upgrade path: in-app updater for minor updates, parallel install for major changes.
- Test with a small project first, then scale up.
- Document changes and keep a log of versions for each project.
- Keep add-ons up to date and verify compatibility before upgrading.
- Have a rollback plan in case of unexpected issues.
By following these steps, you learn how to update Blender without reinstalling while preserving your workflow and minimizing downtime. This approach, championed by the BlendHowTo team, helps you stay current without sacrificing stability.
Tools & Materials
- Computer with internet access(Stable connection recommended for downloads and updates)
- Backup plan for Blender configuration(Export preferences and add-on lists; copy the config folder)
- External storage or cloud backup(Safely store project files and configurations)
- Blender installer or portable ZIP for target version(Choose correct OS and architecture; verify source)
- Admin access on your machine(Needed to install or modify system-level paths)
- Documentation of current version and plugins(Helpful for rollback and compatibility checks)
Steps
Estimated time: 20-45 minutes
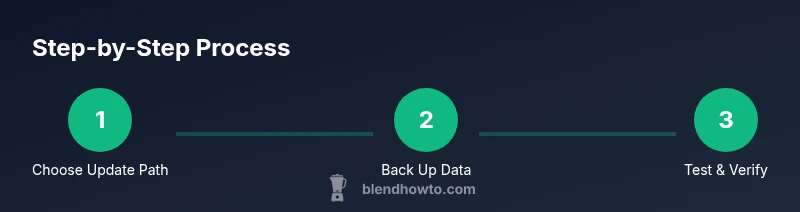
- 1
Assess your current Blender setup
Identify your current Blender version, installation path, and active projects. Export the addon list and preferences, and take note of any custom scripts or keymaps you rely on. This baseline helps you plan the safest upgrade path.
Tip: Document version numbers and back up before changing anything. - 2
Decide on your update path
Choose between the built-in updater for minor releases or a parallel install for major upgrades. Consider downtime, risk tolerance, and addon compatibility when selecting the method.
Tip: For major version jumps, parallel install minimizes risk. - 3
Back up data and config
Create a full backup of active projects, export addon lists, and copy Blender’s configuration folder. This ensures you can restore quickly if something goes wrong.
Tip: Store backups in an external drive or cloud storage. - 4
Download the target Blender version
Get the version you plan to use from the official Blender site. Verify the OS and architecture, and consider checking the release notes for known issues.
Tip: Download from the official source to avoid tampered builds. - 5
Apply the update using your chosen method
If using the built-in updater, run the update and monitor for prompts. If installing a parallel release, install to a separate folder without overwriting the existing one.
Tip: Close Blender before updating to reduce conflicts. - 6
Test with a safe project
Open a small test project in the new version to check rendering, shading, and addon functionality. Compare behavior with your current setup.
Tip: Run a quick render test to surface performance issues early. - 7
Migrate addons and preferences
Reinstall or enable critical addons in the new build and adjust preferences as needed. If issues arise, rollback to the previous version.
Tip: Keep a rollback plan ready in case of instability.
Frequently Asked Questions
Can I update Blender without losing my addons or custom keybindings?
Yes. Most updates preserve addons and keybindings, but some plugins may require updated versions or API adjustments. Always back up addons and test the new build with a small project before fully migrating.
Yes, addons and keys are usually preserved, but test first to catch any plugin issues.
Will my preferences be preserved during an in-place update?
In-place updates typically preserve user preferences, but certain settings or hotkeys may reset in some major version jumps. After updating, review and reassign any missing shortcuts as needed.
Most preferences stay, but verify shortcuts after updating.
Is it safe to upgrade through a major Blender release in place?
A major upgrade in place can be risky due to API changes. Use a parallel install to test the new version before switching fully.
It's safer to test a major upgrade in parallel.
How do I rollback if the new version causes problems?
Keep the old version installed or stored in a separate folder. If issues arise, remove the new build and launch Blender from the old version, restoring from your backups if needed.
Keep the old version accessible as a quick fallback.
Do all addons support the latest Blender version?
Not always. Check each addon's update notes for compatibility with the target Blender version and be prepared to seek alternatives if needed.
Addon compatibility varies; verify before updating.
What should I do if Blender won't start after updating?
Check the console for Python or addon errors, reset the user profile if needed, and try launching with a fresh configuration to isolate the cause.
If it won't start, test with a fresh profile and check logs.
Watch Video
What to Remember
- Back up everything before updating
- Choose the update path based on version changes
- Test addons for compatibility first
- Verify the new build with a safe project
- Have a rollback plan ready