How to Update Blender: A Practical Guide for 2026
Learn how to update Blender safely in 2026 with a practical, step-by-step approach: prepare backups, choose a release path, install, verify files and add-ons, and troubleshoot post-update issues.

By the end of this guide you will know how to update blender safely, from checking your current version to backing up work, choosing an update path, and validating your setup after install. This steps-based approach helps hobbyists and 3D artists keep workflows smooth and secure. Follow the practical steps to minimize downtime and ensure add-ons stay compatible.
Why updating Blender matters
Keeping Blender up to date is essential for security, performance, and access to the latest features. Each new Blender release includes improved modeling tools, faster rendering, and better GPU support, which can speed up your workflow and reduce crashes during complex scenes. Regular updates also help ensure compatibility with newer add-ons and exported file formats, so you can rely on your projects across versions. According to BlendHowTo, a disciplined update habit reduces last-minute surprises when you open a project in a newer build. In this section, you’ll learn the core reasons to stay current and how to plan updates without breaking your workflow.
Understanding Blender's update model
Blender distributes updates as official installers or portable bundles that you can download from blender.org. Releases come in stable, beta, and nightly variants, each serving a different purpose: stability for production work, testing new features, or access to the latest changes. The updater ecosystem is community-driven, but official sources remain the safest path. Before you update, know where your files are stored and how your current version handles your project files. This knowledge helps prevent surprises and preserves project integrity across versions.
Choosing between stable, beta, or nightly builds
For most users, stable releases are the safest choice for ongoing projects. If you’re exploring new features or testing workflows, beta builds give you early access while offering release notes to guide compatibility checks. Nightly builds represent bleeding-edge changes and can be unstable; these are best kept for experimental workflows or learning scenarios. Regardless of path, keep a separate testing project to evaluate how the new build handles your assets, materials, and add-ons before updating your primary work environment.
Preparing for an update
Preparation reduces risk: back up your active projects, export important presets, and document your current add-ons and their versions. Create a restore point or a complete clone of your Blender configuration folder if possible. Gather your OS-specific installer or portable build and confirm you have admin rights if needed. If you use custom scripts or add-ons, consider exporting a list of dependencies and noting any license keys. This groundwork makes the update smoother and rollback faster if needed.
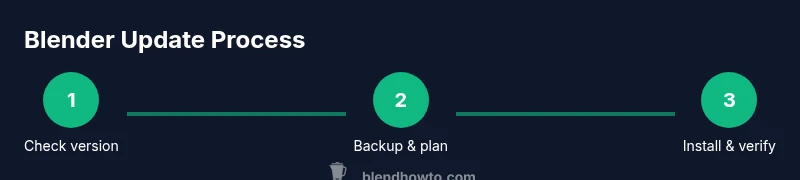
Step-by-step: update path and install (high-impact actions)
- Verify current version and architecture; 2) Back up work and preferences; 3) Decide on stable/beta/nightly; 4) Download the appropriate installer or package; 5) Install in a new directory to preserve the old version; 6) Launch Blender and perform quick feature checks; 7) Update add-ons and re-import projects to confirm compatibility. A deliberate approach minimizes downtime and improves confidence during the transition.
Handling add-ons and scripts after update
Add-ons and custom scripts are a common source of post-update friction. Start by updating every essential add-on to a version compatible with the new Blender release. If an addon is unavailable, disable it temporarily and note alternative workflows. For scripts, test in a copy of a project to ensure behavior remains consistent. Maintain a compatibility log so you can quickly reference required updates for future upgrades.
Troubleshooting common post-update issues
Post-update issues often relate to addon compatibility, shader or driver problems, and preference resets. Start by checking release notes for known issues, then verify that graphics drivers are current. If a crash occurs, try resetting startup files, clearing caches, or rolling back to the previous Blender version using your backup. Community forums and Blender’s official docs are valuable when diagnosing rare problems.
Managing multiple Blender versions for risk mitigation
If your workflow spans projects with different version requirements, keep multiple Blender installations on the same machine, each in its own directory. Use project-specific paths and maintain separate user preferences. This strategy reduces cross-version conflicts and makes it easier to test new updates without disrupting ongoing work.
Best practices and a future-proof update plan
Develop a regular update cadence aligned with your project timeline. Test new builds in a dedicated workspace before upgrading production pipelines. Keep a rolling backup strategy and document addon compatibility notes. By planning ahead, you minimize downtime and maximize access to Blender’s evolving feature set.
Tools & Materials
- Computer or laptop with internet access(Stable connection; avoid public networks during download.)
- Blender installed (latest stable or chosen path)(Download from blender.org; select OS version.)
- Backup drive or cloud storage(Back up active projects and configuration folders.)
- Administrative rights(Needed for installation on some systems.)
- Addon/script inventory(Optional: export a list of important addons.)
- Text editor for scripts(Useful if you manage custom nodes or scripts.)
Steps
Estimated time: 45-60 minutes
- 1
Check your current Blender version
Open Blender, choose Help > About, and note the exact version and build type. This tells you whether you’re on stable, beta, or nightly, guiding your update path and potential compatibility checks.
Tip: Document the version in project notes before updating. - 2
Back up your work and preferences
Save all open projects and copy the Blender configuration folder if possible. Use versioned backups to avoid overwriting important files during update.
Tip: Keep a separate backup for addons and user presets. - 3
Choose the update path
Decide between stable releases, beta builds for testing new features, or nightly builds for the very latest changes. For critical projects, prefer stable releases.
Tip: If unsure, start with a separate test project. - 4
Download and install the update
Visit blender.org, select the matching OS, and run the installer or replace the portable folder in a new directory to keep an easy rollback path.
Tip: Install a new version in a separate directory to avoid conflicts. - 5
Launch Blender and verify
Open the updated Blender, confirm core features run (modeling, shading, rendering), and verify that older project files still open correctly.
Tip: Check startup files and preferences for changes. - 6
Update addons and preferences
Update or reinstall essential add-ons, review and reset preferences if needed, and export current presets to compare before/after.
Tip: If an addon is incompatible, disable it temporarily and look for updates. - 7
Troubleshoot or rollback if needed
If Blender behaves oddly, consult release notes and forums. If problems persist, revert to the previous version using your backup.
Tip: Keep a test project on the old version to validate rollback effectiveness.
Frequently Asked Questions
What happens to my addons after updating Blender?
Most addons remain functional, but some may need updates for compatibility with the new Blender version. Check addon pages and Blender’s release notes, then update or disable if necessary.
Most addons work after updates, but some may need updates for compatibility.
Can I revert to a previous Blender version if something goes wrong?
Yes. Keep a backup of the previous version and your projects. If problems arise, install the old version and reopen projects from the backup.
Yes, you can revert using your backup and installing the old version.
Should I always use the stable release for production work?
For production work, it’s best to stay on the stable release until your pipeline relies on a feature only in newer builds.
Yes, stick to stable releases unless you need new features.
How do I update Blender on Linux?
On Linux, you can use your distro’s package manager, download official tarballs, or use a third-party repository. Follow the distro guidance for installation and update commands.
On Linux, use your distro’s package manager or download from Blender.org.
Are nightly builds recommended for beginners?
Nightly builds are not recommended for beginners due to potential instability. Use stable or beta versions as you gain experience.
Nightly builds can be unstable; beginners should avoid them.
What if Blender starts behaving oddly after update?
If issues occur, check release notes, reset preferences, and verify that hardware drivers are up to date. If needed, rollback to a backup.
If issues occur, check notes and reset preferences, then rollback if needed.
Watch Video
What to Remember
- Back up before updating and test in a safe environment
- Choose the update path based on project criticality
- Verify add-ons and preferences after update
- Keep a rollback plan with a tested backup