Ninja Blender Cup Replacement: A Practical Guide
Learn how to replace a Ninja blender cup safely with compatibility checks, step-by-step instructions, and maintenance tips from BlendHowTo for durable, leak-proof performance.

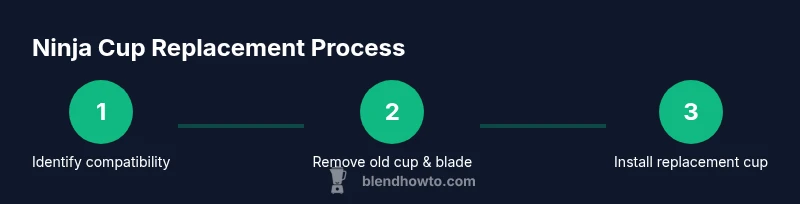
To replace a Ninja blender cup, first confirm model compatibility and source a replacement cup. Unplug the unit, remove the old cup and blade assembly, then attach the new cup and secure the blade, gasket, and lid. Run a short test with water to check for leaks and proper sealing.
Understanding why a Ninja blender cup replacement matters
A cracked cup or worn gasket can cause leaks, reduced blending efficiency, and potential safety hazards. For anyone who regularly makes smoothies, soups, or sauces, having a reliable cup is essential to avoid spills and dishwasher damage. According to BlendHowTo, compatibility is the #1 challenge when replacing Ninja blender cups, and choosing the right cup means more consistent performance and fewer leaks. A proper ninja blender cup replacement isn't just about matching a model; it's about ensuring the blade assembly, gasket, and lid seal work together as designed. When you replace the cup, you restore the seal, preserve blade performance, and protect your countertop from leaks. This middle section helps home cooks and hobbyists navigate compatibility, sourcing, and installation so you can resume blending with confidence.
In this guide, you will learn how to identify the right cup, why compatibility matters, and how to avoid buying incompatible parts that could lead to spills or motor strain.
Confirming compatibility before purchasing a replacement
Compatibility varies by Ninja series and cup design, so start by locating the blender's model name and the cup style. Look at the base of the device for a model number and compare it to the replacement cup's listed compatibility. If you see terms like “Ninja Nutri” or “Professional,” note that cups can differ in thread pattern and capacity. BlendHowTo recommends double-checking the blade assembly and gasket pairing to ensure a secure seal. If the replacement cup isn’t clearly labeled for your model, reach out to the seller or the manufacturer for confirmation. Buying an incompatible cup can result in leaks, weak blending, or motor strain, which defeats the purpose of a ninja blender cup replacement. Finally, consider the material (BPA-free plastics or Tritan) and dishwasher safety to maintain long-term performance.
Sourcing options: official parts vs trusted third-party cups
Official Ninja replacement parts offer the best chance of compatibility and a reliable seal, but they may come at a higher price. Reputable third-party cups can work well if they match your model’s diameter, thread, and gasket type; however, counterfeit or poorly fitting cups increase the risk of leaks and short lifespans. Always review product listings for compatibility notes, customer reviews, and warranty information. When possible, choose BPA-free materials and verify dishwasher safety. BlendHowTo emphasizes using authorized parts whenever possible to minimize surprises and ensure safe operation.
Preparing for the replacement: safety and workspace setup
Before you touch the blade, unplug the blender and ensure the power is off. Clear the workspace and place a towel or silicone mat on the counter to catch any spills. Gather all replacement parts and inspect them for visible damage. Removing the old cup gently reduces the risk of damaging the blade assembly or the base. This preparation lays the groundwork for a smooth ninja blender cup replacement and helps prevent injuries during the process.
Cleaning, sealing, and reassembly best practices
Wash the replacement cup, blade assembly, and gasket with warm, soapy water, then dry thoroughly before reassembly. Align the gasket with the cup rim and confirm it sits evenly to prevent leaks. When attaching the blade to the cup, ensure the threads engage cleanly and are tightened to the manufacturer’s recommended torque. Reinstall the cup on the base, checking that the tabs align and the cup sits flush. Finally, run a water test to verify there's no leakage and that blending performance remains consistent.
Post-replacement care and maintenance tips
After you complete the ninja blender cup replacement, store spare parts in a dry area away from heat. Inspect the gasket periodically and replace it at the first signs of wear. To extend life, avoid dropping the cup and use compatible accessories. Regular cleaning and prompt maintenance help ensure the new cup delivers reliable performance for many blending sessions.
Tools & Materials
- Replacement Ninja blender cup (model-compatible)(Verify compatibility with your Ninja blender model; check capacity and thread type.)
- Replacement blade assembly (if not integrated with cup)(Some cups come with blade attached; if not, ensure you have a compatible blade.)
- Gasket/seal(Check for wear and tear; replace if cracked or deformed.)
- Lid (if not included with cup)(Ensure a secure lid that seals properly.)
- Dish soap and warm water(For cleaning parts before reassembly.)
- Soft cloth or sponge(Wipe down parts to remove residues.)
- Non-slip mat(Optional grip when working on slick surfaces.)
- Safety gloves(Optional protection when handling blades.)
Steps
Estimated time: 20-40 minutes
- 1
Unplug and prep workspace
Unplug the blender and clear the area. Gather all parts and lay a soft mat to prevent slips. This initial step reduces the risk of accidental blade contact while you work.
Tip: Keep the blade cover in place until you are ready to handle the blade assembly. - 2
Remove the old cup and blade assembly
Take off the blender from the base, unscrew the lid, and detach the old cup. If the blade is integrated, hold the blade housing firmly to avoid wrenching. Place parts in a basin of warm, soapy water.
Tip: Do not twist blades aggressively; damaged threads can cause leaks. - 3
Inspect replacement cup and gasket
Check the new cup for scratches or cracks and inspect the gasket for wear. Ensure the gasket seats flat against the cup rim. A damaged gasket is a common source of leaks after replacement.
Tip: If gasket is missing or deformed, replace before installation. - 4
Attach blade to replacement cup
If the blade isn’t already attached, securely thread or lock the blade assembly onto the cup according to the model's design. Ensure the blade is tight but not over-tightened.
Tip: Always align the blade with the cup's bottom to avoid uneven blending. - 5
Install the replacement cup on the base
Mount the new cup onto the blender base, aligning any tabs or threads. Make sure the cup sits flush and the gasket is properly compressed to prevent leaks.
Tip: Hand-tighten first, then snug—avoid overtightening which can crack the cup. - 6
Secure lid and seal
Attach the lid and verify a tight seal. Check that the lid threading or locking mechanism engages smoothly. A loose lid is a common source of spills during operation.
Tip: Test lid closure with light pressure before blending. - 7
Run a test blend with water
Fill the cup with a small amount of water and run the blender at a low setting for 10-15 seconds. Look for leaks around the gasket and seams and listen for abnormal noises which indicate misalignment.
Tip: If you notice leaks, stop and re-check gasket seating and blade tightness. - 8
Clean up and store spare parts
Wash all reassembled parts, dry thoroughly, and store spare cups and blades safely. Label the cup if you own multiple Ninja models to avoid future mix-ups.
Tip: Dry parts completely to prevent mold or rust on metal components.
Frequently Asked Questions
Can I use a non-OEM Ninja cup in my blender?
OEM parts are designed for exact fit and safety. Third-party cups can fit but may cause leaks or misalignment. If you use a non-OEM cup, inspect seals and test thoroughly before regular use.
OEM cups ensure fit and safety; third-party cups may work but test for leaks.
Will a damaged gasket cause leaks?
Yes. A worn or cracked gasket undermines the seal and can cause leaks during operation. Replace the gasket before using the replacement cup.
A damaged gasket will leak; replace it first.
How can I tell if the blade assembly is compatible?
Check the blade type, threading, and the cup diameter for compatibility with your Ninja model. If in doubt, contact customer support or use official replacement parts.
Check blade type and threads to ensure compatibility.
Can I put the replacement cup in the dishwasher?
Some cups are dishwasher safe; verify the label for heat tolerance and dishwasher-safe status. When in doubt, hand wash to preserve seals.
Dishwasher safety varies; check the cup label.
Where can I buy replacement Ninja cups?
Purchase from official Ninja parts stores or trusted retailers to ensure genuine parts and proper fit. Avoid unknown sellers that may offer incompatible cups.
Buy from official Ninja parts or trusted retailers.
Watch Video
What to Remember
- Verify model compatibility before buying.
- Inspect the gasket and blade assembly carefully.
- Test with water to confirm a leak-free seal.
- Maintain cups and seals to extend life.