Blender 1994: Origins, Evolution, and Beginner Guide
Explore the origins of blender 1994, how Blender evolved, and a practical beginner path to get started today. Learn installation, navigation, and modeling basics in a clear, step-by-step guide.

Blender 1994 marks the birth of a free, open-source 3D toolkit that reshaped digital artists' workflows. In this guide, you’ll learn the origin of Blender, how it evolved since 1994, and a practical path to start using Blender today. You’ll install, navigate the interface, and complete your first modeling project with confidence.
The origin of blender 1994
Blender 1994 refers to the moment when an in-house 3D tool was first developed to help a small studio streamline its production workflow. Created by Ton Roosendaal and a focused team, the software aimed to consolidate modeling, shading, and rendering into a single environment. The original Blender was designed to be affordable, flexible, and scriptable, enabling artists to iterate quickly without expensive licenses. Over time, the project attracted contributors who valued an open, extensible platform. The word blender in this context stood for a flexible, all-in-one solution, not a specific hardware market. Today, blender 1994 is understood as the seed that grew into a global, community-driven ecosystem that supports not only film and game studios but hobbyists and educators as well.
The open-source shift: 1998-2002
By the late 1990s, interest in Blender had grown beyond a single studio. In 2002, with the establishment of the Blender Foundation, the software was released under an open-source license, inviting developers and artists worldwide to contribute. This transition unlocked rapid improvements: a Python API for automation, improved modeling tools, a more robust rendering engine, and early steps toward a node-based shading system. The open-source model also fostered extensive community resources—tutorials, add-ons, and forums—that accelerated learning for beginners and seasoned professionals. Blender’s openness turned it from a departmental tool into a shared platform for experimentation and education.
Blender's evolution: from in-house tool to community-driven platform
Since 2002, Blender has evolved through a series of major releases that expanded capabilities while preserving accessibility. The 2.x era introduced a more polished user interface, powerful mesh modeling operations, a built-in compositor, and a cohesive workflow that unified 3D, video editing, and texturing in one app. The project’s growth was never about chasing a single feature set; it was about enabling artists to prototype ideas quickly. Today, Blender keeps refining its core tools—modeling, sculpting, rigging, shading, and rendering—while also nurturing an ecosystem of add-ons and learning resources that empower users at all skill levels.
Getting started in Blender today: installation and basics
Starting with Blender today is straightforward on Windows, macOS, or Linux. Visit blender.org to download the latest stable release, then follow the guided setup to configure preferences for navigation and input devices. The initial workspace presents several panels: the 3D viewport, outliner, properties, and an optional node editor for shading. Beginners should focus on basic navigation (orbit, pan, zoom), creating primitive objects (cube, cylinder, plane), and learning the edit mode to modify vertices, edges, and faces. Practical first steps include resizing objects, applying simple transforms, and saving projects with a clear naming convention. Blender’s built-in tutorials and community forums provide a gentle learning curve for absolute beginners while offering depth for more advanced users.
Core concepts you will learn first: navigation, modeling, shading, and rendering
A strong grounding in Blender starts with understanding the interface and navigation: how to switch between object and edit modes, how to use hotkeys for faster work, and how to customize the layout to your workflow. Modeling introduces the concept of adding, extruding, and manipulating geometry. Shading teaches you to apply materials, adjust roughness and specular highlights, and preview surfaces with real-time shading. Rendering completes the cycle by producing a final image or animation, with lighting and camera settings tuned for the scene. By mastering these core concepts, you’ll build a reliable foundation for more complex projects such as sculpting, animation, and visual effects.
Practical first project blueprint: a simple scene to practice core skills
For a hands-on start, create a small desk scene: a mug on a plate with a simple tabletop. Begin by adding a cylinder for the mug, extruding its walls to form the body, and using a torus for the handle. Create a circular plate with a thin disk and bevel the edge for realism. Add a basic material to each object and place a light and camera to frame the scene. Use the render preview to adjust shadows and reflections. This project reinforces fundamentals—transform operations, object relationships, materials, lighting, and rendering—while providing a tangible result you can iterate on.
Common pitfalls and troubleshooting when starting with Blender
New users often stumble over the difference between object mode and edit mode, or struggle with navigation in 3D space. A common pitfall is working in Edit Mode without understanding how selection modes affect geometry. Performance issues may appear on older hardware when working with high-poly meshes or complex shaders. To combat these, keep your scene organized with collections, enable simplified shading during intermediates, and save incremental versions frequently. Another frequent issue is misplacing the 3D cursor; learning how to reset and snap can prevent accidental transformations.
How blender fits into creative workflows: bridging kitchen artistry and digital sculpture
Blender’s versatility makes it a natural companion for both hobbyists and professional artists. In the kitchen, culinary creatives use Blender to visualize recipe animations, 3D prints of kitchen tools, or stylized food renders. The same toolchain applies to hobbyist projects and classroom demos—modeling a bowl, rigging a character for a short animation, or simulating lighting for a product shot. The cross-disciplinary potential is one of Blender’s strengths: you can prototype concepts quickly, iterate on design, and render compelling visuals that communicate ideas clearly.
Tools & Materials
- Computer with internet access(Any reasonably modern machine capable of running Blender; ensure OS is up-to-date)
- Blender software(Download latest stable release from blender.org)
- Keyboard and mouse with middle mouse button(MMB for orbiting, wheel to zoom, Shift to pan)
- Reference images or concept art(Helpful for modeling practice and composition)
- External storage or cloud backup(Optional for backing up projects and assets)
- Screen capture or note-taking tool(Useful for capturing steps and recording progress)
- Notebook or digital notes app(Keep a log of learned techniques and settings)
Steps
Estimated time: 60-90 minutes
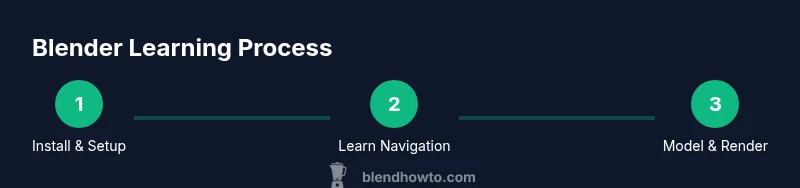
- 1
Install Blender and set preferences
Download the latest stable release from Blender.org and install it on your operating system. Open Blender and reset to default startup if needed. Configure a comfortable layout by enabling the 3D Viewport, Outliner, and Properties panels, then save your startup file as a personal template.
Tip: Use the Quick Favorites menu (Q) to access your most-used tools quickly. - 2
Learn navigation basics
Master orbit (mouse drag with middle button), pan (Shift + middle button), and zoom (mouse wheel). Practice switching between solid and wireframe shading to understand geometry, and try snapping to vertices for precise edits.
Tip: Customize your navigation speed in Preferences to suit your workflow. - 3
Create and edit a simple primitive
Add a cube, switch to Edit Mode, and experiment with selecting vertices, edges, and faces. Use the Extrude operation to form simple geometry and practice moving, rotating, and scaling components.
Tip: Press Tab to toggle between Object and Edit modes; use G, R, and S for quick transforms. - 4
Apply basic materials and lighting
Create a simple material using the Shader Editor or Material Properties. Add a light source and position it to highlight the model’s features. Preview with rendered shading to gauge realism.
Tip: Keep materials simple at first; focus on getting the shape and lighting right before adding textures. - 5
Set up a quick render
Frame your scene with a camera, adjust resolution, and choose a render engine (Eevee for fast previews or Cycles for realism). Run a lower-sample render first, then refine until you’re satisfied.
Tip: Use render preview viewport to iteratively tweak lighting and shading. - 6
Save, organize, and review progress
Save your project with a clear versioning structure. Create a dedicated folder for assets, textures, and renders. Review your progress after each session and note improvements for the next iteration.
Tip: Enable Autosave and create regular backups to avoid data loss.
Frequently Asked Questions
What is blender 1994?
Blender 1994 refers to the origin of Blender as an in-house tool created in 1994. It marks the starting point of a free, open-source 3D software project that expanded into a global community-driven platform. The term highlights Blender’s long history and evolution into a versatile toolkit for modeling, animation, and rendering.
Blender 1994 is the origin of the Blender project, a free 3D tool that grew into a global community-driven platform.
Who started Blender?
Blender was initiated by Ton Roosendaal in the Netherlands as an in-house solution. The project later opened up to the community, and the Blender Foundation helped formalize development and support open-source collaboration.
Ton Roosendaal started Blender, and the project grew through community collaboration.
When did Blender become open source?
Blender became open source in 2002 after the formation of the Blender Foundation, which funded and coordinated development under an open-source license.
Blender became open source in 2002 with the Blender Foundation.
Is Blender still free to use?
Yes. Blender remains free to download and use, with no mandatory subscription. It is maintained by the Blender Foundation and a global community of contributors.
Yes, Blender is still free and open to everyone.
Do I need a powerful computer to run Blender?
Blender runs on a wide range of hardware. Beginners can start on modest systems, while complex scenes benefit from more RAM, a faster CPU, and a capable GPU.
You can start on a modest computer, and upgrade hardware as your projects get heavier.
What’s the best way to learn Blender for beginners?
Begin with the official tutorials and practice by building small, repeatable projects. Join community forums, watch short videos, and gradually tackle more complex tasks like lighting, shading, and animation.
Start with official tutorials, then practice small projects and ask questions in the community.
Watch Video
What to Remember
- Start with Blender basics and build a solid foundation
- Practice navigation, modeling, shading, and rendering
- Save frequently and organize projects with clear versions
- Explore the Python API for automation as you advance
- Engage with the Blender community for tips and feedback