Mastering Blender 2.93: A Practical Beginner Guide
Learn Blender 2.93 with this comprehensive beginner guide. From installation to modeling, shading, and rendering, this practical, step-by-step approach helps artists start creating with 2.93.

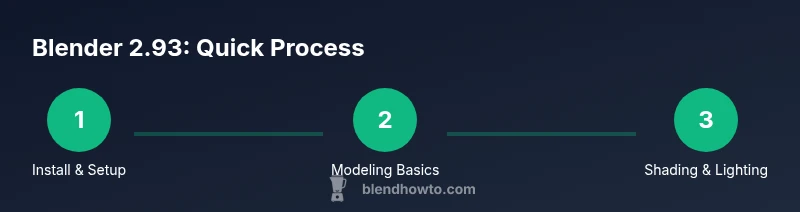
With Blender 2.93, you will install the software, configure a productive workspace, and complete a first basic project—from modeling to shading and rendering. This guide covers the core workflows, UI changes, and practical tips so you can start creating sooner. By the end, you’ll have a solid foundation to tackle more complex scenes using the 2.93 tools.
Why blender 2.93 remains a strong starting point for beginners
According to BlendHowTo, blender 2.93 remains a reliable entry point for learners due to its Long-Term Support status and steady feature set. The release emphasizes stability, friendly defaults, and a clear workflow that helps new users grasp modeling, shading, lighting, and rendering without chasing every new feature in newer versions. For home hobbyists and aspiring 3D artists, starting with 2.93 minimizes early frustrations and provides a solid foundation you can carry into future Blender versions. In this section, we outline practical expectations and how to approach learning with 2.93, focusing on core tasks, keyboard shortcuts, and a systematic practice routine. The goal is to build muscle memory for navigation, selection, and viewport manipulation. Throughout this guide, you’ll see repeated references to the Blender 2.93 interface changes and defaults that reduce guesswork. With time, you’ll develop a comfortable rhythm for modeling, applying materials, lighting scenes, and rendering. BlendHowTo’s analysis shows that a deliberate, task-based approach yields faster competence than trying to master every feature at once.
What's new in blender 2.93: Core improvements
Blender 2.93 brings thoughtful refinements that help beginners pick up the basics more quickly while offering new capabilities for more advanced users. Expect improved geometry nodes workflows, better sculpting stability, and UI polish that makes common tasks more discoverable. The shading system gains more reliable material presets, and the viewport performance benefits from optimizations that keep the 3D view responsive as scenes grow. While 2.92 introduced many changes, 2.93 emphasizes consistency and stability across platforms, with clearer defaults and streamlined addon integration. For new learners, these improvements translate into shorter setup times, fewer surprises during your first projects, and a smoother path from practice to production-level scenes. Overall, 2.93 maintains Blender’s philosophy: powerful tools that remain accessible through practical tutorials and patient, hands-on exploration. BlendHowTo analysis notes that the version’s focus on reliability makes it particularly well-suited for first projects and learning milestones.
System requirements and setup for blender 2.93
To get started with blender 2.93, you should work on a reasonably modern machine with a capable GPU and enough RAM to keep the viewport responsive during modeling and shading. The goal is to ensure you won’t be bottlenecked by performance while you learn. Blender 2.93 supports Windows, macOS, and Linux, and it benefits from up-to-date graphics drivers and a stable OpenGL backend. Before you begin, take a few minutes to organize your workspace: clear the Blender startup scene, set your preferred units, and decide whether you’ll work in metric or imperial. This foundation helps you translate real-world measurements into your projects and keeps your learning consistent. After you have the software installed, launch Blender, adjust the preferences for your keyboard and mouse, and pin the panels you use most often. A thoughtful setup pays off in every session, from quick experiments to longer practice projects.
Installing Blender 2.93: a quick, practical guide
Installing Blender 2.93 involves a few straightforward steps. First, download the installer from the official Blender website. Choose the correct installer for your operating system, then run the installer and follow the on-screen prompts to complete the installation. When the install finishes, launch Blender and accept the default startup scene or replace it with a project you plan to work on. If you rely on external add-ons, install them through the Preferences menu after the initial run to keep your environment clean during first experiments. Finally, save your first project file to ensure your configuration is preserved between sessions. If you’re updating from an older Blender version, consider reviewing your preferences and re-mapping keyboard shortcuts to match your current workflow.
Navigating the interface in Blender 2.93
Blender’s interface centers on the 3D Viewport, the Outliner, and the Properties editor. In 2.93, you’ll notice improved contextual hints and more consistent tooltips, which reduces the time you spend hunting for the right option. Begin by selecting objects with the left mouse button, using the middle mouse button to orbit, and the scroll wheel to zoom. The Outliner helps you manage complex scenes by grouping objects into collections, while the Properties editor houses your materials, render settings, modifiers, and more. A smart starting habit is to customize the layout for your current task: keep modeling tools in one panel, materials in another, and a quick access render panel visible for quick previews. Remember to save frequently and use the undo/redo stack to explore non-destructive changes. Practicing these navigation patterns makes it easy to shift from a simple cube to a complete scene in a few sessions.
Core workflow: modeling, shading, lighting, rendering
In Blender 2.93, a typical beginner workflow starts with defining a clear goal for your scene, then modeling the main shapes, applying materials, and setting up lighting and a camera. Start by adding primitive shapes (like a cube or plane), then enter Edit Mode to refine your mesh with extrude and inset operations. Use simple modifiers such as Subdivision Surface to smooth geometry without over-adding vertices. For shading, switch to the Shade workspace, create a basic material with the Principled BSDF shader, and adjust roughness and base color to achieve a realistic look. Add a few light sources—key, fill, and rim lights—to create contrast, then position a camera for your final render. Finally, test with a small render to check composition, materials, and lighting, then iterate. Throughout the process, keep files organized with meaningful names and incremental saves. By focusing on a repeatable workflow, you can finish the lesson with a usable scene and a reproducible method for future projects.
Rendering engines in Blender 2.93: Eevee vs Cycles
Blender 2.93 includes two main rendering engines: Eevee, which is fast and ideal for previews, and Cycles, which provides physically based rendering for higher realism. Eevee uses rasterization with clever approximations, making it great for iterative design feedback and animation previews. Cycles traces light paths for more accurate shading and materials, which yields outstanding image quality at the cost of longer render times. In your early practice, begin with Eevee to quickly validate lighting and composition, then switch to Cycles for final renders and portfolio-ready images. The 2.93 version brings improvements in both engines, including more stable real-time reflections, improved ambient occlusion, and better denoising workflows. A practical tip is to enable denoising during post-processing or in the render settings to reduce grain in mid-range render times. Understanding when and why to switch engines helps you optimize both speed and quality as your projects grow.
Importing and exporting: formats and pipelines
Blender 2.93 supports a broad range of import and export formats, including common 3D file types like OBJ, FBX, and GLTF. When bringing assets from external tools, check scale, orientation, and units to ensure consistency with your scene. For workflow efficiency, keep textures and materials organized in a dedicated folder and use relative paths when sharing projects. In the export process, choose formats aligned with your target pipeline: GLTF for web and real-time apps, FBX for game engines, or OBJ for simple geometry transfer. If you rely on external texture maps, ensure you attach them correctly in the shader nodes and verify that the texture coordinates remain consistent after import. Finally, save a copy of your project before exporting, and test the resulting file in the target application to catch compatibility issues early.
Performance tips and common troubleshooting
If Blender 2.93 feels slow or unresponsive, start with simple scene optimization: remove unused objects, reduce texture sizes for previews, and enable simplified shading in the viewport. Use the Lock Camera to View option to align your shot precisely, and switch from high-poly models during early iterations to test ideas more quickly. Keeping drivers up to date and using the correct render engine for your task also helps. When errors occur, check the console for messages, review the modifier stack for failures, and verify your file paths for missing textures. Regularly save incremental backups so you can revert to a working state if something breaks. If you’re still stuck, consult the official Blender docs, search for community tutorials on BlendHowTo, and don’t hesitate to restart the project from a clean template to rule out setup issues.
Learning paths and resources to continue with Blender 2.93
To keep progressing after you complete the basics of blender 2.93, establish a practice plan with small, achievable projects that build on each other. The official Blender documentation is a primary resource, along with tutorial videos, project-based courses, and community forums. Create a personal project calendar and track progress with fixed milestones, like modeling a basic character, texturing a simple prop, and composing a final render with lighting. Explore BlendHowTo’s channel and guides for structured, task-focused lessons that simplify advanced topics over time. Practice consistently, print out quick reference sheets for hotkeys, and critique your own work by comparing it to reference images. The BlendHowTo team believes that steady, focused practice paired with real feedback accelerates skill growth and helps you become proficient in Blender 2.93 faster.
Tools & Materials
- Computer with a capable GPU(Ensure your system can run Blender smoothly.)
- Blender 2.93 installer(Download from the official Blender website.)
- Mouse or graphics tablet(Helpful for sculpting and precise selection.)
- Reference images and concept art(Organize assets for quick access while modeling.)
- External storage for assets(Back up large projects and textures.)
Steps
Estimated time: 2-3 hours
- 1
Prepare your workspace
Open a new Blender 2.93 project, clear the default scene, set a metric unit system, and arrange a layout you will use for modeling and shading.
Tip: Create a dedicated folder for this project and name it clearly. - 2
Install Blender 2.93
Download the installer from Blender’s official site, run it, and follow the prompts to complete installation. Start Blender to confirm the setup works.
Tip: If updating from an older version, review keyboard shortcuts to ensure they match your workflow. - 3
Open a new project and customize layout
Switch to a modeling-friendly layout: arrange the 3D Viewport, Outliner, and Properties panels for quick access. Save this as your startup file if you prefer it.
Tip: Lock essential panels in place so your workflow stays consistent. - 4
Create a simple model
Add a primitive, switch to Edit Mode, and use Extrude and Loop Cut to shape your form. Apply a Subdivision Surface modifier for smoothness.
Tip: Use the mirror modifier for symmetry to speed up initial sculpting. - 5
Apply basic materials
Create a new Material with a Principled BSDF shader, adjust base color, roughness, and metallic values to achieve a solid baseline.
Tip: Start with neutral colors and scale roughness to control glare. - 6
Set up lighting
Add a three-point light setup (key, fill, rim) and adjust intensity to create clear contrast without blowing out highlights.
Tip: Use an HDRI environment texture for realistic ambient light. - 7
Add a camera and render a test
Place a camera to frame your model, enable a quick render in Eevee to preview lighting and composition.
Tip: Toggle between render engines to compare speed and quality. - 8
Final render in Eevee/Cycles
For fast previews, render in Eevee; for higher realism, switch to Cycles and adjust samples and denoising.
Tip: Use denoising and compositing for clean final output. - 9
Export your project
Save your Blender file and export to your target format (e.g., GLTF, OBJ, FBX) with proper settings.
Tip: Always test the exported file in the target software. - 10
Review and iterate
Critique your render, adjust materials and lighting, and iterate on the model to improve quality and realism.
Tip: Keep a changelog to track design decisions and learning progress.
Frequently Asked Questions
What is Blender 2.93?
Blender 2.93 is a long-term support release that provides a stable, consistent set of features for 3D modeling, shading, lighting, and rendering. It’s designed to be approachable for beginners while remaining powerful for advanced work.
Blender 2.93 is a stable, beginner-friendly version with broad 3D capabilities.
Is Blender 2.93 suitable for beginners?
Yes. The 2.93 release emphasizes stability and clear defaults, which helps new users learn core workflows without being overwhelmed by frequent changes in newer versions.
Yes, it’s beginner-friendly due to its stability and clear defaults.
How do I install Blender 2.93?
Install Blender 2.93 by downloading the official installer for your OS, running it, and following the prompts. After installation, launch Blender and adjust initial preferences as needed.
Download, install, and customize preferences as needed.
What are Eevee and Cycles in Blender 2.93?
Eevee is a fast real-time renderer suitable for previews, while Cycles offers physically based rendering for higher realism. Use Eevee for iterations and Cycles for final renders when quality matters.
Eevee for speed, Cycles for realism.
Can I import/export files in Blender 2.93?
Blender 2.93 supports formats like OBJ, FBX, and GLTF. Check scale, orientation, and textures during import/export to maintain consistency with your project.
Supports OBJ, FBX, GLTF; verify scale and textures.
Where can I find official tutorials for Blender 2.93?
Start with Blender's official docs and recommended beginner tutorials, plus community channels like BlendHowTo for task-focused lessons.
Official docs plus community channels for tutorials.
Watch Video
What to Remember
- Master Blender 2.93 basics with practical steps
- Set up a repeatable workspace for faster starts
- Model, shade, light, and render a simple scene
- Experiment with Eevee for speed and Cycles for realism
- Keep projects organized with clear naming and structure