Mastering Blender 2.8: A Practical How-To Guide
A complete, step-by-step guide to Blender 2.8 for beginners, covering installation, UI, workspaces, modeling, shading, Eevee rendering, animation basics, and common pitfalls.

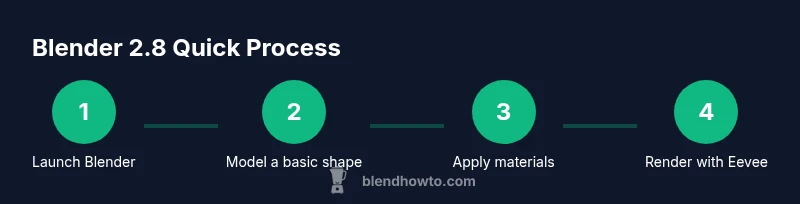
Blender 2.8 marked a major UI overhaul and introduced Eevee, new workspaces, and streamlined workflows that make 3D more approachable for beginners. This guide covers installation, navigation, and core tasks like modeling, shading, and rendering so you can start creating right away.
Blender 2.8: Core changes and why they matter
Blender 2.8 represents a turning point for the software. After years of iterative tweaks, the 2.8 release delivered a refreshed, more approachable user interface, improved defaults, and a real-time rendering engine called Eevee. The goal was to lower barriers to entry for beginners while giving power users a more efficient workspace. For home cooks exploring 3D recipe visuals or hobbyists building simple scenes, the update makes it faster to get to a polished result. According to BlendHowTo, the emphasis on readable defaults and a consistent keyboard and mouse scheme helps new users build confidence quickly. The changes also set Blender on a course toward modern, GPU-accelerated workflows that scale with more complex projects.
In addition to the UI refresh, 2.8 introduced broader changes to how workspaces are organized and how materials and shading are set up. This article focuses on practical steps you can follow to move from first launch to a usable project in a single afternoon, while also outlining best practices you can carry into newer Blender versions. The BlendHowTo team notes that many beginners underestimate how quickly they can prototype a scene once the interface becomes predictable, so you’ll see a clear path from rough shapes to refined renders.
From a learning perspective, Blender 2.8’s emphasis on non-destructive workflows—using modifiers, collections, and layered shading—parallels the way many professionals approach 3D projects. This means you’ll learn not just a tool, but a process you can reuse across future Blender versions. For those who want to deepen their understanding, we’ll provide structured steps, tips, and short exercises you can perform in under an hour to reinforce the concepts as you progress.
As you read, keep in mind that visual clarity and disciplined practice are more important than chasing perfect results on your first try. The BlendHowTo team suggests starting with a simple object and a handful of modifiers to see immediate feedback, which builds intuition about how different parts of a scene interact.
Tools & Materials
- Computer with internet access(Stable connection, minimum 2 GB RAM recommended for Blender 2.8 projects.)
- Blender 2.8 installer (official build)(Download from blender.org; ensure you choose the 2.8 series.)
- Mouse with middle mouse button(Needed for orbit/zoom in the 3D viewport.)
- Keyboard (for shortcuts)(Common keys: G, S, R, E, X, Y, Z.)
- External storage for backups(USB drive or cloud storage helps versioning.)
- Optional: graphics tablet(Helpful for sculpting and painting but not required.)
- Reference images or blueprints(Use as guides when modeling.)
Steps
Estimated time: 60-90 minutes
- 1
Prepare your workspace
Launch Blender 2.8 and reset to the default startup file to have a clean baseline. Familiarize yourself with the Layout workspace and locate the 3D Viewport, Outliner, and Properties panels. This setup reduces confusion as you begin modeling.
Tip: If your screen feels cluttered, switch to a simplified layout (Topbar > Workspace) and hide panels you won’t use in this task. - 2
Install Blender 2.8 and confirm readiness
If you haven’t installed Blender 2.8 yet, download the official 2.8 build and run the installer. Open Blender and verify that the splash screen shows 2.8.x. Check that the Preferences reflect your hardware (GPU acceleration if available).
Tip: Update graphics drivers before heavy work to avoid viewport lag. - 3
Navigate the interface and use core shortcuts
Learn the basic navigation: middle mouse button to rotate, shift+middle mouse to pan, and mouse wheel to zoom. Practice selecting objects, moving them with G, and switching to Edit Mode with Tab. These basics unlock nearly all subsequent tasks.
Tip: Customize a few shortcuts (Edit > Preferences > Keymap) to fit your workflow. - 4
Create your first primitive and switch to Edit Mode
Add a cube (Shift+A > Mesh > Cube) and enter Edit Mode (Tab). Practice selecting vertices, edges, and faces, then use E to extrude, F to fill, and G to grab. This builds hands-on familiarity with topology.
Tip: Try adding a second primitive and align it to the first to visualize simple assembly. - 5
Adjust the object's scale and apply transforms
In Object Mode, scale the object to a desired size (S) and apply the transformation (Ctrl+A > Apply > All Transforms). This step ensures future modifiers and simulations behave predictably.
Tip: Apply transforms only after positioning; otherwise, you may reintroduce scale issues later. - 6
Add a simple modifier to learn non-destructive workflows
Add a Subdivision Surface modifier to smooth the mesh (Modifiers tab > Add Modifier > Subdivision). Increase levels to see the effect without altering the base geometry.
Tip: Keep subdivision low during early prototyping to preserve performance. - 7
Set up a basic material to preview shading
Switch to the Shading workspace, create a new material, and connect a simple Principled BSDF to the Material Output. Adjust base color and roughness to observe how lighting interacts with the surface.
Tip: Experiment with a second material using a different color to compare reflections. - 8
Render a quick preview to see results
Choose Eevee as the render engine (Render Properties > Engine: Eevee) for fast previews. Enable simple lighting and a basic camera angle, then render a test image (F12).
Tip: Keep render samples low during practice to speed up iteration.
Frequently Asked Questions
What is Blender 2.8 and why was it a milestone?
Blender 2.8 introduced a significant UI overhaul, improved workspaces, and Eevee, a real-time render engine. It made Blender more approachable for beginners while expanding professional capabilities.
Blender 2.8 marked a major upgrade with a friendlier UI and Eevee for fast previews; it’s a milestone that many beginners notice first.
Can Blender 2.8 run on older hardware?
Blender 2.8 supports a wide range of hardware, but performance depends on your GPU and RAM. For best results, ensure drivers are up to date and use Eevee with low sample settings on older machines.
It runs on many computers, but you’ll want a decent GPU and more RAM for smooth performance.
What is the difference between Eevee and Cycles in Blender 2.8?
Eevee is a real-time render engine designed for speed and interactivity, great for previs and interactive work. Cycles is a path-tracing engine that produces more physically accurate lighting but is slower. Both can be used in Blender 2.8.
Eevee is fast and good for previews, while Cycles gives higher quality renders but takes longer.
Which workspaces should beginners focus on in Blender 2.8?
Begin with Layout and Modeling to build scenes, then move to Shading for materials and Eevee for rendering. As you progress, explore UV Editing, Animation, and Sculpting to expand capabilities.
Start with Layout, Modeling, then Shading and Eevee for rendering.
How do I save my Blender projects effectively?
Save regularly using incremental versions to avoid losing progress. Use File > Save As to create versioned files, and enable auto-save in Preferences for extra protection.
Save often, and use versioned files so you can revert if needed.
Where can I find authoritative learning resources for Blender 2.8?
Official Blender Manual provides in-depth guidance, and credible courses or university-level resources help reinforce fundamentals. See the references section for links to high-quality materials.
Check the official Blender Manual and reputable learning resources for in-depth guidance.
Watch Video
What to Remember
- Learn Blender 2.8’s UI overhaul and how it streamlines workflows
- Master basic navigation and modeling with simple primitives
- Experiment with Eevee for fast, real-time previews
- Adopt a non-destructive workflow using modifiers and materials
- Practice saving and organizing projects for scalable growth