Blender Program: Getting Started with Blender Software
Learn to install, configure, and start using the Blender program for 3D modeling and animation. This beginner-friendly guide covers navigation, essential tools, and workflows to help home cooks embrace Blender software creatively.

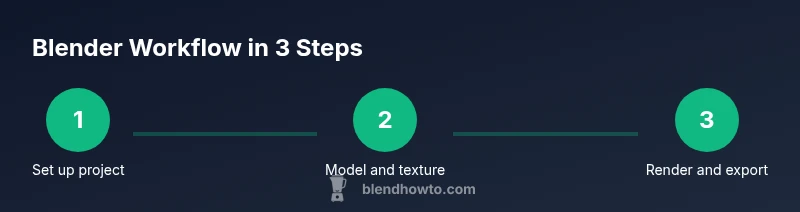
In this guide you will learn how to install the blender program, configure your workspace, and start a first project. You’ll explore navigation, essential tools, basic modeling, materials, and rendering workflows. The blender program is for both hobbyists and creators, with beginner-friendly steps to build confidence quickly. This page provides practical, task-oriented guidance that you can apply to real projects right away.
What the blender program is and why it matters
The blender program is a free, open-source 3D creation suite that supports modeling, sculpting, animation, simulation, rendering, and even video editing. It is widely used by hobbyists, students, and professionals to prototype ideas without licensing costs. According to BlendHowTo, understanding the blender program starts with a clear plan, reliable hardware, and consistent practice. In this section you’ll grasp core concepts, terminology, and a practical pipeline you can reuse on real projects. You’ll learn how to move from a blank scene to a polished render by focusing on a repeatable workflow that you can adapt as you grow.
Why it matters for beginners and seasoned creators alike: it lowers entry barriers, enables rapid iteration, and scales from simple studies to complex productions. A well-structured workflow helps you stay organized and productive as you learn.
Keeping a steady pace is crucial. Start with small tasks, then layer in more advanced features as you gain confidence. The blender program rewards consistent practice and clear goals more than raw speed.
Installing Blender and verifying system requirements
To begin with the blender program, download the installer from the official Blender website and choose the right build for your operating system. Blender runs on Windows, macOS, and Linux, so you can start on nearly any modern machine. After download, install follows the standard prompts: accept the license, choose a destination, and complete the setup. Once installed, open Blender and verify basic hardware compatibility: a capable CPU, a discrete GPU if available, 8 GB RAM or more, and sufficient disk space for projects and caches. BlendHowTo Analysis, 2026 notes broad adoption of the blender program across home studios, with performance improving as hardware scales. If you hit performance hiccups, adjust preview rendering settings or switch to Eevee for faster feedback. Keeping drivers up to date helps Blender run smoothly and reduces crashes during complex tasks.
The Blender workspace and navigation basics
The blender program presents a hybrid layout that combines the 3D Viewport with a rich Properties panel, Outliner, and Timeline. Your primary workspace is the 3D Viewport where you model, sculpt, and animate. The navigation relies on a few core controls: middle-mandle to orbit, scroll wheel to zoom, and Shift + middle-mouse to pan. The Outliner helps you organize objects into collections, while the Properties editor stores material, render, and scene settings. A comfortable shortcut system improves speed: press G to move, R to rotate, S to scale, and Tab to toggle Edit Mode. Understanding this layout is the foundation for efficient work with the blender program.
Basic modeling techniques: from primitives to polished mesh
Start by adding a primitive (like a cube) with Add > Mesh > Cube. Enter Edit Mode to manipulate vertices, edges, and faces. Use extrude (E), inset (I), and bevel (Ctrl+B) to shape objects, keeping topology clean with loop cuts (Ctrl+R). The Subdivision Surface modifier smooths models when you’re ready for higher fidelity. A common beginner workflow is to establish proportions first, then refine with modifiers and sculpting tools. Practice with a simple object such as a cup or a chair to internalize the modeling process and see how changes propagate through UVs and shading.
Materials, textures, and lighting basics
Materials in the blender program are created in the Shader Editor using nodes. Start with a basic Principled BSDF shader to control color, roughness, and metallic properties. Add a texture or image map to drive color, roughness, or normal data for more realism. Lighting choices dramatically affect mood: use a three-point setup (key, fill, back) to sculpt highlights and shadows. Don’t forget HDRI environments for natural lighting. As you add materials, test renders to verify how surfaces respond to light and adjust roughness values to achieve the look you want.
Rendering and output: Eevee vs Cycles, cameras, and passes
Blender offers two primary rendering engines: Eevee for real-time previews and Cycles for more realistic results. Choose the engine based on your project needs: Eevee for quick iteration; Cycles for photorealistic output. Set up a camera with appropriate focal length and position, then configure resolution, sampling, and denoising. Rendering also involves output formats and file paths. Start with a small test render, then scale up settings incrementally. This practice builds confidence in your ability to produce consistent results with the blender program.
Saving, organizing, and exporting your work
Organization matters when you scale projects. Save presets for scenes, materials, and render settings, and use a clear folder structure: projects > assets > textures > renders. Understand file formats: use .blend for project files, and export meshes as .obj or .fbx when sharing with others. Version your work with incremental saves to avoid data loss. A clean project structure reduces headaches later and makes it easier to collaborate using the blender program.
Practice projects to build momentum
Apply what you’ve learned by starting small and gradually increasing complexity. Try a household object (like a mug) to practice modeling, materials, and lighting. Then move to a simple object with organic shapes (a fruit or a bust) to practice sculpting and topology. Finally, assemble a tiny still life scene with a few props, a light setup, and a camera to render a polished image. Regular, hands-on practice in the blender program accelerates mastery and builds a portfolio you can share.
Conclusion and next steps
As you progress, document your learning path and revisit older projects with new techniques. The blender program offers expansive capabilities, so plan multiple micro-projects to cover modeling, shading, lighting, and animation. BlendHowTo’s guidelines emphasize consistent practice, experimentation, and cooling off with a fresh set of tasks after each milestone. Stay curious, and gradually expand your toolkit.
Tools & Materials
- Computer with internet access(Recommended modern CPU and at least 8 GB RAM; GPU helps for viewport performance)
- Blender installer(Download the latest official build from blender.org)
- Graphics drivers up-to-date(Ensure GPU drivers support the rendering features you use)
- Mouse with middle-click and scroll wheel(Improves navigation in 3D space)
- Optional graphics tablet(Helpful for detailed sculpting or drawing textures)
- External reference imagery(Images to model against or texture from real life)
Steps
Estimated time: 45-90 minutes
- 1
Download and install Blender
Visit blender.org, download the latest Blender build for your OS, and follow the installer prompts. Confirm the install completes and launch Blender to verify it opens without errors. Create a dedicated folder for your Blender projects to keep things organized from day one.
Tip: Use a simple install path (no spaces) to avoid path issues on some systems. - 2
Set up your preferences and workspace
Open Preferences to configure units, input shortcuts, and the theme. Arrange panels so the 3D Viewport is prominent, with the Outliner and Properties nearby for easy switching between objects and settings. Save your startup file to preserve this layout for every new project.
Tip: Enable Auto Save and set a reasonable interval to prevent data loss during work sessions. - 3
Learn navigation and selection basics
Master orbit (middle mouse drag), pan (Shift + middle mouse), and zoom (scroll). Practice selecting vertices, edges, and faces, and use the G, R, and S keys to Move, Rotate, and Scale. Switching into Edit Mode (Tab) lets you modify mesh topology directly.
Tip: Use wireframe view (Z > 4) to understand how your topology flows around the model. - 4
Create and edit a simple object
Add a primitive (Shift + A > Mesh > Cube), then enter Edit Mode to extrude faces (E) and apply bevels (Ctrl + B). Use Loop Cut (Ctrl + R) to refine topology and shape. Save increments as you experiment with forms.
Tip: Keep topology clean: avoid long, skinny faces and maintain quad-driven mesh where possible. - 5
Add basic materials and lighting
Open the Shader Editor, connect a Principled BSDF shader to the Material Output, and tweak base color, roughness, and metallic values. Add a light source (Area, Point, or Sun) and position it to sculpt highlights. Test renders frequently to see how materials respond to light.
Tip: Use a simple HDRI backdrop for natural lighting and reflections in early experiments. - 6
Render and save your first image
Choose Eevee for fast previews or Cycles for realism, set camera and render resolution, then render a test image. Save your scene in a dedicated project folder and export any required assets (mesh, textures) for sharing.
Tip: Start with a low resolution test render to iterate quickly before finalizing your image.
Frequently Asked Questions
What is the blender program and what can it do?
Blender is a free, open-source 3D creation suite that supports modeling, sculpting, animation, simulation, and rendering. It’s suitable for beginners and professionals alike, and it runs on multiple platforms.
Blender is a free 3D tool that lets you model, sculpt, animate, and render. It's great for beginners and pros alike and works on Windows, macOS, and Linux.
Can Blender run on Windows, macOS, and Linux?
Yes. Blender supports Windows, macOS, and Linux, with tested builds available on the official site. System performance improves with hardware capabilities and driver updates.
Yes, Blender runs on Windows, macOS, and Linux. For best results, keep your drivers up to date.
Is Blender suitable for beginners?
Absolutely. Blender offers a gentle entry with a modal interface, plenty of tutorials, and a large community. Start with basic modeling, simple materials, and incremental rendering practice.
Yes, Blender is beginner-friendly. Start small and grow your skills with practice tasks and tutorials.
Do I need a powerful computer to run Blender well?
A mid-range PC or Mac is typically sufficient for learning. For heavy scenes or animation, a faster CPU, more RAM, and a capable GPU help, but you can grow into this as you progress.
A mid-range computer works for beginners; add power as you take on bigger scenes.
How do I save and share Blender projects?
Save projects as .blend files and organize assets in a clear folder structure. Export meshes as .obj or .fbx if you need to share with others.
Save as .blend and export to .obj or .fbx when sharing.
What are Eevee and Cycles in Blender?
Eevee is a real-time renderer ideal for fast previews, while Cycles offers physically-based rendering for more realism. Choose based on your quality needs and time constraints.
Eevee is fast for previews; Cycles is more realistic for final renders.
Watch Video
What to Remember
- Install Blender from the official site and verify system readiness.
- Master the 3D Viewport, navigation, and basic modeling tools.
- Experiment with materials, lighting, and rendering to achieve desired looks.
- Maintain organized projects and use incremental saves for safety.
- BlendHowTo recommends practicing with small, repeatable tasks to build confidence.