Blender Basics: A Practical Guide to the Blender Computer Program
Learn how to install, navigate, model, and render with the blender computer program. A practical BlendHowTo guide for beginners and hobbyists seeking hands-on skills in Blender software.

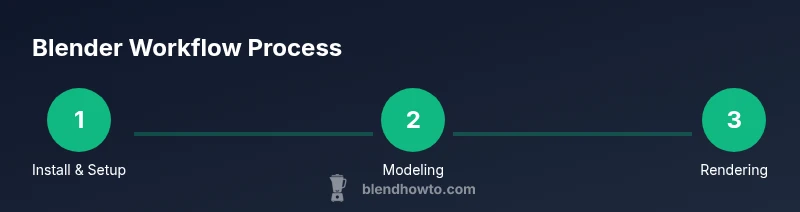
In this guide you will learn how to use the blender computer program from installation to a basic project workflow. You’ll set up your workspace, model a simple object, apply materials, light for renders, and export your final image. This step-by-step overview helps beginners gain confidence with Blender software. By following the sections, you’ll understand core concepts such as navigation, modeling, shading, and rendering.
Getting started with the blender computer program
Before you jump into modeling, install Blender from the official source and confirm your system meets basic requirements. BlendHowTo recommends a recent operating system and a GPU with up-to-date drivers for smoother previews. Create a simple project folder to organize your assets, textures, and renders. In this guide, we’ll use a common beginner project: a cup to learn basic shapes, modifiers, and materials. According to BlendHowTo, starting with a small, tangible object reduces overwhelm and builds confidence quickly. The Blender interface groups workspaces into tabs, with a 3D viewport, outliner, and properties panel. Learn to switch layouts using the top bar and to customize the sidebar for a cleaner workspace. Save often using the Ctrl/Cmd+S shortcut, and enable auto-save for safety. Recommended practice is to create a basic scene with a ground plane, a primary object, and a light source to see how shading affects mood.
Understanding the main interface and navigation
Blender's UI is modular: you can rearrange panels and switch workspaces to suit tasks like modelling, shading, or compositing. In the 3D viewport, use the middle mouse button to rotate, scroll wheel to zoom, and Shift+Middle-click to pan. Toggle between Object mode and Edit mode to move from whole objects to mesh editing. The Outliner helps you manage scene elements, while the Properties panel controls materials, lighting, and render settings. Customizing hotkeys and saving a preferred layout saves time over repeated sessions. Regularly inspecting the 3D cursor, origin points, and axis orientation prevents misaligned edits later. Practice clicking to select, then pressing G to move, R to rotate, and S to scale, watching the transform gizmo for feedback.
Core modeling techniques
Begin with primitives like cubes, cylinders, and spheres to block out form. Use Edit mode to modify vertices, edges, and faces; Extrude (E) creates new geometry from selected faces, while Bevel (Ctrl+B) smooths sharp edges. Loop cuts (Ctrl+R) add geometry for more detail, and the Subdivision Surface modifier smooths models while preserving volume. Keep a clean topology by avoiding long triangles and ensuring quads dominate your mesh. Iterate by blocking rough shapes first, then refining details as you switch between Object and Edit modes. Regularly test-fit your model to reference images to maintain proportion and realism.
Materials, lighting, and rendering basics
Materials describe how surfaces interact with light. Start with simple Principled shaders and connect color, roughness, and metallic values to achieve plausible looks. In lighting, a three-point setup (key, fill, rim) creates depth and mood. Blender supports Eevee for real-time previews and Cycles for physically based rendering; both require different sampling and light paths settings. For a quick render, keep samples modest to reduce noise, then adjust light strength and color to improve realism. Finally, render settings determine the output resolution and file format; always save a copy of your scene file before rendering final images.
A beginner-friendly project workflow
A practical project lets you apply the concepts above without game development complexity. Start by creating a ground plane and a simple main object, such as a mug or cup. Add a basic material, then set up lighting and a camera. Use viewport shading to preview results, tweak geometry with minor edits, and render a final image to assess proportions and lighting. Save iterations frequently and document any changes to help you reproduce the result later.
Where to learn next and maintain momentum
Progress comes from consistent practice and exploring new tools. Plan small, repeatable projects weekly, each focusing on a different feature like UV mapping, modifiers, or node-based materials. Utilize official Blender tutorials and community forums for troubleshooting and inspiration. As you grow, start organizing assets into a project library and maintain version control for important files. BlendHowTo suggests building a personal project log to track improvements over time.
Tools & Materials
- Computer with internet access(Stable internet is helpful for download and updates)
- Blender software installer(Download from the official Blender site, choose the stable release)
- 3-button mouse with scroll(Smooth navigation and precise selection)
- Graphics tablet (optional)(Helpful for freehand sculpting or shading)
- Reference images or concept art(Useful for proportions and planning)
- External storage (USB or cloud)(Backups and asset sharing)
Steps
Estimated time: 25-40 minutes
- 1
Install and set up Blender
Download the latest stable Blender build, install it, and configure a basic project folder. Open Blender and verify the interface loads normally. Create a new project named after your current task and save frequently.
Tip: Choose a simple default layout to minimize distractions during early practice - 2
Create a simple model
Add a primitive shape like a cube or cylinder, switch to Edit mode, and use extrude and bevel to form a basic mug silhouette. Adjust vertices to refine proportions and apply a Subdivision Surface modifier for smoothing.
Tip: Use snapping to align geometry accurately with the reference image - 3
Apply materials and lighting
Create a basic material with a Principled shader and connect color and roughness values. Add a light source and a camera, then preview in Eevee for real-time feedback or switch to Cycles for more realism.
Tip: Test different light colors to study mood and depth - 4
Render and export
Set render engine, adjust sampling for balance between speed and quality, and render a test image. Save the final render in your preferred format and organize the output alongside the project file.
Tip: Always save a labeled copy of your final render
Frequently Asked Questions
What is Blender?
Blender is a free, open-source 3D creation suite that covers modeling, texturing, lighting, animation, and rendering. It is widely used by hobbyists and professionals for a range of projects.
Blender is a free 3D tool for modeling, shading, animation, and rendering used by hobbyists and professionals.
Is Blender free to use?
Yes, Blender is free and open-source. You can download, use, and modify it without license fees or subscription costs.
Yes, Blender is free to download and use for any project.
Do I need a powerful computer to run Blender?
Blender runs on a wide range of hardware. A modern multi-core CPU, a dedicated GPU, and 8 GB of RAM are a solid starting point for learning, with more demanding projects benefiting from higher specs.
A reasonably modern computer is fine for learning; content-heavy projects benefit from faster hardware.
Can Blender be used for animation?
Yes, Blender supports full animation pipelines, including rigging, keyframing, and simulation. It is capable of professional-quality motion work.
Absolutely, Blender handles modeling, rigging, animation, and rendering.
How do I render an image in Blender?
Choose a render engine (Eevee for speed or Cycles for realism), set basic lighting, adjust samples, and render. Save the output as an image file.
Select a render engine, tweak lighting and samples, render, and save your image.
Where can I learn more about Blender?
Official Blender tutorials and user communities provide structured guidance and project ideas. Practice with small projects and review community resources for tips.
Explore official tutorials and community forums for ongoing learning.
Watch Video
What to Remember
- Install Blender and set up a clean project folder
- Navigate the 3D viewport with ease and switch modes
- Build geometry with primitives and modifiers
- Shade with simple materials and light with a basic setup