Blender 3D: A Practical Step-by-Step Guide for Beginners
A practical, step-by-step Blender 3D guide for beginners. Learn to install Blender, navigate the UI, model, texture, light, render, and export your first scene with clear, actionable steps.

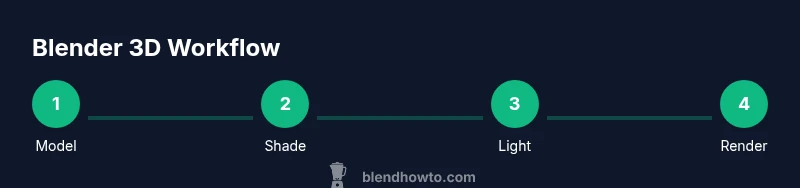
By the end of this guide you will create a simple 3D scene in Blender 3D: install Blender, initialize a new project, model a basic chair, apply materials, set up lighting and a camera, and produce a final render. You’ll learn essential navigation, hotkeys, and safe-saving habits, plus handy tips for organizing your project files and assets. No prior 3D experience required; work at a comfortable pace and practice with the included steps.
Getting started with Blender 3D
Blender 3D is a powerful, free, open-source 3D creation suite that works on Windows, macOS, and Linux. This first section covers how to install Blender, confirm your system meets the minimum requirements, and tailor the interface to a beginner-friendly setup. According to BlendHowTo, getting comfortable with Blender 3D starts with a clean installation and a predictable workspace. Start with the default scene to learn the basic layout: a perspective viewport, a Outliner for scene objects, a Properties panel for materials and render settings, and a Timeline for animation. Create a dedicated project folder to keep assets, textures, and renders organized from day one. As you proceed, remember that consistent practice beats long, unfocused sessions; aim for small, repeatable tasks that reinforce muscle memory and workflow.
Navigating the Blender workspace
Blender's interface can feel overwhelming at first because it is highly modular. The key to mastering it is understanding how to switch between editors, customize hotkeys, and reset views quickly. Use the number keypad to switch views (1 for front, 3 for side, 7 for top) and hold down the middle mouse button to orbit; scroll to zoom. The T and N keys toggle tool shelves and side panels, allowing you to hide distractions while you focus on modeling or shading. In the context of Blender 3D, it helps to set up a simple, repeatable layout: a 3D Viewport for modeling, a Shader Editor for materials, a UV Editor for texture work, and a Video Sequencer for basic animation previews. Save frequently and enable autosave to minimize loss from unexpected crashes.
Essential modeling techniques for beginners
Modeling is about creating and refining geometry. Start with primitive shapes (cube, cylinder, plane) and learn to switch between Object Mode and Edit Mode. In Edit Mode, you can extrude faces, scale vertices, and insert edge loops to add detail. The Loop Cut (Ctrl+R) tool is invaluable for adding topology that follows the object’s silhouette. Bevel edges (Ctrl+B) to smooth sharp corners and avoid sharp shadows in renders. Non-destructive workflow matters: use modifiers like Subdivision Surface to add smoothness without permanently changing geometry. As you progress, practice clean topology: avoid triangles for hard-surface models unless necessary, and aim for quads for easier UV unwrapping and deformation in animation.
Materials and textures: bringing color to your model
Materials define how surfaces interact with light. Blender 3D uses the Principled BSDF shader as a versatile, physically based base. Start by creating a new material on your object and connect a color to the Base Color input. For realistic skin, metal, or plastic looks, adjust roughness, metallic, and specular values. UV unwrapping is essential for texturing: mark seams, unwrap, and export the UV layout for painting textures in external tools or in Blender’s Texture Paint mode. HDRI lighting combined with a few well-placed textures can transform a flat model into a believable scene. Remember to name your textures and keep resolution appropriate for your rendering target to balance quality and performance.
Lighting and rendering: making scenes come alive
Lighting shapes mood and realism. Start with a three-point lighting setup: key light, fill light, and rim light to separate the subject from the background. Choose between Eevee for real-time previews and Cycles for higher realism and advanced lighting simulation. Adjust environment lighting, set camera focal length, and tweak exposure to avoid blown highlights. Do not over-process the scene—keep a few well-placed lights and calibrated color temperatures. When you are ready to render, set sampling levels to a balance of quality and speed, and enable denoising to reduce grain in final images. Blender 3D supports multiple render passes that can be composited later for more control.
Animation basics: bringing motion to your scene
Animation begins with keyframes. For a simple scene, set the frame range, insert a location or rotation keyframe, and move to a new frame to apply another value. Use the Graph Editor to smooth transitions and the Dope Sheet to manage timing. Don’t over-animate; even subtle motion reads more convincingly than rapid, constant changes. If your model deforms, consider adding a basic Armature for rigging or using simple shape keys for facial expressions. Always test playback at the target frame rate to avoid pacing issues, and render a short preview to check timing and motion realism.
Importing and exporting: working with external assets
Blender 3D plays well with external content. You can import OBJ, FBX, STL, and other common formats to bring in meshes created elsewhere. When exporting, pick a format that matches your intended pipeline: FBX for game engines, OBJ for static meshes, or GLTF for web deployments. Preserve textures and material assignments by exporting the correct material options and embedding textures where supported. If you work with HDRIs or external textures, keep file paths relative and pack all assets into the .blend file when sharing with teammates. Regularly test imports and exports to catch compatibility issues early.
Practical project: a simple kitchen scene
A practical project helps consolidate your Blender 3D skills. Start with a simple kitchen counter, a few cabinets, a wall, and a basic appliance like a toaster to learn alignment and proportion. Model primitives, then modify them with extrusion, beveling, and subdivision to achieve a believable silhouette. Apply materials with varied roughness and metallic properties to simulate wood, metal, and plastic. Populate the scene with simple lighting, a camera, and a basic render. This project enables you to iterate quickly while building a cohesive, presentable composition that demonstrates core Blender 3D capabilities.
Tips for learning Blender effectively
Consistency beats intensity. Practice a small, defined task every day, such as creating a new material or tweaking a lighting setup. Track your progress with a simple checklist and rely on high-quality tutorials and reference images. Build a personal library of assets (models, textures, HDRIs) to reuse in future projects. Engage with the Blender community for feedback and critique, which accelerates learning and helps you avoid common missteps. Finally, remember that every expert started with basic shapes—persistence and deliberate practice are your best tools.
Tools & Materials
- Blender software (latest stable release)(Download from blender.org; no subscription required)
- Computer with modern GPU and at least 4-8 GB RAM(A dedicated GPU helps with rendering previews, especially Cycles)
- 3-button mouse or equivalent trackpad gestures(Middle-click to pan, scroll to zoom, right-click context menu)
- Reference images or mood boards(Helpful for proportion and color guidance in modeling)
- Textures or HDRI library(Used to enrich materials and lighting in scenes)
- External storage or cloud backup(Regular backups prevent data loss)
Steps
Estimated time: 60-90 minutes
- 1
Install Blender and set up the workspace
Download and install Blender from the official site. Open Blender and reset to the default layout, then save a dedicated project folder for the session. Configure a simple layout: 3D Viewport, Shader Editor, and Properties panel visible. This step establishes a stable base for learning Blender 3D basics.
Tip: Tip: Enable autosave and set a short interval to protect your work. - 2
Create a new project and reset the scene
Start with a clean scene: delete the default cube if you don’t need it, or keep it as a base. Create the basic structure for your chair (or chosen object) using primitive shapes. Switch to Edit Mode to begin shaping the model, and name your objects clearly in the Outliner.
Tip: Tip: Use the N key to quickly toggle the right-side panel for precise numeric inputs. - 3
Add geometry and refine topology
Add extrusion, loop cuts, and bevels to build the model’s silhouette. Keep topology clean by aiming for mostly quads. Utilize modifiers like Subdivision Surface non-destructively to test smoothing without committing to geometry changes.
Tip: Tip: Work non-destructively with modifiers first, then apply when you're satisfied with the shape. - 4
Unwrap UVs and apply textures
Mark seams around your geometry, unwrap, and lay out the UV map. Create or import textures and connect them to the material’s Base Color. Ensure textures are properly scaled to avoid stretched or compressed appearances.
Tip: Tip: Use a checker texture to quickly verify UV mapping before painting real textures. - 5
Set up materials with Principled BSDF
Create a new material and use the Principled BSDF shader as a foundation. Tweak roughness, metallic, and specular values to achieve the look you want. For metal surfaces, assign a slightly lower roughness; for wood, use a roughness map or varied color.
Tip: Tip: Use node groups to reuse common material setups across multiple objects. - 6
Light, camera, and render
Place a camera and several light sources to illuminate the scene. Compare Eevee for fast previews with Cycles for more realistic rendering. Set render samples to balance quality and speed, and enable denoising to clean noise in the final result.
Tip: Tip: Do a small low-resolution render first to confirm the composition before a full-quality render.
Frequently Asked Questions
What is Blender 3D and what can I do with it?
Blender 3D is a free, open-source software for 3D modeling, animation, texturing, lighting, and rendering. You can create everything from simple objects to complex scenes for games, films, or architectural visuals.
Blender 3D is a free tool for modeling, texturing, and rendering 3D scenes. You can create anything from simple objects to full animations.
Do I need a powerful computer to run Blender effectively?
Blender runs on a wide range of hardware. For beginners, a modern CPU and at least 4 GB of RAM are workable, but a dedicated GPU and more RAM improve viewport performance and render times.
A modest modern computer works for learning Blender, but a better GPU helps with rendering and real-time previews.
Which render engine should I use in Blender, Eevee or Cycles?
Use Eevee for fast previews and real-time feedback, especially during early modeling and interior scenes. Switch to Cycles when you need higher realism and advanced lighting effects.
Choose Eevee for speed and Cycles for realism, depending on what you’re rendering.
How do I start learning Blender if I’m new to 3D?
Begin with basic modeling of simple shapes, then progress to materials, lighting, and basic animation. Follow structured tutorials, practice daily, and build a small portfolio of completed scenes.
Start with simple shapes, then gradually add texture, light, and motion. Practice daily.
Where can I find reliable Blender learning resources?
Use a mix of official Blender documentation, reputable online courses, and community tutorials. Bookmark common workflows and revisit them as you tackle new projects.
Look for official docs and well-reviewed tutorials. Build a personal library of trusted resources.
Is Blender suitable for professional production work?
Blender is used in professional contexts for modeling, animation, and visual effects; however, workflows differ across studios. It’s a robust tool for prototyping and independent projects, with a growing ecosystem of add-ons and pipelines.
Yes, Blender is capable in professional settings, especially for prototyping and indie work.
Can I import assets from other 3D programs into Blender?
Blender supports common formats like OBJ, FBX, and GLTF. Import assets, then adjust scale and materials to fit your scene. Always recheck textures and animation imports after transfers.
Yes, you can bring in models from other tools and adjust them in Blender.
What’s the best way to organize Blender projects for growth?
Create a clear folder structure with separate subfolders for scenes, textures, renders, and assets. Use consistent naming conventions and enable versioning to maintain a clean workflow as projects scale.
Keep a clean folder structure and consistent naming so your projects stay manageable.
Watch Video
What to Remember
- Install Blender and configure a beginner-friendly workspace
- Model with attention to topology and clean edge flow
- Apply materials and UVs for realistic surfaces
- Light and render with a practical balance of speed and quality
- Practice daily with small, concrete projects