Blender Tips for Beginners: Quick Start Guide
Learn Blender tips for beginners with actionable steps, practical workflows, and essential shortcuts. Build confidence through hands-on projects, shading basics, and simple renders crafted for home cooks, hobbyists, and aspiring 3D artists.

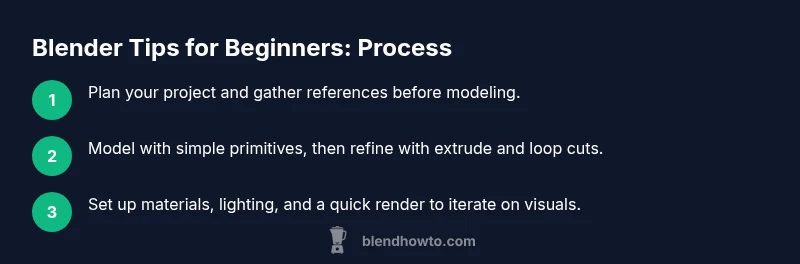
Master Blender tips for beginners with a concise roadmap: learn viewport navigation, object selection, and the fundamental transform tools; then tackle a simple modeling project to cement skills. This quick-start path covers interface basics, core tools, essential workflows, and practical shortcuts to speed up your learning curve.
Interface and Navigation Essentials
Blender welcomes new users with a powerful interface that can feel overwhelming at first. The key is to start small and build muscle memory around navigation and selection. Begin by familiarizing yourself with the viewport, the 3D cursor, the outliner, and the properties panel. Practice orbiting with the middle mouse button, zooming with the scroll wheel, and panning with Shift + middle mouse. Learn to switch between Perspective and Orthographic views and between Object and Edit modes. According to BlendHowTo, a deliberate focus on navigation and basic selection dramatically reduces early frustration and speeds up hands-on learning. As you gain confidence, you’ll start noticing how the interface responds to your intent, which makes more advanced tasks feel achievable. Build a habit of keeping your screen organized: name objects clearly, use collections for grouping, and store your reference images beside the workspace for quick access.
Related concepts to explore next: scene units, viewport shading options, and the hotkeys that turn complex actions into single keystrokes. A solid start is to learn the basic shortcuts for transforming objects (G to grab, R to rotate, S to scale) and to practice toggling between Object Mode and Edit Mode to understand how Blender treats whole objects versus mesh components.
Core Tools You Will Use Most
For beginners, a few core tools unlock the majority of Blender workflows. Start by mastering the Transform tools (grab, rotate, scale) and the selection modes (vertex, edge, face) to pick precisely what you need. In Edit Mode, practice extruding faces to extend geometry, using Loop Cut (Ctrl + R) to add geometry, and beveling edges (Ctrl + B) to soften corners. These operations form the backbone of most models, from simple household objects to basic character geometry. When you’re ready, enable the Mirror modifier for symmetry-driven designs and try Subdivision Surface to create smoother surfaces without overloading your mesh. Blender’s preferences can speed things up: enable left-click select if you prefer, adjust the viewport clamp to better handle large scenes, and customize your gizmo size for easier manipulation. A pragmatic tip is to keep your projects simple at first and progressively layer complexity as you gain fluency with these tools.
Practical tip: keep a running list of the most-used shortcuts and practice them daily to reinforce muscle memory.
Modeling Basics: Primitives to Polished Shapes
Modeling starts with simple primitives, which you can bend into more complex forms through a few disciplined steps. Begin with a cube or cylinder to learn how to switch between Edit Mode and Object Mode, and then use extrude, inset, and scale to craft shapes. Practice symmetry by using the Mirror modifier on your main axis, which helps you create balanced objects like cups, bowls, or bottles. Turning on snapping (magnet icon) can help you place vertices precisely, especially when aligning a lid or handle. To avoid topology problems later, aim for quads (four-sided faces) and minimize triangles in smooth surfaces. UV mapping becomes relevant when you apply textures and labels, so gradually incorporate a basic UV unwrap for your simplest objects. Track your progress by saving incremental versions as you explore different proportions and forms.
Hands-on reminder: frequently switch to Wireframe view to verify there are no hidden faces or extraneous geometry that could cause render artifacts later.
Shading, Materials, and UV Mapping
Shading introduces color, texture, and light interaction to your models. Start with a basic material: set a diffuse color, adjust roughness for rough or glossy surfaces, and experiment with metallic values for metal-like finishes. The Shader Editor helps you build simple node networks: a Principled BSDF node connected to a Material Output node is often enough for solid results. UV mapping is essential when textures are involved; a simple unwrap (U > Unwrap) can map an image to your object with predictable results. For beginners, use flat colors first to verify geometry and lighting, then introduce textures gradually. Don’t rush the shading phase—clarify your object’s material intent (porcelain, ceramic, metal) and keep a reference board handy so you maintain consistency across the project. Remember to save materials with descriptive names to avoid confusion in larger scenes.
Pro tip: enable Eevee’s Screen Space Reflections for more realistic surface results without heavy rendering cost on a modest setup.
Lighting, Camera, and Rendering Foundations
Lighting defines mood and readability in your Blender scenes. Start with a basic three-point lighting setup: key light, fill light, and a subtle backlight. Position your camera to frame the object clearly, then adjust the focal length to avoid distortion. For beginners, Eevee is fast for testing lighting and materials, but Cycles offers more physically accurate results if you’re patient with render times. Learn to tweak shadow settings, use a soft area light to avoid harsh lines, and balance ambient occlusion for depth. When rendering, start with lower resolution, enable denoising, and keep an eye on render times. File management matters here too: save your renders with descriptive filenames and consider using a dedicated renders folder to keep your project tidy. Finally, render previews actively during your learning; they’re invaluable for catching material or lighting issues early.
Best practice: establish a consistent render profile that matches your project goals, so you aren’t reworking settings for every new scene.
Practice Project: Mug Workflow for Beginners
A mug is an approachable project that teaches modeling, topology, and surface shading in one package. Start with a cylinder and cap the ends, then extrude the body to form the mug’s walls. Add a loop cut to define the mug’s lip edge, smooth with subdivision modifiers as needed, and use a torus to create a simple, functional handle. While you work, keep the geometry clean by avoiding extraneous vertices and ensuring quads where possible. Apply a simple material with a ceramic-like finish and place a basic light rig to assess how materials react to light. Finally, render a few test shots to see how proportions and curvature appear in different lighting conditions. This practical exercise reinforces what you’ve learned and gives you a tangible, attractive result to reference in future projects.
Troubleshooting, Common Issues, and Performance Tips
New Blender users often encounter performance slowdowns or display quirks. If frames stutter or load slowly, consider reducing viewport shading quality, turning off overlays you don’t need, and ensuring your scene isn’t overloaded with unnecessary geometry. If shading looks wrong, double-check normals (recalculate outside with Shift + N in Edit Mode) and verify your materials are connected to the correct shader outputs. For bigger scenes, enable the Simplify options to manage texture sizes and limits during editing, and use the Layers and Collections system to hide unrelated objects while you work. Regularly saving incremental versions helps you revert to a stable state if a workflow goes off track, and keeping your Blender version up to date ensures you benefit from the latest performance improvements and bug fixes.
Next Steps: Building a Consistent Practice Routine
Consistency is the engine behind real progress in Blender. Set a weekly schedule and choose small, achievable projects that demonstrate tangible improvement. Build a habit of revisiting the same foundational tasks—navigation, modeling a simple tool, applying materials, and rendering—before moving to more complex scenes. Document your process with quick notes or a screenshot log to track what you’ve learned and where you need more practice. The BlendHowTo team recommends pairing structured lessons with spontaneous experimentation: allow yourself time to explore new features, but couple that with a defined, repeatable workflow so your skills grow steadily over time.
Tools & Materials
- Computer with Blender installed (latest stable release)(Ensure GPU drivers are up to date; recommended to have at least 8GB VRAM for comfortable viewport performance.)
- Mouse with reliable middle button and scroll wheel(A three-button mouse improves navigation; trackpads can work but may slow workflow.)
- Keyboard for shortcuts(Learn common shortcuts (G, R, S, E, Ctrl+R, Ctrl+B) to accelerate work.)
- Optional graphics tablet(Helpful for sculpting or fine control but not essential for beginners.)
- Reference images or concept art(Keeps proportions consistent during modeling.)
- Blender manual or official docs(Useful as an on-demand reference when you’re stuck.)
Steps
Estimated time: 60-90 minutes
- 1
Open Blender and reset the scene
Launch Blender, load the default startup file, and reset the viewport to a clean state. Delete the default cube to start with a blank canvas if desired. This ensures you are not carrying over hidden transforms from a previous project.
Tip: Use a clean scene to avoid accidental transformations on existing objects. - 2
Add a cylinder and set up units
Add a cylinder to form the mug body and switch to Edit Mode to explore its geometry. Set up the scene units to metric or whichever system you prefer so measurements feel consistent as you scale the mug.
Tip: Toggle Snap to keep extrusions aligned with grid lines for clean topology. - 3
Shape the mug body with extrude
In Edit Mode, select the top and bottom faces and extrude to form the mug’s curved walls. Use scale to taper slightly if needed and keep edges rounded with a gentle bevel. Maintain mostly quad faces to simplify shading.
Tip: Use Subdivision Surface sparingly to keep topology tidy while achieving a smooth look. - 4
Create and attach the handle
Model a basic handle by creating a torus, adjusting its scale, and positioning it against the mug body. Use a gentle bend to fit the mug’s contour, then join the handle to the mug and merge vertices for a single mesh.
Tip: Snap the handle’s inner edge to the mug rim for a believable connection. - 5
Shade, materials, and basic lighting
Add a simple ceramic material using a Principled BSDF shader. Adjust roughness and slight specular highlights. Place a basic light setup and a camera so you can preview how the mug looks under typical lighting.
Tip: Test different viewer lighting to understand how material properties respond to light. - 6
UV unwrap and apply texture (optional)
If you want labels or textures, unwrap the mug’s surface (U > Unwrap) and apply a simple image texture. For beginners, start with a flat color to confirm topology first.
Tip: Keep UV islands small and proportional to the geometry for less distortion. - 7
Render a quick test image
Set a basic render using Eevee, adjust camera framing, and perform a quick render to assess proportions, shadows, and material response. Iterate on lighting and shading based on the render results.
Tip: Use denoising and lower resolution for faster iteration during practice. - 8
Save and export your project
Save the Blender file with a descriptive name and consider exporting a common format (OBJ or FBX) for sharing or use in another program. Maintain versioned saves to track improvements over time.
Tip: Create a dedicated folder for exports to keep your workflow organized.
Frequently Asked Questions
What are the essential Blender shortcuts for beginners?
Start with G to grab, R to rotate, S to scale, E to extrude, and Ctrl+R for loop cuts. These shortcuts speed up modeling and enable smoother workflows.
Essential Blender shortcuts to memorize are grab, rotate, scale, extrude, and loop cut. They speed up everything from basic edits to more complex modeling.
Is Blender free to download and use?
Yes. Blender is free and open-source software, supported by a global community and extensive documentation.
Yes, Blender is completely free and open-source, with a large supporting community and lots of tutorials.
Which Blender version should I start with?
Start with the latest stable release to ensure you have current features and long-term support.
Begin with the latest stable release so you have up-to-date features and reliable support.
What is the difference between Object Mode and Edit Mode?
Object Mode edits entire objects; Edit Mode alters the individual mesh components like vertices, edges, and faces.
Object Mode edits whole objects; Edit Mode changes the mesh geometry itself, like vertices and faces.
How long does it take to learn Blender basics?
Learning the basics depends on practice time; steady, focused sessions build competence over weeks.
With steady practice, most beginners pick up the basics over a few weeks of consistent work.
How can I learn Blender quickly?
Follow a structured guide, complete small projects, and practice routinely to reinforce concepts and build confidence.
Follow a structured plan, complete small projects, and practice regularly to accelerate learning.
Watch Video
What to Remember
- Learn essential Blender navigation first and foremost.
- Master core modeling tools using small, repeatable steps.
- Build confidence with a simple, completed project like a mug.
- Balance shading, materials, and lighting early for better renders.
- Practice regularly and save incremental versions for progress tracking.