Vitamix Blender Ice Cream: A Home Guide
Learn to make creamy, scoopable ice cream with a Vitamix. This comprehensive guide covers base ideas, texture science, step-by-step methods, troubleshooting, and flavor variations for reliable, delicious results.

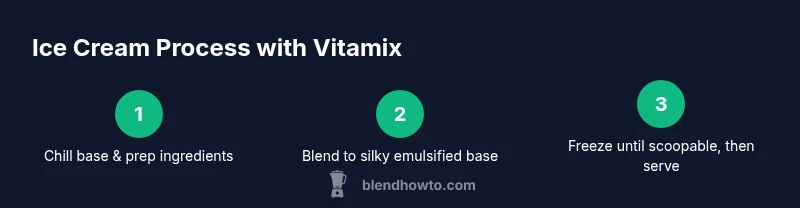
Goal: make creamy, scoopable ice cream using a Vitamix. You’ll blend a cold base (cream or milk with optional eggs or starch, sugar, and flavorings) until smooth, then freeze briefly to deepen texture. For best results, work in small batches, pulse to avoid overheating, and add mix-ins near the end.
Why a Vitamix Excels at Ice Cream Making
According to BlendHowTo, a Vitamix excels at ice cream because its high shear and robust motor emulsify fats, sugars, and flavorings into a smooth, creamy base. The key is keeping ingredients cold and using short pulses to avoid overheating. This prevents butterfat separation and helps trap air for a lighter, scoopable texture. For many home cooks, a Vitamix is the most reliable tool for a consistent base—especially when you want to experiment with dairy-free or custard-style blends. When you combine speed control with careful temperature management, vitamix blender ice cream becomes not just possible, but repeatable. The BlendHowTo Team emphasizes that patience in blending and chilling pays off in texture and stability, even when you’re trying new flavor combinations.
Base Concepts: Creamy vs. Icy, and How to Balance Texture
A creamy ice cream starts with balance between fat, sugar, and air in the base. Dairy bases rely on fats from cream or coconut milk for richness, while milk lowers fat and yields a lighter mouthfeel. Sugars not only sweeten but affect freezing point and texture. For texture, you want enough fat to feel luxurious, but enough water control (via sugar, salt, or stabilizers) to avoid a hard, icy finish. If you’re avoiding eggs, you’ll rely more on proper chilling and blending technique; with eggs, you’re creating a custard that hardens differently and adds body. Flavorings should be added in the final blend to keep aromas vibrant. BlendHowTo’s guidance highlights the importance of temperature control and batch size for consistent results across flavors.
Base Recipes and Ratios: Dairy, Dairy-Free, and Custard Styles
You have several viable paths when building a vitamix blender ice cream base. A classic dairy base uses a ratio of cream to milk that yields a rich yet scoopable texture. If you prefer lighter ice cream, replace part of the cream with milk or half-and-half. For dairy-free versions, full-fat coconut milk or almond milk blends work well, often complemented with a small amount of oil or dairy-free creamer to mimic fat. Custard-based bases (with egg yolks) create extra creaminess and a silkier melt, but require careful tempering to avoid curdling. Whichever path you choose, keep your base well-chilled before blending and consider a stabilizer option if you want a longer shelf life. These approaches offer versatility while preserving the characteristic Vitamix speed and control that home cooks rely on.
Techniques for Texture, Temperature, and Consistency
Texture control is the core challenge when making ice cream in a high-powered blender. Start with a cold base and keep blending times short, using pulses to monitor heat generation. If the mixture becomes too thick for the blender to move, pause and chill the base briefly before continuing. The goal is a velvety, spoonable base that softens into scoopable ice cream after a short freeze. You’ll also learn to adjust creaminess by using more or less fat, or by incorporating a small amount of stabilizer such as guar gum or cornstarch in custard bases. Finally, avoid over-blending; once the base looks glossy and smooth, stop to preserve airiness and a creamy mouthfeel.
Flavor Ideas, Mix-Ins, and Customizations
Vitamix ice cream shines when you tailor flavors. Classic vanilla, chocolate, coffee, and fruit blends are easy to implement. Add-ins like chocolate chips, crushed cookies, nuts, or swirls of caramel should be folded in after the base has emulsified to keep texture intact. For fruity or tart flavors, puree the fruit separately and swirl it in after blending for bursts of brightness. If you’re experimenting with dairy-free bases, cacao powder, peanut butter, or toasted sesame paste can deliver rich complexity. The key is to avoid overpowering the base with mix-ins until the base reaches a stable, cream-like consistency.
Freezing, Serving, and Storage Tips
Freezing time profoundly affects texture. A quick 2- to 4-hour chill can yield a scoopable texture, but for more robust flavor, let the ice cream harden overnight in the freezer. Before serving, let the container sit at room temperature for a few minutes to soften slightly for easy scooping. Store ice cream in airtight containers to prevent freezer burn and flavor absorption from other foods. Label flavors and dates to track freshness. Good freezer habits extend the life of your creations while preserving the Vitamix-crafted texture.
Cleaning and Maintenance After Making Ice Cream
Ice cream bases can leave residue that might blunt blade performance if not cleaned promptly. Rinse the blender jar, wipe the lid, and run a quick cycle with warm water and a small amount of dish soap to remove dairy fats. If you used egg yolks, a light vinegar rinse can help remove odors. Always dry components thoroughly to prevent rust and ensure your Vitamix stays in peak condition for future batches. Regular cleaning keeps blades sharp and your blending experience smooth.
Tools & Materials
- Vitamix blender(Ensure the container is clean and fully assembled before blending.)
- Measuring cups/spoons(Accurate measurements help with base balance and texture.)
- Mixing bowls(Use chilled bowls for preparing ingredients and resting blends.)
- Spatula(Scrape the jar between pulses to maximize texture.)
- Freezer-safe container(Prefer airtight containers to prevent freezer burn.)
- Ice cream scoop(Optional for serving; helps portion ice cream.)
- Thermometer (optional)(Useful if making custard-based bases to monitor temperature.)
Steps
Estimated time: 30-60 minutes active + 2-4 hours freezing
- 1
Gather ingredients and chill base
Collect all base ingredients and chill them thoroughly before blending. A cold base reduces friction heat and helps creamy texture. Prepare any mix-ins separately and refrigerate until needed.
Tip: Chill all dairy components in the fridge for at least 1 hour before starting. - 2
Measure ingredients precisely
Use measuring cups for liquids and scales for solids to ensure balance. Accurate measurements support texture and flavor consistency across batches.
Tip: Weigh ingredients when possible for repeatable results. - 3
Add base to Vitamix in correct order
Pour the base, then add sugar and any flavoring agents. This helps the blades pick up the liquid smoothly and prevents dry pockets.
Tip: Starting on low speed prevents splatter and protects motor. - 4
Pulse blend to emulsify
Pulse in short bursts until the mixture looks glossy and smooth but not runny. Avoid running at high speed for long periods to prevent overheating.
Tip: If the blender gets warm, pause and rest for 1–2 minutes. - 5
Incorporate mix-ins at the end
Add chips, swirls, or fruit pieces after the base has achieved a thick, emulsified texture. Folding in mix-ins preserves crunch and distribution.
Tip: Over-mixing can break air pockets and make the texture dense. - 6
Freeze to set and serve
Transfer to a freezer-safe container and freeze 2–4 hours for scoopable texture; longer for deeper flavors. Let soften briefly before serving.
Tip: If you want softer ice cream, reduce freeze time by 20–30 minutes.
Frequently Asked Questions
What base should I use for Vitamix ice cream?
Choose a dairy base (cream, milk, or half-and-half) for creaminess, or a dairy-free base (coconut milk or almond milk) for a lighter option. Custard bases with eggs add richness but require careful tempering.
You can start with a dairy base, or try dairy-free milks for a lighter texture and flavor.
Can I use eggs in Vitamix ice cream?
Yes, eggs can create a custard base that’s richer and silkier, but temper the yolks with hot liquid to avoid curdling. If you’re not comfortable with eggs, skip them and use starch or a stabilizer for body.
Eggs are optional but can add richness if tempered correctly.
Is it safe to blend hot ingredients in a Vitamix?
Hot ingredients can create pressure and steam, which may cause the lid to pop or the base to splatter. Always chill or cool ingredients before blending and blend in short pulses.
Avoid blending hot liquids; let them cool first and use small pulses.
How long should I freeze the ice cream for scoopability?
Typically 2-4 hours yields scoopable texture. For deeper flavor and a denser feel, freeze longer, but plan for at least 1 hour to allow initial setting.
Most people find 2-4 hours gives a good scoopable texture.
Can I make sorbet or dairy-free versions in a Vitamix?
Yes. Use fruit purées with a bit of sugar and water or dairy-free milks; stabilizers help achieve a smooth texture. Sorbet usually omits dairy entirely.
Absolutely—fruit-based blends can be churned into sorbet with the right balance.
What should I do if the texture is icy or grainy?
Ice crystals come from too-fast freezing or insufficient fat. Chill base, use stabilizers, or blend longer with smaller pulses, then freeze longer for a softer finish.
If it’s icy, adjust fat and chill time, then blend in shorter bursts.
Watch Video
What to Remember
- Blend base ingredients in batches for even texture
- Chill base and pulse blend to avoid heat buildup
- Add mix-ins at the end to preserve texture
- Freeze for scoopable texture, then soften before serving
- Clean the Vitamix promptly to maintain performance