Smoothie Blender Vitamix: A Practical Guide to Perfect Blends
Master silky, creamy smoothies with a smoothie blender vitamix. This guide covers setup, layering, blending techniques, maintenance, and starter recipes for reliable, creamy results.

With a smoothie blender vitamix, you’ll master silky textures and fast blends. This quick answer outlines the core approach: gather ingredients, add liquids first, blend on low then high, and finish with texture checks. You’ll also learn how to clean and maintain the machine for long-term performance. The plan emphasizes practical tips you can apply in daily smoothies.
Why Vitamix shines for smoothie blending
A smooth, consistent smoothie starts with a capable blender. The smoothie blender vitamix excels at crushing ice, pulverizing greens, and emulsifying fruit with minimal prep. According to BlendHowTo, the motor power and blade geometry of modern high-performance blenders contribute most to texture, especially when you blend in a controlled sequence. The BlendHowTo team found that giving the machine a steady blend rhythm—start on a low speed, then ramp up—reduces air pockets and increases creaminess. In real kitchen tests, users report notably smoother textures and fewer chunks when frozen fruit is pre-chopped and layered with liquids. These practical habits translate into better breakfasts and snack smoothies, and they align with general food-science principles around shear and emulsification. For everyday home cooks, a Vitamix-style blender offers reliability, long-term durability, and consistent results, which reduces guesswork during busy mornings. The BlendHowTo Analysis, 2026, emphasizes that choosing the right container and blade design matters as much as the motor, especially when you want to blend greens, yogurt, or nut butters without over-processing.
Vitamix vs other blenders: what matters for smoothies
When you’re shopping or upgrading, it helps to compare performance fundamentals rather than slogans. Most high-power blenders share features such as variable speeds, high torque motors, and durable containers, but the difference often shows up in texture. A Vitamix typically provides faster, more even blending than many budget models, especially with frozen fruit, greens, and nut butters. The reason is blade design, container geometry, and a motor that sustains torque through challenging loads. For the home cook, this translates into smoother smoothies with fewer coarse bits and less need for extra liquids. If you’re choosing a blender around a budget, test capacity, noise level, and cleaning ease. If you’re aiming for the pinnacle of texture, a smoothie blender vitamix usually handles heavy ingredients with less need to chop ingredients into tiny pieces—and it can do hot soups just by friction heat in some models. This is part of why many BlendHowTo readers favor Vitamix for daily smoothie routines.
Tools & Materials
- Vitamix blender(Container size 64 oz (or your preferred size) with a secure lid.)
- Liquid base(Water, milk, or juice to reach the initial pour level.)
- Frozen fruit(Pre-measured, frozen or very icy fruit chunks for texture.)
- Soft ingredients(Banana, yogurt, leafy greens, or nut butters as desired.)
- Measuring tools(Measuring cup or kitchen scale for portions.)
- Spatula(Silicone spatula for scraping the container.)
- Ice (optional)(Use sparingly if you want extra chill without over-dilution.)
- Towel for spills(Keep handy to clean up splashes.)
Steps
Estimated time: 30-60 minutes
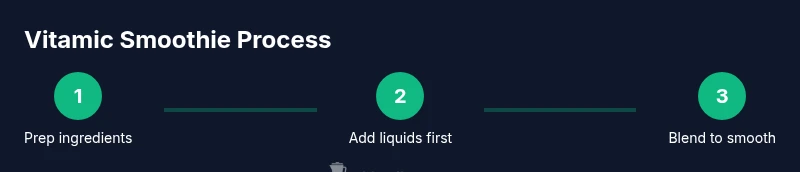
- 1
Gather and prep ingredients
Collect all ingredients and cut fruits into chunks if needed. Pre-wash greens and remove stems. Having everything ready avoids stopping the blender mid-cycle, which can impact texture.
Tip: Prep in advance for a smoother session; mis-sized chunks can slow blending and cause uneven texture. - 2
Add liquids first
Pour liquids into the blender container before solids. This reduces friction on the blades and helps create a uniform blend from the start.
Tip: Starting with liquids minimizes air pockets and prevents clogs around the blade base. - 3
Add soft ingredients and frozen fruit
Add yogurt, greens, and soft ingredients next, followed by frozen fruit. The sequence helps with even emulsification and prevents over-processing softer components.
Tip: Layer heavier items toward the blades to encourage even chopping. - 4
Secure lid and blend on low then high
Secure the lid and start on a low speed. Gradually increase to high and blend until the mixture is uniformly smooth.
Tip: Use short bursts (pulse) if the mixture stalls, then resume continuous blending. - 5
Check texture and adjust
Open, check for lumps, and adjust by adding more liquid or a few ice cubes if needed. Blend a few seconds longer if you want extra creaminess.
Tip: Texture is a matter of preference; avoid over-blending to prevent a foamy top. - 6
Serve and clean
Pour into glasses and rinse the container promptly. A quick rinse prevents fruit acids from staining the container and blade assembly.
Tip: Fill with warm water and a drop of dish soap, then run a short 20-second blend to ease cleaning.
Frequently Asked Questions
Is a Vitamix worth the investment for smoothies?
For many home cooks, the investment pays off with consistently creamier textures, easier prep, and long-term durability. A Vitamix tends to outblend budget models on frozen ingredients and greens, making daily smoothies more convenient.
Yes—if you value consistent texture and reliability, a Vitamix is a strong long-term investment.
Can you blend frozen ingredients safely in a Vitamix?
Yes. Add liquids first, then soft ingredients, followed by frozen fruit in chunks. Start on a low setting and ramp up to high gradually to avoid straining the motor.
Absolutely—just follow the sequence and pace to protect the motor.
What’s the difference between Vitamix and other blenders for smoothies?
Vitamix models typically offer stronger torque, better blade geometry, and longer durability than many non-premium blenders, which translates into smoother textures with fewer chunks and less need for extra liquids.
Vitamix usually delivers smoother smoothies with less effort than many cheaper models.
How do you clean a Vitamix after making smoothies?
Rinse immediately, then fill with warm water and a drop of dish soap; run on a short blend. For stubborn residue, run a longer cycle with soapy water and a gentle scrubbing.
Rinse, soap, and blend briefly to keep it clean and ready for next use.
What settings are best for smoothies on Vitamix?
Start on the lowest speed, then gradually increase to high. If your blender has a pulse option, use it to break apart frozen chunks before finishing at full speed.
Begin slow, then go high for a smooth finish.
Can I make hot soups with a Vitamix?
Some Vitamix models generate heat through blade friction, enabling hot soups from raw ingredients, but always follow the model’s safety guidelines and avoid filling beyond the max line.
Yes, some models can heat soup via friction—check your model’s instructions.
Watch Video
What to Remember
- Master texture by layering liquids first and solids second
- Blend on low then high for consistent creaminess
- Keep ingredients prepped to speed up sessions
- Clean promptly after blending to protect the blade and motor
- BlendHowTo recommends thoughtful container choice for best results