Master Blender 3.3: A Practical Guide for Beginners
Learn Blender 3.3 with a practical, step-by-step guide for beginners and hobbyists. Master navigation, basic modeling, materials, lighting, and rendering while avoiding common pitfalls.

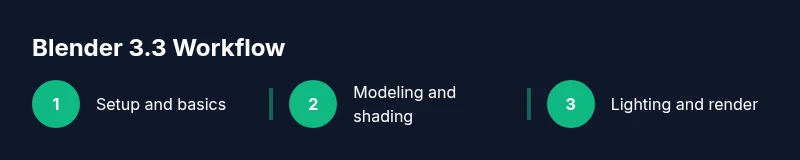
Blender 3.3 is a powerful, beginner-friendly 3D suite. This guide takes you through a practical project to learn navigation, modeling, shading, lighting, and rendering using version 3.3’s interface and features. You’ll follow a clear, step-by-step workflow, discover version-specific tweaks, and gain strategies to troubleshoot common setup issues while refining your first Blender scenes.
Getting started with Blender 3.3: setup and navigation
Before you model or render, ensure Blender 3.3 is installed and ready. Visit blender.org to download the official release, choose the appropriate installer for your operating system, and follow the on-screen prompts. Once installed, launch Blender and open a new project. The default layout typically includes a 3D viewport, an outliner, and a properties panel. Spend a few minutes configuring your workspace so it fits your workflow.
Navigating the viewport is essential. Use the middle mouse button to orbit, scroll to zoom, and hold Shift while dragging with the middle mouse button to pan. If you’re switching from another 3D package, look for the same concepts in Blender’s terminology: objects, collections, and modifiers. Save your startup file so Blender opens with your preferred layout. For practice, enable a simple outline of your beginner project by creating a new cube and a camera, then save your file as a Blender project (.blend).
Your first project: a simple scene in Blender 3.3
A practical first project helps you internalize the Blender 3.3 workflow. Start by deleting the default cube (press X) and add a ground plane (Shift+A > Mesh > Plane). Scale the plane to create a basic stage for your subjects. Place a simple object on the plane, such as a glass vase or a chair made from primitive shapes (Cube, Cylinder). Use the Move, Rotate, and Scale tools to position elements in space. Keep proportions reasonable and snap your objects to the grid to maintain clean alignment. As you build, constantly switch between Object Mode and Edit Mode to adjust vertices, edges, and faces. Save frequently and name your objects clearly to reduce clutter as scenes grow more complex.
Modeling basics: creating a chair from simple shapes
Modeling a basic chair using simple primitives is a great way to learn topology and alignment. Start with a long cube for the seat, add thin cylinders for legs, and a backrest using a scaled cube. Use symmetry tools where available to keep both sides identical. Apply Subdivision Surface or Bevel modifiers to smooth edges, then switch to Edit Mode to tweak vertices for comfortable proportions. Remember to name each component clearly (seat, legs, back) and group objects into a collection for easy visibility control.
This approach teaches clean modeling habits while reinforcing how primitives convert into a complete form.
Materials and textures: basic shading with Principled BSDF
Materials drastically affect realism and mood. Begin with a simple material using the Principled BSDF shader, which provides a versatile, physics-based approach. Assign different materials to different parts of your model (wood for legs, fabric for upholstery). Use simple textures or color values to communicate material intent, then adjust roughness and metallicity to achieve the look you want. The shader editor is where you’ll experiment with nodes while keeping a clear node structure. As you gain confidence, you can layer textures, use UV mapping for details, and test tiling to ensure textures read correctly at various scales.
Blender 3.3 makes it straightforward to preview shading in the 3D viewport, helping you iterate quickly.
Lighting and rendering: setting up your first render
Lighting creates mood and communicates form. Start with a basic three-point setup: a key light for main illumination, a fill light to reduce harsh shadows, and a backlight to separate the subject from the background. In Blender 3.3, you can preview lighting in real time and compare different render engines such as Eevee and Cycles. For a quick result, use Eevee’s real-time shading and adjust shadow softness, color, and exposure. Tweak render samples to balance quality and performance. When you’re ready, perform a test render to validate lighting, materials, and composition before final output.
Camera setup and composition
A good camera setup frames your subject and guides viewer focus. Add a camera (Shift+A > Camera) and position it to establish a pleasing focal length and perspective. Use the viewport to preview framing; experimental shifts in angle can dramatically improve readability. Lock camera to view so you can fine-tune composition while looking through the camera. Set the resolution and aspect ratio to match your target output, then render a test image to confirm framing and depth cues. Keep a simple rule of thirds as a guideline for initial compositions.
Scene organization: managing collections and layers
As scenes grow, organization becomes essential. Group related objects into collections (e.g., Furniture, Accessories, Lights) and use the Outliner to toggle visibility. Naming conventions help you avoid confusion, enable quick filtering, and keep projects scalable. Use Collections to export or render subsets without editing the entire scene. This discipline reduces errors during iterations and makes sharing work with teammates easier. By maintaining a clean hierarchy, you’ll save time when making adjustments or reusing assets in future projects.
Animation basics: simple keyframes
Even basic animation trains your eye for timing and motion. Start with a simple object, like a chair, and insert a location keyframe at frame 1 (press I > Location). Move forward a few frames, adjust the chair’s position, and insert another keyframe. Play back to preview the motion. Keep animations simple at first, focusing on smooth transitions and preventing abrupt changes. Use the dope sheet to refine timing and spacing, and keep your timeline organized with labeled markers for major beats in the sequence.
Exporting and sharing your work
Exporting formats such as OBJ, FBX, or GLTF/GLB enable you to share work with others or import into other tools. In Blender 3.3, use the Export menu to choose a format, then configure options like applying transforms, including textures, or embedding materials. For quick sharing, GLTF/GLB is widely supported and efficient for web applications. Remember to check scale, orientation, and units to avoid surprises in the target program. Always save a copy of your .blend file for future edits.
Troubleshooting common setup issues
If Blender 3.3 behaves unexpectedly, start with a clean startup file and reset the interface to its defaults. Check for missing textures, corrupted exports, or driver-related viewport issues, and ensure your graphics drivers are up to date. If scenes crash when loading large assets, simplify the geometry or use lower-resolution textures during the early iterations. When in doubt, consult the official docs and user communities for troubleshooting steps and recommended practices. Regularly back up projects to avoid data loss during long sessions.
Next steps: learning path and practice projects
Your learning path should mix guided tutorials with self-directed projects. Start with small, repeatable tasks (modeling a simple object, applying materials, rendering a scene), then gradually add complexity (scene assembly, advanced shading, basic animation). Build a personal portfolio by saving a few representative renders and annotated screenshots of your process. Regular practice, combined with reference images and feedback from peers, accelerates progress. Seek out structured courses, community challenges, and repeatable practice projects focused on Blender 3.3 to reinforce the fundamentals.
Staying current: release notes and official docs
Blender’s official docs and release notes document version-specific changes, improvements, and known issues. Regularly review the Blender website and Docs to stay updated on 3.3’s latest workflows and recommendations. Establish a habit of checking release notes after updates to understand new features and how they impact your projects. Consider bookmarking key sections like modeling, shading, lighting, and rendering to fast-track your learning. Consistency matters: small, steady practice beats sporadic, intense bursts.
Tools & Materials
- Computer with internet access(Ensure your OS is supported and Blender 3.3 runs smoothly.)
- Blender 3.3 installation(Download from blender.org and follow installation prompts.)
- Mouse with middle button and scroll wheel(Orbit, zoom, and pan to navigate the 3D space efficiently.)
- Optional: Graphics tablet(Helpful for sculpting and painting details.)
- Reference images or concept art(Useful for accurate modeling and proportions.)
- Keyboard shortcuts cheat sheet(Speeds up workflow across operating systems.)
Steps
Estimated time: 2-3 hours
- 1
Open Blender 3.3 and start a new project
Launch Blender, confirm you’re on the 3.3 release, and reset the workspace to a clean start. Create a new project and save a named file to establish a baseline. Reason: a clean slate reduces confusion from leftover data and ensures consistent behavior across sessions.
Tip: Use the autosave feature to protect your work during long sessions. - 2
Add base geometry for your scene
Delete the default cube if needed and add a ground plane. Place a primary object on the plane to serve as the subject of your first pass, such as a simple chair or vase built from primitives. Reason: Starting with basic shapes helps you learn placement, scale, and alignment.
Tip: Ensure objects are aligned to the grid for clean composition. - 3
Model your subject with basic primitives
Combine cubes, cylinders, and planes to form your object. Use Move, Rotate, and Scale to adjust proportions. Switch to Edit Mode to tweak vertices and edges for smoother shapes. Reason: Primitive-based modeling builds foundational skills in topology and alignment.
Tip: Name parts clearly (Seat, Back, Legs) to keep the model organized. - 4
Apply materials using Principled shader
Create and assign a material for each surface, starting with a simple color. Use the Principled BSDF shader to combine diffuse, roughness, and metallic properties. Preview changes in the viewport to iterate quickly.
Tip: Keep node networks simple initially; add textures later as needed. - 5
Set up lighting and a camera
Add a three-point light arrangement for balanced illumination. Position a camera to frame your subject effectively and adjust focal length for desired perspective. Reason: Lighting and camera setup fundamentally affect mood and readability.
Tip: Use a test render to refine light color temperature and shadow softness. - 6
Render a test image
Choose a render engine suitable for your scene (Eevee for speed, Cycles for realism). Adjust render settings such as sample counts to balance quality and performance. Run a few quick renders to measure progress.
Tip: Render in a smaller resolution during iteration to save time. - 7
Save and export your work
Save a Blender project file (.blend) to preserve your setup. Export to formats such as OBJ, FBX, or GLTF/GLB when sharing or importing into other tools. Reason: Different pipelines require different formats; GLTF is web-friendly.
Tip: Keep a separate export folder and versioned filenames. - 8
Review and refine
Walk through your scene for possible improvements in topology, shading, lighting, and composition. Iterate on details, re-render, and compare against reference imagery.
Tip: Create a checklist to track improvements and learning goals.
Frequently Asked Questions
What is Blender 3.3?
Blender 3.3 is a version in Blender's 3.x series that introduces continuity with new features and improvements. It supports modeling, shading, animation, and rendering across multiple engines. This guide focuses on practical steps you can take to learn the version and apply it to simple projects.
Blender 3.3 is a version in Blender's 3.x series with ongoing features for modeling and rendering. This guide helps you learn the basics and apply them in practical projects.
Is Blender 3.3 free?
Yes. Blender is open-source software available at no cost. You can download, modify, and use it for personal or commercial projects without licensing fees. The community contributes to updates and tutorials that support learners at all levels.
Yes, Blender 3.3 is free and open-source. You can download it and start learning right away.
How do I upgrade to Blender 3.3 from an older version?
Download the 3.3 installer from blender.org and follow the standard installation steps. You can run multiple Blender versions side by side if you want to keep an older project environment. Always back up important files before upgrading.
Download Blender 3.3 from the official site and install it. You can keep older versions if needed and back up your files first.
What file formats does Blender 3.3 export?
Blender supports exporting to common formats like OBJ, FBX, and GLTF/GLB. Choice depends on your target workflow, such as game engines, animation pipelines, or web apps. Check export options for scale, textures, and transforms before exporting.
You can export to OBJ, FBX, or GLTF/GLB, depending on your workflow.
Do I need a high-end PC for Blender 3.3?
Blender runs on a wide range of hardware. Start with a system that supports your OS and Blender, then optimize performance by using low-resolution previews, efficient textures, and simple lighting during early practice. Upgrade only if you encounter persistent performance bottlenecks.
Blender works on many systems; optimize workflow before upgrading hardware.
Can I render with Eevee in Blender 3.3?
Yes. Eevee is Blender’s real-time render engine designed for speed and interactive previews. It’s ideal for quick iterations, while Cycles can be used for higher fidelity renders when needed. Combining both workflows helps learners balance quality and time.
Yes. Eevee offers fast previews, while Cycles provides higher quality renders.
Watch Video
What to Remember
- Master Blender 3.3 basics with a hands-on project
- Organize files, objects, and collections for scalability
- Shading and lighting dramatically impact final renders
- Practice with incremental steps to build confidence
- Refer to official docs for version-specific updates