Blender Character Modeling: A Complete How-To Guide
Learn Blender character modeling from concept to render. Plan references, block, sculpt, retopo, UVs, shading, hair, rigging, and final presentation with practical tips for clean topology and production-ready assets.

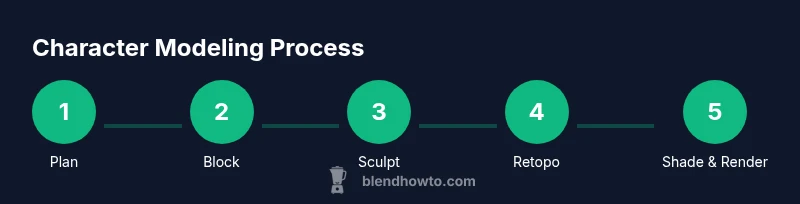
In this guide you will learn how to model a Blender character from concept to render, focusing on clean topology and animation readiness. You'll plan references, block a base mesh, sculpt, retopologize, unwrap UVs, shade, hair, and rig for posing. Essential workflow steps and best practices are included.
Planning Your Character Concept
Before touching a vertex in Blender, define your character’s style, silhouette, and purpose. Are you aiming for realistic humans, stylized cartoons, or fantastical creatures? Gather references from anatomy books, concept art, and real-world photography. Build a mood board to guide proportions, feature placement, and overall silhouette. In blender character modeling, a strong concept reduces rework and speeds up the workflow. Start with a few core shapes that establish the pose and silhouette, then map features to the animation needs you anticipate. Decide on a consistent aesthetic—skin tone, hair color, clothing textures, and accessory geometry—so every modeling decision aligns with the character’s story. Document this plan in a simple checklist: style targets, key landmarks (eyes, hands, torso), and the minimum set of poses you want to support in early rig tests. This planning phase is not wasted time; it’s the foundation that makes later steps smoother, more cohesive, and easier to iterate when feedback arrives.
According to BlendHowTo, planning up front lets you optimize topology around deformation zones and reuse assets across similar characters. A clear concept keeps your mesh clean and your texture work targeted, saving time during later stages.
Blocking and Topology Basics
Blocking establishes form with a low-resolution mesh that captures major volumes without wasting cycles on detail. Begin with a simple sphere for the head and cylinders or boxes for limbs, then stitch them into a single manifold mesh. Focus on clean quad topology and edge loops that follow muscle groups and facial features. The eye sockets, mouth, and joints benefit from evenly spaced loops that preserve deformation during animation. Keep topology uniform across the torso and limbs to reduce distortion during bending. In Blender, enabling my keyboard shortcuts and using mirror modifiers enables rapid, symmetric blocking. Avoid triangles in the primary topology; they can cause shading artifacts and unpredictable deformations. Proportional editing and multi-resolution modeling can help you test proportions without committing to a single subdivided mesh. Throughout blocking, constantly check silhouette from multiple angles and compare with your concept. The goal is a believable, rig-friendly foundation you can sculpt on and refine later.
Sculpting a Clean Base Mesh
With a solid block, switch to sculpt mode and refine primary anatomy and proportions. Use a light touch at first; establish major planes, neck connection, and jawline, then progressively tighten features. Start with a symmetric mesh and mirror sculpt to preserve balance; turn off symmetry only when asymmetry is intentional. Use standard brushes (Grab, Move, Draw) and smoothing to shape forms, then transition to clay or blob brushes to add mass where needed. When you sculpt, keep polygon density under control by frequently switching to a lower resolution to test silhouette. This stage is about readability, not micro-detail; you’ll add surface texture later in texture maps. Remember to save often and use a consistent reference scale so the final mesh feels proportional when posed. Finally, compare your sculpt against a clean wireframe to ensure edge loops support expected deformation.
Retopology for Animation
Retopology creates a clean, animation-friendly mesh that preserves the form established in sculpting while delivering efficient geometry. Start by snapping a new low-poly mesh to the high-res sculpt, maintaining critical shapes on the silhouette and major features. Establish loops around the eyes, mouth, shoulders, and knees for natural deformation; keep quads dominant and avoid long, skinny poles near joints. Use Blender's Retopo workflow: snapping, snapping tools, and incremental edge loops, then bake normal maps from the high-res sculpt. Keep tape and snapping guides visible to ensure precision. After retopology, run a quick pose test to verify that deformations look natural and that the topology supports bending without collapsing. Finally, apply clean naming conventions for all topology elements to streamline rigging and texture work. This step ensures the model behaves predictably in animation pipelines and reduces rework across frames.
UV Unwrapping and Texture Setup
Unwrapping lays out the 3D surface onto 2D space for painting textures. Start with logical seams that minimize distortion, usually around hidden areas or natural breakpoints (wrists, behind ears, under clothing). Use Blender’s UV editor to arrange shells in an organized, grid-like pattern that preserves texel density. After unwrapping, create a basic texture set: skin, eyes, lips, hair, and clothing. Bake a normal map from the high-res sculpt if you plan to keep the visual detail while using a lower-polygon mesh. Pack texture maps efficiently to avoid wasted texture space, and consider UDIMs if your asset requires multiple texture tiles for high-res details. When painting, leverage PBR workflows so materials respond convincingly under different lighting. Regularly check UVs in a render view to catch seams and stretching early in the process.
Shading, Materials, and Skin Texture
Materials define the character’s surface and how it interacts with light. In Blender, use the Principled BSDF shader as a starting point for skin, cloth, and hair fibers. Create separate texture maps for color (albedo), roughness, normal (bump), and subsurface scattering for skin realism. Layer sub-surface details with micro normals and subtle color variation to avoid a flat look. Use image textures or procedural textures to achieve freckles, veins, and pores without excessive memory costs. For eyes, use reflective cornea layers and a separate iris texture with proper specular highlights. Hair and clothing materials can benefit from stroke-based textures or particle hair shading pipelines; ensure light interacts with fibers realistically. Test materials under multiple lighting environments and render settings (cycles vs. eevee) to ensure consistency. Finally, document shader node setups to reuse assets across characters and save time on future projects.
Hair, Clothing, and Accessories
Hair is often the most challenging area due to its density and movement. Blender’s particle hair system is a robust option, but carefully manage density to balance realism and performance. For clothing, model garments as separate meshes with appropriate folds and seams; use cloth simulation when possible for natural draping, then bake the results into a fixed mesh for performance. Accessories like belts, jewelry, or armor should follow the same topology rules as the main mesh and be UV-wrapping-friendly. When creating hair and fabric, consider the character’s movement and wardrobe changes in animation to avoid clipping and unexpected deformations. Use reference shots to guide hair direction and fabric flow. Finally, group related parts with clean parenting so rigs and modifiers apply consistently during posing and animation.
Rigging and Weight Painting Considerations
Early rig considerations help avoid rework later. Plan a simple skeleton with essential joints corresponding to major anatomy (neck, shoulders, elbows, wrists, hips, knees, ankles) and ensure control objects are accessible in the viewport. Weight painting distributes influence of bones to the mesh; start with automatic weights and then refine by painting on problem areas such as the jaw, shoulders, and fingers. Use mirror-weight tools to speed symmetry; test poses frequently to detect deformation issues. For facial rigging, consider a combination of shape keys, bones, and drivers for expressive performances; keep driver relationships clear and well-documented. Finally, keep a clean limb hierarchy and group modifiers to accelerate iteration during rigging tests. Document any deviations from the base mesh to facilitate updates across animation cycles.
Rendering, Posing, and Output
Rendering is the final stage where the artist communicates character appearance and mood. Decide on the engine (Cycles for realism, Eevee for real-time workflows) and prepare appropriate lighting setups—three-point lighting, rim light, and subtle ambient fill. Pose the character to reflect personality and story; use reference poses to guide anatomy and balance. Export a clean, animation-ready mesh with a well-structured topology, and bake any textures or maps required for the target pipeline. Save multiple render passes (albedo, normal, specular, AO) to give graders or clients flexibility in post-processing. When presenting the model, provide an unobstructed turntable view, wireframe overlays, and close-ups of critical features (eyes, hands, mouth) to demonstrate topology quality and shading fidelity. A clean, well-documented asset demonstrates your Blender character modeling skills and readiness for production.
Tools & Materials
- Blender (latest stable release)(Ensure you have the latest Long-Term Support build for stability and new sculpting tools.)
- High-performance computer with GPU(A capable GPU (CUDA/OPTIX) helps with sculpting and rendering workloads.)
- Reference images (sketches, photos, concept art)(Organize in a folder or mood board for quick access during planning.)
- Keyboard and mouse(Essential input devices; consider a graphics tablet as optional for drawing brushes.)
- Graphics tablet (optional)(Helpful for 2D detail work and texture painting.)
- Blender tutorials or reference libs(Direct access to Blender manual pages supports learning curves.)
Steps
Estimated time: Total time: 16-22 hours
- 1
Plan and reference your character
Define style, silhouette, and animation goals before modeling. Gather references from art books, concept art, and real photos. Create a mood board and a simple feature checklist to guide later decisions.
Tip: Collect references from at least three sources to ensure consistency across anatomy, pose, and texture. - 2
Set up Blender project and add references
Create a new project with a clean scene. Import reference images as image planes to align proportions while blocking. Enable mirror modifiers for symmetric work during blocking.
Tip: Lock reference planes to avoid accidental movement while modeling. - 3
Block a base mesh with primitives
Use simple shapes (sphere for head, cylinders for limbs) to establish overall proportions. Focus on clean quad topology even at this stage.
Tip: Keep initial density very low so changes are fast and forgiving. - 4
Refine blocking to establish primary forms
Add major mass and landmarks (jawline, neck, chest) using proportional editing. Ensure symmetry and pose-readiness before moving to sculpting.
Tip: Pause to compare with concept silhouettes from multiple angles. - 5
Sculpt high-detail features
Switch to sculpt mode; define anatomy and expressive features with a light touch. Mirror sculpt until symmetry breaks intentionally.
Tip: Switch between high- and low-resolution views to maintain readability. - 6
Retopologize for animation
Create a clean low-poly mesh following the high-res sculpt morphology. Build edge loops around eyes, mouth, and joints for natural deformation.
Tip: Name topology consistently to simplify rigging later. - 7
Unwrap UVs and bake maps
Unwrap with logical seams, organize UVs, and bake normal maps from the high-res sculpt for retained detail on a lower-poly mesh.
Tip: Check for UV distortion by viewing in a render preview. - 8
Build materials and shading
Set up Principled BSDF shaders and texture maps (albedo, roughness, normal, subsurface). Test under different lighting environments.
Tip: Document node setups to reuse across projects. - 9
Rig, pose, and render
Create a basic rig, paint weights, test poses, and render with appropriate settings for final presentation. Save multiple passes for post-processing tweaks.
Tip: Render at multiple angles and compare to concept art to validate proportions.
Frequently Asked Questions
What is the best starting topology for a humanoid character?
Start with quad-dominated topology that follows natural muscle and joint lines around the torso, arms, and legs. Place edge loops to support blink- and smile-driven deformations and ensure joints have clean, bendable topology.
Use quad-dominated topology that follows anatomy to support natural deformation.
Do I need to retopologize for every character?
Retopology helps ensure animation-friendly geometry and predictable deformations. While some projects tolerate mid-res sculpt topology, retopology generally improves rig performance and reduces distortions in movement.
Retopology improves deformation and rig performance, so it’s usually necessary.
Which Blender tools are essential for character modeling?
Key tools include the Sculpt brush set for shaping, the Retopo tools for topology, the UV Editor for unwrapping, and the Shader Editor for materials. Mastering modifiers like Mirror, Subdivision Surface, and Skin/Remesh can speed workflows.
Sculpt, retopo, UVs, and shaders are the core toolkit for character modeling.
How can I keep edge loops in the right places?
Place loops around joints and facial features to preserve deformation. Align loops with muscle lines and avoid creating poles near elbows or knees that cause distortion.
Align loops with joints and muscles for smoother deformation.
Texture work: Blender vs Substance Painter?
Blender can handle texture painting and baking, but many artists use Substance Painter for advanced texture painting workflows. Choose based on your pipeline and performance needs.
Blender handles textures well, but Substance Painter offers richer painting tools when needed.
What is the difference between Eevee and Cycles for character renders?
Cycles provides more physically accurate lighting and shading, while Eevee offers real-time performance for faster iteration. Many productions use Eevee for drafts and Cycles for final renders.
Cycles for realism, Eevee for speed during iterative work.
Watch Video
What to Remember
- Plan concepts before modeling to save rework
- Keep topology quad-dominant for predictability
- Retopologize to animation-friendly geometry
- Unwrap UVs with deliberate seams for clean textures
- Test rigs and shading early to catch issues
- Document setups for reuse in future projects