How to Get Started Sculpting in Blender
Learn how to get started sculpting in Blender with a practical, beginner-friendly workflow. This guide covers essential tools, step-by-step actions, and tips to build confident sculpting skills.

Get started with Blender sculpting by installing the latest stable Blender, opening a dedicated Sculpting workspace, and following a guided workflow: start with a simple base mesh, enable symmetry, use Dynamic Topology or Remesh for form, and gradually refine details. According to BlendHowTo, following a structured plan shortens the learning curve and builds consistent results.
What sculpting in Blender is and why it's approachable for beginners
Sculpting in Blender is a digital sculpting workflow that lets you push and pull a mesh to shape volume, texture, and fine details as if you were molding clay. It shines for character design, fantasy creatures, and quick prototypes because you can iterate without worrying about exact polygon counts early on. For newcomers, the key is a guided, repeatable process rather than mastering every tool at once. According to BlendHowTo, the learning curve can be smoothed with a clear plan, short practice sessions, and a few reliable starter projects. Start with a simple starting mesh and a focused goal to build confidence before tackling complex anatomy or hard-surface forms.
Core concepts and tools you'll use
Sculpting relies on brushes that sculpt, smooth, carve, or pin shapes. Core brushes include Grab for posing, Smooth for polishing, Draw for adding volume, Clay Strips for building mass, and Crease for defining seams. Symmetry is frequently enabled so edits apply to both sides of the model, saving time and ensuring consistency. Dynamic Topology (Dyntopo) can add or remove geometry on the fly, which is great for free-form sculpting but can complicate topology later. Remesh can help create uniform topology when starting from a rough base. The workflow emphasizes iterative refinement: rough form → secondary shapes → fine details → surface polish.
Setting up your sculpting workspace in Blender
Begin by switching to the Sculpting workspace in Blender, then enable Symmetry (X axis) to keep edits mirrored. Choose a simple base mesh (like a cube or a 50–100 vertex sphere) and use a low-resolution starting point to practice strokes. Turn on Dyntopo for organic shapes or use Remesh for uniform topology; each approach has trade-offs. Assign a comfortable brush size and adjust falloff for smoother transitions. Regularly save versions to compare progress and avoid losing experiments.
A beginner-friendly sculpting workflow
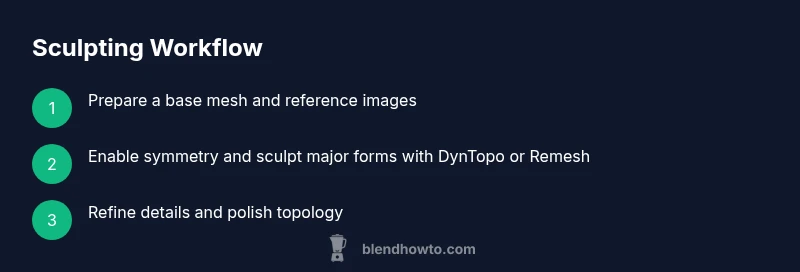
A practical workflow keeps momentum: (1) set up reference imagery; (2) create a clean base mesh; (3) block in major volumes with a large brush and enable symmetry; (4) switch to Dyntopo or Remesh to refine mass; (5) add mid- and small-scale details with focused brushes; (6) periodically check silhouette and topology to avoid pinching or stretched areas; (7) export a low-poly version for animation or 3D printing. This loop supports steady progress and reduces frustration from chasing perfection too early.
Practice projects to build confidence
Start with three mini-projects: a stylized bust, a clay mug, and a simple creature head. For each, set a clear goal (e.g., “establish jawline and cheekbone early”), work with a limited brush set, and finish with a quick render to evaluate proportions. Use reference imagery to train your eye for anatomy and form. Revisit projects after a break to rework problem areas with fresh eyes, which reinforces learning and fosters long-term retention.
Common mistakes and how to fix them
Common errors include over-detailing too soon, neglecting topology, and relying on a single brush for all surfaces. The fix is to alternate between form-building passes and topology checks, keep iterations small, and use reference guides for anatomy or mechanical shapes. If you notice clipping, reduce brush strength or switch to a lower-frequency base before reintroducing detail. Regularly save versions and compare against your earlier attempts to track progress.
Exporting and sharing your sculpt
When you’re ready, export your sculpt as an OBJ or FBX for use in other apps or for 3D printing. Create a low-poly version with clean topology, bake details to textures if needed, and annotate your model to explain design decisions. Share images or short GIFs to social channels and portfolios. Consider creating a simple turntable render to showcase volume, silhouette, and material values. Blender’s built-in Eevee or Cycles render engines can produce appealing results for showcasing your early work.
],
toolsMaterials":{"items":[{
name1...
Tools & Materials
- Blender (latest stable release)(Download from blender.org and install the latest stable build.)
- A computer meeting minimum specs(8GB RAM minimum, quad-core CPU, dedicated GPU recommended.)
- Mouse (or pen tablet)(A mouse works, but a graphics tablet improves brush control.)
- Reference images set(Prepare sketches or photos to guide proportions.)
- Digital drawing tablet (optional)(Wacom/XP-Pen with pressure sensitivity helps for sculpting finesse.)
- Starting mesh base (optional)(A simple primitive mesh to start your blocking.)
- Well-lit workspace(Good lighting helps evaluate form during sculpting.)
- Backups (external drive or cloud)(Regular backups prevent loss of work.)
Steps
Estimated time: 2-3 hours
- 1
Open Blender and switch to Sculpting workspace
Launch Blender and select the Sculpting workspace from the top tabs. Configure the interface to show essential brushes, symmetry, and a low-poly starting mesh. This first step establishes your working environment and saves you setup time later.
Tip: Save a default Sculpting workspace preset so you can start quickly next time. - 2
Set up a base mesh and reference
Create or import a simple base mesh (such as a cube or icosphere) and align reference images for anatomy or form. Keeping the initial geometry simple helps you learn massing before adding details.
Tip: Keep initial brush size large to block in proportions faster. - 3
Enable symmetry and choose your topology approach
Turn on X-axis symmetry to mirror edits. Decide between Dynamic Topology for free-form sculpting or Remesh for uniform topology as you shape the form.
Tip: If you plan detailed final topology, use Remesh sparingly to avoid excessive geometry. - 4
Block in major forms with broad strokes
Use large brushes to establish primary volumes (jawline, cheekbones, brow ridge). Focus on silhouette first, not micro-details.
Tip: Check proportions against your reference from multiple angles. - 5
Refine mass and add mid-details
Switch to mid-sized brushes to refine anatomy and add medium-detail features. Periodically rotate the model to assess form from all angles.
Tip: Pause after each pass to evaluate whether mass is balanced and reads as intended. - 6
Polish details and optimize topology
Switch to small brushes for surface detail and ensure topology remains clean for animation or printing. Consider baking textures later if needed.
Tip: Keep edge loops near high-detail areas to support shading.
Frequently Asked Questions
Do I need a graphics tablet to start sculpting in Blender?
No, you can start with a mouse, but a graphics tablet improves control and precision for brush strokes. If you have one, it’s worth plugging in, especially for long sessions.
A tablet isn’t required, but it can make sculpting smoother and more precise.
What is the difference between DynTopo and Remesh in Blender sculpting?
Dynamic Topology adds geometry as you sculpt, ideal for free-form shapes. Remesh creates uniform topology, which can be better for clean topology but may require retopology later.
DynTopo is for organic forms; Remesh helps with uniform mesh structure.
How long does it take to learn the basics of sculpting in Blender?
Learning the basics typically takes a few focused sessions over several weeks. Regular practice and project-based learning accelerate progress.
It varies, but steady practice over a few weeks builds a solid foundation.
Which brushes are essential for beginners?
Clay, Draw, Smooth, and Crease are the most useful starting brushes. As you progress, add Grab and Fill for more control.
Start with Clay, Draw, Smooth, and Crease, then add others as you need.
How can I improve topology while sculpting?
Plan your topology around major features and avoid stretching. Switch to a Remesh or retopology pass when moving to production-quality models.
Think about topology early and keep things organized as you sculpt.
Can I use Blender sculpting for 3D printing?
Yes, but you’ll need to ensure watertight geometry and a suitable resolution. Retopology and mesh cleanup are often required for printability.
Sculpt for form first, then prepare for printing with clean topology.
Watch Video
What to Remember
- Start with a simple base mesh and clear references
- Enable symmetry to speed up progress
- Block in major forms before detailing
- Keep topology considerations in early passes
- Save frequent versions for easy iteration