ZBrush Blender Workflow: Sculpt in ZBrush, Finish in Blender
A comprehensive, step-by-step guide to using ZBrush and Blender together for high-detail sculpting, clean topology, baking maps, and polished renders. Learn formats, workflow tips, and troubleshooting for a smooth zbrush blender pipeline.

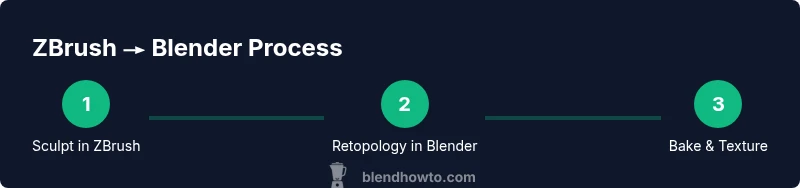
With a zbrush blender workflow, you can sculpt in ZBrush for maximum detail and finalize topology, UVs, and rendering in Blender. This guide shows how to export clean geometry, bake maps, and transfer polypaint for texturing. You’ll learn file formats, normal map workflows, and how to avoid common pitfalls when moving data between apps.
Why a ZBrush Blender workflow matters
For many artists, ZBrush provides unmatched sculpting detail, while Blender offers a versatile, open-source suite for topology, UVs, texturing, rigging, and rendering. A combined workflow lets you push high-resolution sculpting in ZBrush and then bring a clean, animation-ready mesh into Blender. The result is a production-friendly process that preserves sculpted detail without sacrificing real-time previews or shading quality. In practice, this workflow reduces iteration time: you can sculpt, export, retopologize, bake maps, and shade within a single project file set. BlendHowTo analysis shows that studios and hobbyists alike benefit from preserving edge loops and maintaining a manageable polygon budget when transferring data. Key to success is discipline in naming conventions, consistent export options, and an awareness of how different software handles normals, UVs, and texture maps. As you adopt this approach, you’ll balance sculptural fidelity with the rigging and rendering capabilities Blender offers, enabling faster previews and smoother collaboration.
Pipeline fundamentals: formats and data transfer
A robust zbrush blender workflow begins with choosing the right file formats and understanding data transfer. Generally, you’ll export a high-poly sculpt from ZBrush as OBJ or FBX for the base mesh, and bake texture maps (diffuse/polypaint, normal, and displacement) separately. In Blender, import the low-poly mesh, then apply the texture maps to the material and bake any additional maps as needed. OBJ preserves grouping information well, while FBX can carry more scene data for animation pipelines. To transfer polypaint, generate a texture map in ZBrush and import it into Blender as a color texture. Always verify scale, axis orientation, and unit settings between applications. Consistent naming patterns for subtools, textures, and maps streamline collaboration and troubleshooting in larger projects. BlendHowTo research highlights that a clear folder structure and a shared project template dramatically reduce back-and-forth during reviews.
Sculpt in ZBrush: tips for clean export
Sculpting in ZBrush should be followed by a plan for export. Use DynaMesh or ZRemesher to control topology before exporting to Blender to avoid excessive polygons breaking UVs or bake maps. Maintain separate subtools for hard surface and organic parts where possible, and keep a clean, descriptive naming convention. When you finish a pass, consider creating a low-poly proxy mesh that matches the silhouette but is optimized for Blender. Before export, ensure all transforms are reset and the model is centered in the world. This reduces alignment issues once imported into Blender and simplifies object parenting for animations. Finally, bake any necessary polypaint to a texture map so Blender can display color directly.
Import into Blender: maintaining mesh integrity
Importing the ZBrush export into Blender should start with checking scale and orientation. Apply rotation and scale (Ctrl-A) to the mesh, set the correct unit scale, and verify the origin. If your model contains multiple sub-parts, join or keep them separated as needed to maintain future rigging or animation plans. Reassign materials and connect the color texture map created from polypaint to the appropriate shader. Confirm that edge flow and loop placement look correct in Blender’s viewport, and adjust the shading to ensure the baked texture maps render accurately. This careful import preserves the sculpt’s fidelity while enabling Blender’s topology, UVs, and render workflows to take over.
Retopology, UVs, and topology considerations in Blender
Retopology is where your high-detail sculpt becomes a production-ready mesh. Use Blender’s Quad Draw or other retopology tools to create a clean quad-based mesh that follows natural edge flow and serves your animation needs. Plan the topology around deformation, keeping edge loops where they matter for movement (joints, fingers, facial features). After creating the low-poly mesh, unwrap UVs efficiently with minimal stretching and logical island layout. Use a unified texel density to ensure consistent texture resolution across the model. A well-planned UV map simplifies baking and texturing, and helps prevent seams during rendering.
Baking, texturing, and materials in Blender
Texture baking is the bridge between high-poly sculpt and game-ready or render-ready meshes. Create a low-poly version of your model, then bake normal, displacement, and diffuse maps from the high-poly ZBrush sculpture. In Blender, set up Cycles for accurate light interaction, or Eevee for fast previews. Apply the color texture from polypaint to your base color input, and layer normal and ambient occlusion maps for depth. Fine-tune roughness, specular highlights, and subsurface scattering to achieve a faithful, painterly look. If needed, bake additional maps for realistic pores or micro-surface details and connect them to your shader network. This stage is where the asset’s visual quality is defined for final renders.
Rendering and final polish: best practices
With maps baked and materials assigned, focus on lighting, camera setup, and render settings. Use HDR environments or carefully placed area lights to sculpt mood and emphasize form. In Cycles, enable adaptive sampling to balance noise and render speed, and use denoising to refine results. For real-time previews, set up Eevee with screen-space reflections and shadows tuned for accuracy. Finally, perform test renders at multiple angles to confirm color accuracy, texture alignment, and silhouette integrity. A polished render often reveals subtle shading issues that inform minor tweaks to maps or UVs.
Common pitfalls and troubleshooting
Scale and axis mismatches are common when moving between ZBrush and Blender; always apply transforms before export/import. If textures appear washed out or incorrect, confirm the color space, gamma, and texture coordinates. Missing or broken normals usually indicate a bake with insufficient cage or wrong bake target. Overly dense topology can stall performance; decimate or optimize with care. Seams in UVs often show up after baking—check island boundaries and normalization. Keep backups at key milestones to quickly revert after a misstep.
Advanced tips for professional pipelines
Leverage Blender’s data transfer modifiers to bring shading or UV data from high-poly forms to clean low-poly meshes. Use a consistent naming convention and a shared asset library to coordinate projects across teams. Create automated scripts to batch bake maps and apply textures, reducing manual repetitive steps. Consider using procedural textures in Blender to quickly adjust surface variation without re-baking. For complex scenes, mix high-poly sculpt layers with normal maps to achieve depth without overwhelming the render engine.
Tools & Materials
- ZBrush(High-detail sculpting; polypaint export options)
- Blender(Topology, UVs, baking, shading, rendering)
- Export formats (OBJ/FBX)(Choose based on data transfer needs)
- Texture maps (diffuse, normal, displacement)(Optional; export from ZBrush or bake in Blender)
- Reference images and turntable setup(Keep assets organized in project folders)
Steps
Estimated time: 60-90 minutes
- 1
Prepare project structure
Create a dedicated project folder with subfolders for meshes, textures, and renders. Plan your data flow from ZBrush to Blender, and name files clearly to avoid confusion later.
Tip: Use a naming convention like model_name_source_date to keep versions organized. - 2
Sculpt primary forms in ZBrush
Build your base silhouette and major forms in ZBrush. Reserve a high subdivision count for detail while keeping separate subtools for distinct parts of the model.
Tip: Save incremental versions frequently to capture creative decisions without losing work. - 3
Add high-detail surface and polypaint
Refine surface texture and color using polypaint. Prepare texture maps if you plan to bake color details separately in Blender.
Tip: Organize polypaint layers so they map cleanly to texture channels later. - 4
Export high-poly and maps
Export a high-poly mesh as OBJ or FBX and generate texture maps (diffuse, normal, displacement) for Blender. Keep a low-poly proxy if you plan to bake maps from the high-poly.
Tip: Export UVs intact to ease texturing in Blender. - 5
Import to Blender and verify scale
Import the low-poly mesh, apply transforms (Ctrl-A), and check the scale and origin alignment with the ZBrush model. Import the color texture and assign it to the base shader.
Tip: Match the unit scale between the two apps to prevent size issues during baking. - 6
Retopology and UV mapping
Create a clean quad-based topology suitable for animation, then unwrap UVs with even texel density. Organize UV islands to minimize seams in the final texture map.
Tip: Use mirror symmetry for faster UV layout on symmetrical assets. - 7
Bake maps from high-poly to low-poly
Set up the high-poly cage, bake normal, displacement, and ambient occlusion maps in Blender. Verify bake quality by comparing high-poly and low-poly silhouettes.
Tip: Baking with a well-placed cage reduces artifacts on edges and corners. - 8
Texture, shading, and lighting
Connect textures to a PBR shader in Blender, adjust roughness and specular values, and set up HDRI lighting for realistic renders. Do a few test renders to evaluate material response.
Tip: Enable filmic color management for more realistic tonality. - 9
Render and iterate
Render at multiple angles to check consistency, adjust any UV seams or map issues, and iterate based on feedback. Export final images and, if needed, deliver a Blender-friendly asset pack.
Tip: Keep a versioned render folder to track visual changes across iterations.
Frequently Asked Questions
What is the recommended file format to export from ZBrush for Blender?
OBJ preserves grouping and is reliable for static meshes, while FBX can carry more scene data for animation. Export texture maps separately to bring polypaint into Blender as textures.
Use OBJ for static transfers or FBX if you need extra scene data; export polypaint as textures to Blender.
Should I decimate my mesh before export?
Keep a high-detail mesh for baking, then create a lower-poly version in Blender for the final mesh. Decimation in ZBrush is useful for previews, but ensure bake maps are done from a separate high-poly state.
Only decimate for previews; bake from a dedicated high-poly state to avoid quality loss.
How do I bake textures and normal maps in Blender?
Create a low-poly proxy, enable Cycles, and bake normal, displacement, and ambient occlusion maps from the high-poly model. Use a cage to improve bake accuracy and verify artifacts in the resulting textures.
Bake maps in Cycles with a cage for accuracy, then apply textures in the shader.
Can polypaint textures be used directly in Blender?
Polypaint can be exported as a texture map from ZBrush and used in Blender as a color texture. You may need to tweak gamma and color space for accurate results.
Yes, export polypaint as a texture and adjust color space in Blender.
Which Blender render engine is best for this workflow?
Cycles is recommended for accurate baking and material realism, while Eevee is great for fast previews during iteration.
Use Cycles for accuracy, Eevee for quick previews.
What are common pitfalls when transferring data between ZBrush and Blender?
Watch for scale/orientation mismatches, unapplied transforms, and seams in UVs. Always keep backups at key milestones to revert if needed.
Be mindful of scale, transforms, and UV seams; back up often.
Watch Video
What to Remember
- Plan data flow early and name files clearly
- Export formats depend on data transfer needs
- Bake maps from high-poly to low-poly for accuracy
- Retopology and UVs determine texture quality
- Test renders early and iterate