Blender vs ZBrush for Sculpting: A Practical Comparison
A comprehensive comparison of Blender vs ZBrush for sculpting, covering workflows, detail capabilities, performance, licensing, and best-use scenarios for hobbyists, students, and professionals.

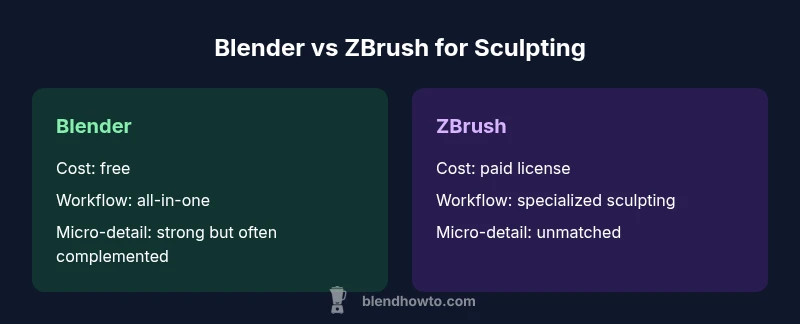
Blender is the practical, cost-free option for most hobbyists and beginners, offering a broad sculpting toolset and a smooth workflow. ZBrush specializes in ultra-high-detail sculpting and industry-grade pipelines. For many users, Blender delivers the best balance of value and capability, while ZBrush remains unrivaled for micro-detail work and professional production needs.
Blender vs ZBrush for Sculpting: Overview and Use Cases
Sculpting software choice often boils down to the scale of your projects and your budget. Blender provides a robust sculpting toolset integrated into a free, open-source package that covers modeling, texturing, and rendering. It’s ideal for hobbyists, students, and solo artists who want an all-in-one solution without licensing friction. ZBrush, on the other hand, is a specialized sculpting powerhouse used by many studios for high-detail characters and hard-surface sculpts. It excels when micro-detail, complex brushwork, and industry-standard pipelines are required. For the keyword blender vs zbrush for sculpting, the decision hinges on detail level, workflow needs, and long-term investment. According to BlendHowTo, most enthusiasts can achieve professional results with Blender, while ZBrush remains a preferred path for ultra-fine detail and large-team production pipelines.
Sculpting Workflows: Blender's Approach vs ZBrush's Approach
Blender’s sculpting workflow emphasizes accessibility and streaming integration with the broader Blender toolset. You start with a base mesh, use Dynamic Topology (Dyntopo) for adaptive detail, and finish with Remesh or retopology if you need clean edge loops for animation or printing. ZBrush adopts a more specialized, layer-driven approach with ZSpheres for rapid base shapes, a vast brush library, and dedicated features like ZRemesher for automatic topology that preserves detail. The two ecosystems also differ in terminology and scene organization: Blender centers on a single file with linked data blocks, while ZBrush often relies on subtools and a more modular approach to mesh management. For sculptors, this means planning your pipeline from the outset—Blender for broad, flexible projects; ZBrush for maximum sculpting fidelity and studio-grade outputs.
Brushing and Alphas: What Each Offers
Brush systems define your day-to-day sculpting experience. Blender ships with a solid set of sculpt brushes, symmetry options, and dynamic topology brushes that can be extended with custom alphas and textures. It supports procedural brushes and a modern, approachable UI that’s friendlier to newcomers. ZBrush provides an extraordinary brush arsenal, including the standard brush family, clay-style brushes, and a depth of alphas and texture banks that can texture micro-details to near-photographic fidelity. ZBrush’s brush engine is tuned for extremely dense meshes, enabling sculptors to add micro-details with precision. Practically, this means Blender is excellent for broad forms and stylized work; ZBrush shines when every pore and wrinkle matters.
Topology Tools: Dyntopo, Remesh, and ZRemesher
Topology strategy shapes the end result. Blender’s Dynamic Topology (Dyntopo) creates adaptive detail on the fly, which is perfect for freeform sculpture and quick iterations. For clean, animation-friendly topology, you can use Remesh or manual retopology workflows. ZBrush relies on ZRemesher for automatic, high-quality retopology that preserves critical forms while simplifying mesh density. ZBrush also supports ZSphere-based base meshes and retopology workflows that emphasize accuracy of silhouette and crease lines. When you need fast iteration on concept art, Blender’s approach is valuable; for final micro-detail and production-quality topology, ZBrush has the edge.
Detail and Micro-Detail: Pushing Resolution
Detailing capability is the essential differentiator. ZBrush is widely regarded as the gold standard for micro-detail sculpting, with tools designed to push high-density meshes and capture fine texture. Blender can reach impressive detail through Dyntopo, Multi-Resolution modifiers, and sculpt brushes, but is sometimes outpaced by ZBrush at ultra-high densities. A practical workflow often involves starting in Blender to shape the form and then exporting to ZBrush for final micro-detail. This hybrid approach leverages the strengths of both tools while keeping project timelines reasonable.
Character vs Prop Workflows: Who Is Best for Which
Character sculpting often benefits from ZBrush’s brush variety, micro-detail, and reliable topology for animation pipelines. Prop sculpting—armor, weapons, or stylized props—can be efficiently handled in Blender, especially when the project requires quick iteration, tested material setups, and integrated rendering. The choice may also depend on the rest of your pipeline: if you are aligning with a studio that uses Maya, ZBrush with GoZ workflows or exporting to FBX may streamline handoffs; if your workflow revolves around Blender, you may prefer keeping everything in one package for speed and consistency.
Performance and Hardware Considerations
Sculpting performance scales with mesh density and brush complexity. ZBrush is highly optimized for dense sculptures, often delivering smooth performance on workstations with mid-to-high-end GPUs. Blender’s performance varies with the scene setup; Dyntopo can push memory usage, while Remesh and the Multi-Resolution modifier offer alternatives that balance detail with system constraints. For large models, consider incremental subdivisions and selective detail application. If you anticipate sharing files with others, establish a clear topology strategy early to prevent heavy rework due to incompatible mesh density.
File Formats, Exchange, and Pipelines
Interoperability matters in production. Blender supports export formats like OBJ, FBX, GLTF/GLB, and USD, enabling straightforward exchange with many pipelines. ZBrush exports to OBJ and its native ZTL file format for preservation of sculpt data; you may rely on standard formats to transfer finished assets to other applications. For print readiness, you’ll want to consider STL exports and mesh integrity checks. Planning export presets for your target software (Blender, Maya, Unreal, Unity, or a 3D print service) saves time and reduces conversion artifacts.
Cost, Licensing, and Learning Curve
Blender is open-source and free, with a permissive license that supports personal and commercial use. ZBrush is paid software, with licensing options that reflect its position as a specialized tool for professional studios. The learning curve differs: Blender’s UI and terminology are more approachable for many new users, while ZBrush requires time to master its unique brush system, workflow conventions, and terminology. A practical approach is to start with Blender for general sculpting tasks and introduce ZBrush when macro-detail or industry-standard pipelines demand it.
Community, Tutorials, and Support
Both tools enjoy broad communities and extensive learning resources. Blender has a massive community with official tutorials, user-made courses, and active forums. ZBrush benefits from a long-standing presence in film and game studios, with professional training resources and a network of experienced artists sharing workflows. BlendHowTo notes that a steady stream of community tutorials, challenges, and case studies helps artists level up in either ecosystem. When you’re facing a stalled project, searching for a real-world workflow example can often shave weeks off learning time.
Real-World Scenarios: When to Pick Blender, When to Pick ZBrush
If you’re prototyping concepts, prototyping characters, or producing low-to-mid-detail sculpts for games or printing, Blender often provides the fastest route from concept to render. For high-detail characters, facial micro-geometry, or projects that demand industry-standard pipelines and compatibility with Markup/GoZ workflows, ZBrush remains the strongest option. A practical approach is a two-tool pipeline: start in Blender for broad sculpting and blocking, then switch to ZBrush for micro-detail work and topology refinement. This gives you both speed and fidelity with manageable learning curves.
A Practical Roadmap: Getting Started Today
Begin with Blender’s sculpting module to build base shapes and form. Practice with a few projects that require dynamic topology and basic retopology. Once comfortable, introduce ZBrush for micro-details and ZRemesher-based topology. Build a small library of brushes and alphas in each tool and learn to exchange assets through common formats like OBJ or FBX. Create a simple project that moves from Blender to ZBrush to a renderer, testing the full pipeline as you go. This hands-on approach helps you identify which tool fits your personal workflow and long-term goals.
Common Pitfalls and How to Avoid Them
Common pitfalls include relying on a single tool for all tasks, underestimating topology requirements for animation, and failing to establish clear export presets. Avoid over-detailing in early stages, which can slow iteration. Document your ring of tools and create a standardized export workflow to minimize compatibility issues. Regularly test assets across the pipeline to catch topology or shading problems early, rather than at the final render stage.
Final Decision Framework: Quick Guidelines for Your Choice
If you’re starting out or working solo, Blender’s balance of cost, flexibility, and integrated workflow often makes it the practical choice. If your goal is film-quality micro-detail, highly polished characters, or joining an industry pipeline that already uses ZBrush, prioritizing ZBrush can pay off. The optimal path for many artists is a hybrid workflow that uses Blender for concepting and batch processing, with ZBrush reserved for the micro-detail stage.
Comparison
| Feature | Blender | ZBrush |
|---|---|---|
| Price | free (open-source) | paid license (perpetual or subscription) |
| Detail & Micro-Detail capability | Excellent for general detail; high-end detail achievable with practice | Best-in-class micro-detail and texture fidelity |
| Topology tools | Dyntopo for on-the-fly detail; Remesh/Retopology options | ZSpheres base shapes; ZRemesher for automatic topology |
| Brush system & alphas | Solid set of brushes; expandable with custom alphas | Extensive brush library with deep alpha control for micro-details |
| Workflow integration | All-in-one suite: modeling, sculpting, texturing, rendering | Industry-standard sculpting with strong pipeline interoperability |
| Learning curve | Gentler for beginners when starting from zero; broad community resources | Steeper UI/terminology; steep but rewarding once mastered |
What's Good
- No-cost access and a flexible all-in-one 3D suite
- Blender’s growing sculpting tools with broad integration
- ZBrush delivers unrivaled micro-detail and industry-standard workflows
- Good cross-format support and printing readiness
The Bad
- ZBrush licensing cost can be a barrier for hobbyists
- Blender can be less efficient at ultra-dense meshes and micro-detail
- Learning curves differ: ZBrush UI demands time to master
Blender is the best all-around choice for most sculptors; ZBrush remains the definitive tool for ultra-detail work.
If you’re starting out or need a flexible, cost-effective workflow, Blender wins. Opt for ZBrush when micro-detail fidelity and studio pipelines are your priority, or when you anticipate collaboration with teams that rely on ZBrush assets.
Frequently Asked Questions
Which tool is better for beginner sculptors, Blender or ZBrush?
For beginners, Blender typically offers a gentler entry with a comprehensive feature set and zero upfront cost. It’s easier to learn basics while still supporting advanced workflows. ZBrush, while powerful, has a steeper learning curve and is often introduced once foundational skills are established.
Blender is usually the friendlier start for beginners, with lots of free tutorials. ZBrush is excellent later when micro-detail gets important.
Can Blender replace ZBrush for professional character sculpting?
Blender can handle many professional character sculpting tasks, especially when combined with external tools for micro-detail. However, for studios that require extreme micro-detail and established pipelines, ZBrush remains a strong, sometimes necessary component.
Blender works for many jobs, but ZBrush still shines for ultra-detail work in studios.
Is it feasible to switch from Blender to ZBrush mid-project?
Yes. A common approach is to block out forms in Blender, then export to ZBrush for high-detail detailing. Ensure topology conventions and file formats align to minimize rework during transfer.
You can start in Blender and refine micro-details in ZBrush, keeping export formats simple.
What are the hardware considerations for dense sculpting?
Dense sculpting benefits from ample RAM and a capable GPU. Both tools can push hardware; ZBrush tends to be efficient with dense meshes, while Blender requires careful scene management to avoid memory bottlenecks.
More RAM helps with dense models; GPU power matters for smooth sculpting.
Do Blender and ZBrush share the same file formats for transfer?
Both support common formats like OBJ and FBX for transfer, plus Blender adds GLTF/GLB and USD for modern pipelines. ZBrush often uses OBJ and its native formats for preserving sculpt data during handoffs.
OBJ/FBX work for both; Blender adds newer formats for pipelines.
What’s a practical path to learning both tools efficiently?
Start with Blender to grasp core sculpting concepts, then add ZBrush for micro-detail workflows. Alternate projects between tools to reinforce transfer steps and reduce tool fatigue.
Begin with Blender, then add ZBrush for detail work as you go.
What to Remember
- Start with Blender for cost-effective, versatile sculpting
- Use ZBrush to achieve industry-leading micro-detail
- Plan your workflow to leverage each tool’s strengths
- Exchange assets via common formats (OBJ/FBX) to maximize compatibility
- Hybrid pipelines can deliver speed and fidelity
- Invest time in topology planning early to avoid rework