Is Blender as Good as ZBrush? A Comprehensive Comparison
A detailed, objective comparison of Blender and ZBrush for digital sculpting. Learn strengths, limitations, pricing models, and which tool best fits your home artist workflow.

According to BlendHowTo, Blender can be a strong substitute for ZBrush for many sculpting tasks, especially for hobbyists and indie artists. While ZBrush remains the industry standard for high-detail digital sculpting, Blender offers a capable, cost-free workflow with competitive sculpting tools, a broad ecosystem, and a gentle learning curve. The BlendHowTo team found that for many projects, Blender’s dynamic topology, brushes, and modifiers deliver results that are production-ready for early concepts and game prototyping.
Understanding the Sculpting Landscape: Blender vs ZBrush
Is blender as good as zbrush? The short answer depends on your goals, budget, and pipeline. Blender is free and open source, with a growing sculpting toolset designed to cover a wide range of workflows from concept art to game-ready characters. ZBrush, by contrast, remains the industry standard for ultra-high-detail sculpts and dense micro-surface textures used in film and AAA game pipelines. For many home artists and small studios, Blender provides a surprisingly capable alternative that integrates sculpting with modeling, texturing, and rendering in a single application. According to BlendHowTo, this combination often reduces tool-switching and accelerates iterative design. Still, the choice should be rooted in your target output, whether you value cost, speed, or ultimate sculpting fidelity.
Core Sculpting Toolsets: Brushes, Dynamesh vs ZBrush Brushes
Blender’s sculpting workspace offers a modern brush library, Dynamic Topology (DynTopo) for on-the-fly topology changes, and a solid set of brushes for clay, pull, push, and scrape effects. ZBrush brings a dense ecosystem of specialized brushes and alphas, sculpting surfaces with incredible micro-details and a legendary brush system that many artists learn as a craft. If your work leans toward concept silhouettes and rough detailing, Blender’s tools are more than adequate. For the finest pores, wrinkles, and micro-skin textures, ZBrush’s brushes—paired with its Subtools workflow—often outperform Blender in a straight pixel-for-pixel sense.
Detailing and Subdivision: From Base Mesh to Micro-Detail
Detailing is where the debate sharpens. Blender’s DynTopo can push polygon counts dynamically, enabling broad exploration and fast iteration. ZBrush uses adaptive subdivisions and powerful multi-resolution approaches to reach tiny details without bogging down the entire mesh. For professional character work intended for close-up renders, many artists rely on ZBrush for the micro-detail stage, then transfer to other packages for shading and posing. BlendHowTo notes that the most productive pipelines often blend both worlds, building base forms in Blender and refining micro-details in ZBrush when necessary.
Retopology, UVs, and Texture Integration
A clean topology remains essential for animation and deformation. Blender provides robust retopology tools, snapping brushes, and a capable UV editor, all within the same app. ZBrush supports Retopology and UV workflows but tends to favor standalone steps or plugins in a broader pipeline. If your project demands quick retopo passes in a single package, Blender shines. If you’re exporting dense sculpts to external engines, you may appreciate ZBrush’s export options and its well-established texturing pipelines with GoZ-like integrations.
Rendering, Shading, and Real-time Viewports
Blender’s Cycles and Eevee engines offer realistic shading, lighting, and fast viewport previews, enabling a loop of sculpt, shade, and render. ZBrush features its own internal render and a different shading paradigm, often used for presentation-ready spheres and turntables. Blender’s integrated approach means fewer file handoffs, but ZBrush can still be preferable when the final presentation requires ultra-precise material cues and high-fidelity displacement maps.
Interoperability and File Formats
Both tools rely on shared formats like OBJ and FBX, which makes round-tripping feasible but sometimes requires extra cleanup. Blender’s strong plugin ecosystem further smooths the transfer, while ZBrush’s robust ZTL/ZT format and native GoZ-enabled export paths remain pivotal in many production pipelines. For many hobbyists, exporting from Blender to ZBrush for micro-detailing is a practical approach that preserves efficiency without sacrificing fidelity.
Pricing, Licensing, and Learning Resources
Blender’s free, open-source model is a decisive advantage for hobbyists and students. ZBrush is a paid, perpetual license with educational discounts and a heavier upfront cost but widely recognized as a standard in professional workflows. Both communities supply abundant learning resources; Blender’s tutorials range from beginner to advanced, while ZBrush training is abundant but often more specialized and pipeline-driven. BlendHowTo recommends starting with Blender to learn core sculpting concepts, then adding ZBrush if the project scope demands ultra-high detail.
Performance and Hardware Demands
Hacking through dense, high-poly sculpts requires sufficient RAM and a capable GPU. Blender tends to be leaner in some real-time editing scenarios thanks to its multi-threaded rendering options in Eevee and Cycles. ZBrush is historically efficient at handling heavy polygons due to its internal architecture, but it can require careful management of memory and scene organization for extreme detail. If you’re targeting consumer hardware, Blender’s flexibility makes it easier to scale without sacrificing core sculpting capabilities.
Real-World Workflows: Concept Art, Game Prototyping, and Film VFX
In practice, many artists start a concept in Blender to leverage its quick iteration and then export to ZBrush for high-detail finishing, texture sculpting, or normal map creation. Independent studios often rely on Blender for modest assets and use ZBrush for characters and gear that demand meticulous micro-sculpting. This blended approach minimizes cost while keeping pipelines adaptable across project scopes.
Common Pitfalls and Practical Workarounds
Common challenges include over-reliance on DynTopo without planning topology, which can complicate later retopology. A practical workaround is to sculpt with DynTopo for volume, then switch to a dedicated retopology mode to create a clean mesh, followed by texture baking. ZBrush aficionados sometimes encounter GoZ integration hiccups when moving assets between apps; in Blender-first pipelines, careful export settings and manual retopology checks help avoid surprises.
Hybrid Workflows: Leveraging Both Tools
A practical approach is to establish a base mesh in Blender, push for primary details with DynTopo, export to ZBrush for micro-detailing, then bring back for final texture maps and shading. This hybrid workflow maximizes the strengths of each tool—Blender’s accessibility and integrated ecosystem, and ZBrush’s precision for fine detail. The BlendHowTo team emphasizes documenting the handoff steps and maintaining consistent vertex counts to minimize cleanup later.
Getting Started: A Practical 48-Hour Plan for Beginners
Start by installing Blender, running foundational sculpting tutorials, and building a simple character from a primitive. Once comfortable, test DynTopo on a basic form, then attempt a ZBrush-style detailing pass in Blender using alphas and custom brushes. If you have access to ZBrush, perform a small project to compare the feel of ZBrush brushes with Blender equivalents, noting where you prefer one approach over the other.
Comparison
| Feature | Blender | ZBrush |
|---|---|---|
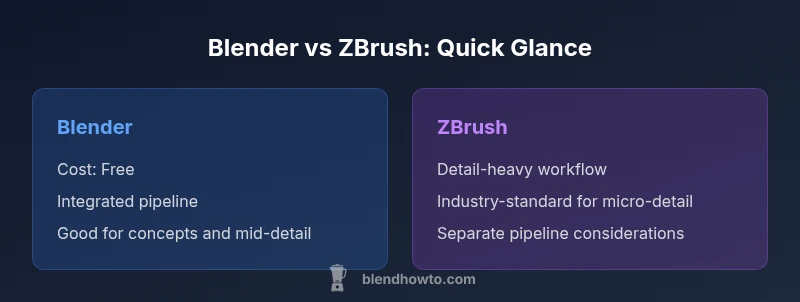
| Sculpting workflow style | Procedural, integrated workflow with DynTopo and multi-resolution sculpting; strong for concept to mid-detail | Industry-standard, deep brush system with specialized alphas and multi-resolution detailing; optimized for ultra-high-detail work |
| Detail potential | Excellent for concept detail and game-ready assets with a flexible topology approach | Exceptional micro-detail capability; scalable detail through adaptive subdivisions and fine controls |
| Learning curve | Steeper initially due to breadth of features but generous free learning resources | Steep and focused; mastery requires time, practice, and pipeline familiarity |
| Price range | Free and open-source; no license cost | Paid license with educational discounts; no ongoing subscription required in many cases |
| Best for | Indie artists, quick concept-to-prototype work, projects needing an all-in-one tool | Character sculpting, film characters, high-detail assets for production pipelines |
| Interoperability | Strong OBJ/FBX/GLTF support; good plugin ecosystem; easy round-tripping with other tools | Excellent export options and GoZ-style integrations; widely adopted in professional pipelines |
What's Good
- Blender is free and open-source, lowering the barrier to entry
- Integrated workflow reduces tool-switching and speeds iteration
- Active community and abundant free tutorials
- Blender’s real-time viewport and Eevee enable fast previews
The Bad
- ZBrush still leads for the finest micro-details and texture work
- ZBrush has a steeper learning curve for beginners
- Some large pipelines favor dedicated tools with long-standing industry standards
Blender is a strong, cost-effective alternative for many sculpting tasks; ZBrush remains unmatched for extreme detail in professional pipelines
If your focus is fast iteration and cost efficiency, Blender wins. If your goal is micro-detail fidelity for film or AAA games, ZBrush is the superior choice, though a blended workflow can leverage both strengths.
Frequently Asked Questions
Can Blender replace ZBrush for production workloads?
Blender can replace ZBrush for many production tasks, especially in indie and small-studio contexts where cost and speed matter. For ultra-high-detail character work, ZBrush remains the industry benchmark. A blended workflow often yields the best balance between cost and fidelity.
Yes, for many production tasks Blender can replace ZBrush, especially in smaller studios, though ultra-high-detail work still benefits from ZBrush. A blended workflow often works best.
Is Blender good for character sculpting compared to ZBrush?
Blender is capable for character sculpting and animation-ready topology, with a growing set of brushes and retopology tools. ZBrush excels in micro-details and complex surface textures, making it preferred for high-end characters in film.
Blender can handle character sculpting well, but ZBrush shines with micro-detail work.
Does ZBrush offer features that Blender cannot replicate?
ZBrush provides certain specialized brushes, alphas, and micro-detail workflows that are hard to fully replicate in Blender. Some studios also rely on ZBrush-specific pipelines for quality control and texture baking.
Yes, ZBrush has unique brushes and micro-detail workflows Blender can’t always match.
Can I export from Blender to ZBrush without issues?
Exporting between Blender and ZBrush is common via OBJ or FBX formats. Some texture and subdivision data may require tweaks after transfer, but the major geometry and UV data typically survive the handoff.
You can export from Blender to ZBrush via OBJ or FBX with minor adjustments needed afterward.
Is the learning curve steeper for ZBrush than Blender?
ZBrush generally has a steeper initial learning curve due to its dense feature set and unique workflows. Blender offers a gentler entry point for beginners, with a broader range of functions beyond sculpting.
ZBrush is steeper to learn; Blender is usually easier to start with.
What’s a practical 2-stage workflow for a mid-size project?
A practical approach is to block and shape in Blender, then move to ZBrush for micro-detailing and texture sculpting if needed. Return to Blender for final renders and pipeline integration. This minimizes upfront costs while preserving detail where it matters.
Block in Blender, detail in ZBrush, then render and finalize in Blender.
What to Remember
- Start with Blender to learn core sculpting concepts
- Use ZBrush for micro-detail work when required by the project
- Plan pipelines to minimize asset handoffs and retopology time
- Experiment with hybrid workflows to balance cost and fidelity
- Invest in learning resources that match your target output