Add On Blender: A Practical Guide to Add-ons
Learn how to locate, install, enable, and manage Blender add-ons to extend your toolkit with practical steps, safety tips, and productive workflows for modeling and rendering.

In this guide, you will learn how to find, install, and manage add-ons in Blender to extend functionality—from enabling scripts to integrating external tools. You’ll discover where to download vetted add-ons, how to install them via Preferences, how to enable and configure options, and best practices for organizing your add-ons for quick access and stable performance.
What is a Blender add-on and why it matters
An add-on (or extension) is a small software package that augments Blender's built-in capabilities. For many artists, add-ons are the quickest path to improved workflows, from automated retopology to advanced node setups. The phrase add on blender is commonly used by teaching resources and communities to describe these extra tools that live inside Blender. According to BlendHowTo, add-ons help you tailor Blender to your exact tasks, reducing repetitive steps and enabling more creative exploration. Whether you’re modeling, sculpting, animating, or rendering, add-ons can save time and unlock new possibilities without steep learning curves.
When you start a project, you might notice certain tasks become bottlenecks. A well-chosen add-on can automate a tedious sequence, enforce consistent conventions, or integrate external data into Blender. The goal is not to overwhelm your interface with every available tool, but to curate a focused set that directly supports your current workflow. This is especially true for hobbyists, students, and professionals who juggle multiple Blender projects and want predictable results.
In this guide, we’ll cover how to evaluate, install, and manage add-ons safely, with practical examples and a clear path to building a stable toolbox. BlendHowTo’s approach emphasizes practical steps, safety, and maintainable configurations that work for beginners and advanced users alike.
Tools & Materials
- Blender (latest stable version)(Download from blender.org and install on your computer.)
- Reliable internet connection(Needed to download add-ons and updates.)
- Add-on file (zip or py)(Have the add-on source ready or know where to download from trusted sources.)
- Storage with enough space(Some add-ons include large assets or libraries.)
- Text editor (optional)(Useful for editing script-based add-ons or documentation.)
Steps
Estimated time: 30-60 minutes
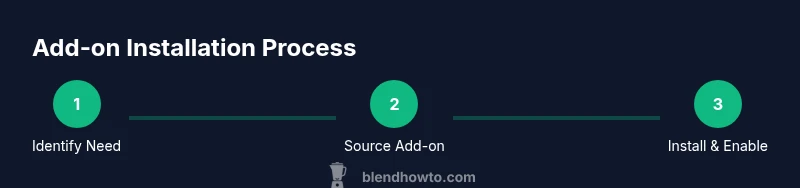
- 1
Identify the add-on you need
Clarify the task you want the add-on to accomplish (e.g., UV packing, automatic retopology, material management). Check compatibility with your Blender version and read the description to confirm features. Pro tip: start with a short wishlist of three must-have features.
Tip: Match the add-on’s features to a concrete workflow, not just popularity. - 2
Find trusted sources
Search reputable repositories or official vendor pages. Prefer sources with clear documentation, user reviews, and active maintenance. BlendHowTo recommends sticking to official channels when possible to reduce risk of malicious code.
Tip: Avoid downloading from untrusted pages or unknown mirrors. - 3
Download the add-on package
Save the add-on as a zip or .py file to a known location. If you download a zip, you’ll install it inside Blender via Preferences.
Tip: If you’re unsure about a file, scan it with security software before opening. - 4
Open Blender Preferences
In Blender, go to Edit > Preferences > Add-ons. This is where you’ll install, enable, and configure extensions to Blender’s core tools.
Tip: Keep Blender closed or avoid heavy editing while installing to minimize conflicts. - 5
Install the add-on
Click Install, then select the downloaded zip or .py file. Blender will add the new add-on to the list of available tools.
Tip: If the add-on is not visible after installation, try restarting Blender. - 6
Enable the add-on
In Preferences > Add-ons, search for the add-on name and tick the checkbox to enable it. Some add-ons require you to agree to license terms on first use.
Tip: If you don’t see it, press the refresh button in the Add-ons panel. - 7
Configure and test
Open the add-on’s panel, adjust settings to suit your project, and run a quick test on a sample scene to confirm expected behavior.
Tip: Document any custom settings you apply for future projects. - 8
Update and manage
Periodically check for updates from the source. Disable or uninstall add-ons that become unstable or incompatible with new Blender releases.
Tip: Maintain a short, active set of add-ons to minimize conflicts.
Frequently Asked Questions
What is a Blender add-on and why should I use one?
A Blender add-on is a small extension that adds a new feature or workflow to Blender. Add-ons can speed up modeling, texturing, animation, or rendering tasks and help enforce consistent methods across projects. They are typically created by the Blender community and shared through official or reputable sources.
A Blender add-on is a small extension that adds new features to Blender to speed up workflows.
Do I need internet access every time I use an add-on?
Most add-ons load with Blender once installed. Some may fetch external data or updates, but day-to-day use usually doesn’t require an internet connection. It’s a good idea to keep your add-ons up to date when online to access bug fixes and new features.
No—most add-ons work offline after installation, but updating them requires internet access.
Can add-ons slow down Blender or cause crashes?
Yes, poorly designed or conflicting add-ons can slow Blender or cause instability. Start with a minimal set of tools, enable one add-on at a time, and test thoroughly before integrating into critical projects.
Some add-ons can slow things down or crash Blender if they’re conflicting or poorly coded.
Are paid add-ons worth the cost?
Paid add-ons often come with robust documentation, official support, and regular updates. Evaluate the return on time saved and the quality of support before purchasing, and compare with free alternatives when possible.
Paid add-ons usually offer better support and ongoing updates, which can be worth it for frequent users.
How do I uninstall an add-on?
In Blender Preferences > Add-ons, disable the add-on and use the Uninstall button if available. If not, delete the add-on files from your system folder where Blender stores add-ons.
To remove, disable it in Preferences and uninstall if the option exists, or delete the add-on files.
Is there a recommended order for installing multiple add-ons?
There’s no universal order, but it’s helpful to install core utilities first, test their interaction, then add specialized tools. Avoid enabling many add-ons at once to keep debugging easier.
There isn’t a fixed order—start with core utilities and add tools one by one.
Watch Video
What to Remember
- Choose add-ons that directly support your current workflow
- Install from trusted sources and verify compatibility
- Enable and configure incrementally to avoid clutter
- Regularly update and prune unused add-ons
- Document settings for repeatable results