Step to Blender Addon: A Practical How-To Guide
A comprehensive guide to building a Blender addon from planning to distribution, with hands-on steps, tooling tips, testing, and maintenance for beginners and hobbyists.

Want to build a Blender addon from scratch? This guide walks you through planning, coding basics, packaging, and testing to help you ship a usable tool quickly. It covers addon structure, Python essentials, and distribution basics, enabling a smooth step to blender addon. You'll learn best practices, debugging tips, and how to validate addon behavior in Blender's scripting environment.
Why a Blender addon matters in your workflow
Addons automate repetitive tasks, extend the UI, and unlock capabilities Blender ships with by default. For home cooks? Not relevant. For 3D artists and hobbyists, a well-designed addon reduces manual work, standardizes workflows, and lets you focus on creative decisions. The idea of a step to blender addon appears as a practical path: plan, implement, test, and polish in small, repeatable cycles. By starting with a clear goal and an MVP, you validate assumptions early, minimize rework, and build something that others can confidently adopt. BlendHowTo’s approach emphasizes concrete steps, reusable patterns, and documentation so beginners can scale from a tiny prototype to a feature-rich tool.
Core concepts you'll master
An addon is a Python module that Blender can load to extend its capabilities. Core ideas include the addon’s metadata (bl_info), the register and unregister functions, and the Blender Python API (bpy). You’ll learn how to define operators, panels, and user preferences, and how to organize code into a clean, reusable structure. Expectations and limitations vary across Blender versions, so you’ll also learn to write forward-compatible code. This section grounds you in terminology and architecture so you can speak the same language as the API and your future collaborators. If you’re starting from zero, focus on understanding how a single operator interacts with the UI before scaling up to a full-featured addon. BlendHowTo’s approach favors modular design and explicit documentation.
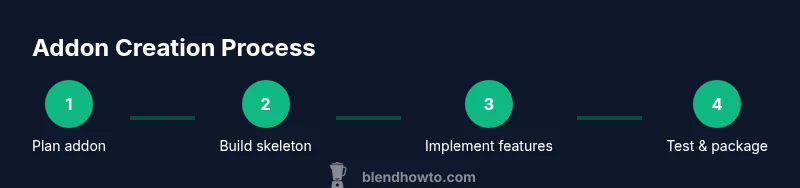
Planning your addon: scope, audience, and UX
Successful addons begin with a clear scope and a target audience. Define the primary task your addon performs, the UI it exposes, and the minimum features required to be useful. Consider your user’s perspective: is this tool for beginners or power users? Sketch a simple UX flow that minimizes clicks and avoids disrupting common Blender workflows. Write user stories that describe who benefits, what they achieve, and how they measure success. This planning phase also helps you estimate effort, set milestones, and decide on release pacing. Remember to document decisions so future you can revisit and adjust as Blender API evolves.
Environment and tools: setting up before you code
Before writing code, ensure your dev environment is stable and repeatable. Install Blender and a capable code editor, then configure your editor to work with Blender’s Python environment. Create a dedicated folder for your addon files, including init.py, bl_info, and a minimal operator to test the API. Initialize a simple Git repository to track changes and experiment with branches for features. Keep a clean, readable code style with docstrings and comments. Finally, review the Blender API docs to understand how bpy.types, operators, panels, and preferences are defined and registered.
Implementing the addon skeleton: bl_info, init.py, and registration
The skeleton provides the scaffolding that Blender expects. Start with a bl_info dictionary that declares the addon name, author, version, and bl_region_type. Create init.py and implement the register and unregister functions. Within these, register classes (operators, panels) and define any properties you will expose. A clean skeleton makes it easier to add features later and reduces debugging time when Blender loads the addon. Use a consistent naming convention and file layout so it’s obvious where to find things as you grow the project.
Building a simple example addon: a tiny utility
A small, tangible example makes the learning concrete. Implement a simple operator that performs a non-destructive task, like converting the active object's name to lowercase or printing a message to the console. Create a panel in the UI to expose the operator, and wire up a couple of properties to demonstrate user interaction. This concrete example provides a testing ground for your registration logic and helps you understand how Blender invokes Python code during tool use. Incrementally expand this example to avoid overwhelming yourself at the start.
Testing, packaging, and distributing your addon
Put your addon through a thorough test cycle inside Blender. Install it using Preferences > Add-ons > Install, enable it, and try common workflows that invoke its features. When packaging, bundle the addon folder (with init.py and bl_info) into a ZIP file and provide clear installation instructions. Write a short README and keep a simple changelog. If you publish publicly, include licensing information and usage examples. Maintenance comes next: monitor Blender API changes and keep the addon up to date with new Blender versions.
Troubleshooting and common pitfalls to avoid
Developing addons involves solving API quirks and packaging gotchas. Common problems include misnamed classes, missing bl_info, or incorrect registration order. Always run in Blender’s console or script editor to capture tracebacks, and use print statements or a logger to isolate issues. Avoid global state that complicates unloading or reloading, and keep dependencies optional where possible. By anticipating these issues, you’ll reduce debugging time and deliver a smoother user experience.
Next steps and ongoing learning
After you have a working addon, plan a roadmap for features, tests, and documentation. Explore related addons to learn patterns you can reuse, such as property groups, panel layouts, and addon preferences. Regularly review Blender API changes and participate in the community by sharing your code and asking for feedback. The more you practice, the quicker you’ll become at delivering robust tools that blend seamlessly into Blender workflows.
Tools & Materials
- Blender installed (recent version)(Ensure Blender version supports the addon API used (e.g., 3.x/4.x).)
- Code editor (VS Code, PyCharm, etc.)(Configure Python linting for Blender compatibility.)
- Git for version control(Keep a changelog and branches for experimentation.)
- Blender API documentation(Reference for bpy.types, operators, panels, properties.)
- Addon skeleton template(Starting point for bl_info, __init__.py, and registration.)
- Blender’s Text Editor(Test snippets without leaving Blender.)
- Project workspace folder(Organize __init__.py, icons, resources.)
Steps
Estimated time: 4-6 hours
- 1
Define addon goals and user stories
Outline the primary task the addon performs and capture user stories that describe who benefits and how they will use it. This helps scope features and drives UX decisions from day one.
Tip: Write 2-3 user stories before touching code. - 2
Set up development environment
Install Blender and your code editor, then configure a dedicated addon workspace. Create a Git repo to track changes and branches for experimentation.
Tip: Test in Blender’s Python console to verify API calls. - 3
Create addon skeleton
Add bl_info, create __init__.py, and implement basic register/unregister functions. Register a minimal operator to verify the loading mechanism works.
Tip: Name files and classes consistently to ease maintenance. - 4
Implement core features
Add the main operator logic, panels, and any properties. Keep functionality modular so you can extend without breaking existing code.
Tip: Start small, then add one feature per iteration. - 5
Refine UI and UX
Polish the interface, use layout.split and alignment options, and document how users interact with controls. Add help text where needed.
Tip: Prioritize discoverability and minimal clicks. - 6
Test in Blender
Load the addon in Blender, enable it, and run through typical workflows to catch edge cases and runtime errors.
Tip: Use Blender’s console to trace exceptions. - 7
Package and distribute
Zip the addon folder with __init__.py and bl_info, include a README, and provide installation steps for users.
Tip: Include license and terms of use. - 8
Document and maintain
Create inline docstrings, user documentation, and a changelog. Plan for future Blender API changes and version compatibility.
Tip: Maintain a changelog with each release.
Frequently Asked Questions
What is a Blender addon?
A Blender addon is a Python script that extends Blender's features by adding operators, panels, or tools. It follows a defined structure with bl_info and register/unregister functions.
A Blender addon is a Python script that extends Blender with new tools and UI.
Do I need to know Python to create an addon?
Yes. Blender addons are written in Python, and understanding bpy, operators, and property definitions is essential.
Yes, you need Python knowledge to build addons.
How do I test an addon in Blender?
Install the addon via Preferences > Add-ons > Install, enable it, and run its tools within Blender to verify behavior.
Install and enable it in Blender, then test the tools.
How should I package and distribute an addon?
Package as a ZIP with the addon folder, include a README and license, and provide installation steps for users.
Package as a ZIP and share it with clear install steps.
Can I reuse code from other addons?
You can adapt open-source code where licenses allow; always respect licenses and avoid proprietary code.
Reuse is possible where allowed by licenses.
Watch Video
What to Remember
- Plan addon scope before coding.
- Follow a clean addon structure (bl_info, register, unregister).
- Test iteratively in Blender with small, repeatable steps.
- Package as a ZIP with clear install instructions.
- Document usage and maintain compatibility with Blender updates.