Beginner Blender: A Complete Starter Guide for 3D Beginners
A thorough, beginner-friendly guide to Blender basics for starting your journey in 3D modeling. Learn setup, core concepts, simple projects, and essential tips for steady progress in 2026.

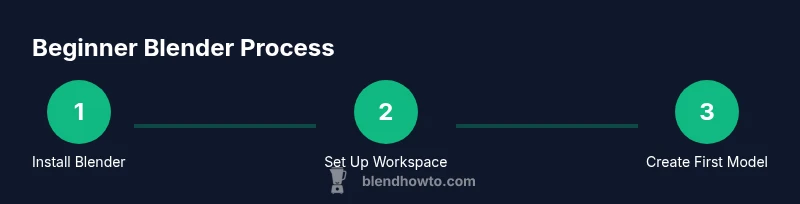
By the end of this guide, you will have a working Blender setup, a basic project template, and your first simple object. This quick-start covers installing Blender, configuring a comfortable workspace, navigating the interface, and creating a beginner-friendly model. It also highlights common pitfalls and, importantly, how to save and back up your work.
What is Blender and Why Start as a Beginner
Blender is a powerful, free, open-source 3D creation suite used for modeling, sculpting, animation, rendering, and more. For a beginner, Blender offers a single, comprehensive toolkit that runs on Windows, macOS, and Linux. If you are a true beginning blender, the first step is to understand that Blender is not only for experienced artists; it's designed to grow with you. The interface may look intimidating at first, but with a structured approach you can learn core concepts in days rather than weeks. This section lays the foundation: what Blender is, why it matters in today’s creative workflow, and how to frame your learning so you don’t get overwhelmed. You’ll come to see Blender as a versatile tool for both visualization and imagination, enabling you to turn simple shapes into expressive 3D scenes and simulations. As you embark on your beginning blender journey, expect a learning curve that rewards patience and regular practice.
Key ideas to remember:
- Blender is free and widely supported across platforms.
- Start with fundamentals before chasing advanced features.
- Small, consistent practice beats long, erratic sessions.
Setting Up Your Blender Workspace
Setting up properly from day one saves you time and frustration. Download Blender from Blender.org to obtain the latest stable release; the software is free and cross-platform. After installation, begin with a clean startup file: a camera, a light, and a single cube give you a simple, controllable starting point. Customize your workspace by docking essential panels—the 3D Viewport, Outliner, and Properties—so you can see objects, scene structure, and settings at a glance. Save your preferences so your layout loads the same way each time. Create a dedicated project folder for your Blender work, and adopt a simple versioning system (e.g., project_v01.blend) to keep track of iterations. This disciplined approach will grow with you as your projects become more complex.
Tips:
- Use File > Defaults > Load Factory Settings to start fresh if needed.
- Enable Auto Save in Preferences to minimize data loss.
- Consider a basic naming convention for objects and collections.
Core Concepts for New Users
As a new creator, focus on the core concepts that recur most in Blender projects. A scene contains objects organized in a hierarchy; objects exist in two primary modes—Object Mode for positioning and Transform, and Edit Mode for shaping geometry. Navigation is essential: orbit with middle mouse, pan with Shift+Middle Mouse, and zoom with scroll. Understand the difference between a mesh’s vertices, edges, and faces, and learn the transform tools (G to move, S to scale, R to rotate). Grasp the role of modifiers (like Mirror and Subdivision Surface) as non-destructive tools that can be applied and adjusted later. Your first goal should be to move from a blank scene to a basic composition, then gradually integrate lighting and materials.
Highlights to master:
- Object vs Edit Mode
- Basic transforms and snapping
- Non-destructive modifiers
- Saving incremental versions
With time, you’ll recognize Blender’s general workflow: model, refine, shade, light, and render.
Building Your First Simple Scene
A practical starting project helps cement concepts. Begin with a floor plane and a simple cube to serve as your primary object. Position the camera to frame your scene and add a light for depth. In Edit Mode, extrude faces to form a basic table or chair, using loop cuts to add detail where needed. Keep materials simple—two or three distinct colors help you understand how light interacts with surfaces. Finally, render a test image using a quick render engine like Eevee to see the results of your layout, lighting, and shading in a single frame. This hands-on approach is the fastest route from concept to a tangible result, reinforcing the skills you’ve just learned.
Practical steps to try:
- Create a floor, a block, and a basic stool by extruding faces.
- Use the Subdivision Surface modifier sparingly to smooth edges.
- Save a quick render as a reference image for comparison as you iterate.
Basic Modeling Techniques
Modeling in Blender introduces a set of practical tools that build on each other. Start with Extrude (E) to extend geometry from faces, then use Loop Cut (Ctrl+R) to add more geometry where you need it. Bevel edges (Ctrl+B) to soften corners and avoid harsh silhouettes in close-ups. Learn to merge vertices (M) when combining separate parts, and use Mirror modifiers for symmetry in models like characters or furniture. Always switch between Edit Mode and Object Mode to verify how individual edits affect the overall shape. Over time, these techniques become second nature, allowing you to craft more complex shapes with confidence.
Tips for efficiency:
- Use snapping (magnet icon) to align vertices precisely.
- Name vertices and edges in Edit Mode for easier editing later.
- Practice with a single object before attempting multi-part assemblies.
Lighting, Materials, and Rendering Basics
Lighting and material setup are essential to making models feel real. Blender offers Eevee for real-time rendering and Cycles for physically based rendering; starting with Eevee provides quick, visual feedback while you learn. Begin with a simple three-point light setup and adjust color, intensity, and radius to control mood and depth. Materials range from solid colors to reflective, glossy, or translucent surfaces; keep the initial materials basic—color, roughness, and metallic settings are enough to convey form. Don’t rush texture work; focus on getting the lighting and shapes right first. Rendering at low samples in Eevee is a good stepping stone before moving to higher-quality Cycles renders.
Common starter pitfalls:
- Overcomplicating materials early on.
- Ignoring world lighting and HDRi contributions.
- Rendering with too many samples at first, causing long wait times.
By mastering these basics, you’ll be able to produce clean, well-lit renders that demonstrate your progress and understanding.
Saving, Organizing, and Backing Up
Organization pays off as projects grow. Establish a consistent folder structure for each project: assets, scenes, renders, and exports. Use Save As to create versioned files and enable Autosave to reduce risk of data loss. Regularly back up your Blender files to an external drive or cloud storage, especially after meaningful progress. Develop a habit of exporting essential assets (OBJ or FBX) for reuse in future projects. This discipline helps you track progress and makes collaboration simpler if you ever work with others.
Best practices:
- Save at logical milestones (e.g., scene_v01.blend, scene_v02.blend).
- Maintain a separate folder for textures and reference images.
- Use relative paths when moving projects between drives or devices.
Common Beginner Mistakes and How to Fix Them
Beginners often run into a handful of repeatable issues. Common mistakes include starting with overly complex models, neglecting scene organization, and skipping the basics of lighting. Another frequent misstep is spending too much time on material creation before confirming the fundamental geometry and composition. Solution-focused habits include modeling simple shapes first, naming and grouping objects, and testing renders early to identify how lighting and shading interact with your forms. Regular reviews of your project with fresh eyes can reveal issues before they become hard-to-fix habits. Overcoming these early hurdles will set a strong foundation for more advanced Blender work.
Closing Note: Onward with Your Beginning Blender Journey
As you continue your learning, the key is consistent practice, curiosity, and incremental challenges. Begin with small, well-defined projects that reinforce each concept, from basic geometry to simple lighting and color. Track your progress with a notebook or digital log of what you tried, what worked, and what didn’t. Before long, you’ll be able to take on more complex scenes, animate your models, and experiment with different render styles. The journey from beginner to confident Blender artist is a marathon, not a sprint, but with regular practice you’ll steadily unlock new capabilities.
Tools & Materials
- Blender software (free)(Download from blender.org; latest stable release.)
- Computer with internet(Stable connection to download assets and references.)
- Mouse and keyboard(Recommended for precise navigation; a graphic tablet optional.)
- Reference assets or images(Optional but helpful for tracing shapes.)
Steps
Estimated time: 60-90 minutes
- 1
Install Blender and set up your workspace
Download Blender from the official site, install it, and open a fresh project. Reset to a clean layout or arrange a basic setup with a 3D Viewport, Outliner, and Properties panel. This creates a stable foundation for your beginner-friendly workflow.
Tip: Configure a comfortable layout and save as default so every new project starts the same. - 2
Create a base mesh
Add a default cube (Shift-A > Mesh > Cube) to the scene. Position it with G and scale with S to establish a ground reference for your model. This cube becomes your starting point for practicing basic edits.
Tip: Name the object early (e.g., 'BaseCube') to keep your scene organized. - 3
Enter Edit Mode and shape
Switch to Edit Mode (Tab). Use face selection and the Extrude tool (E) to extend geometry. Add loop cuts (Ctrl-R) to introduce new geometry where you need more detail.
Tip: Enable proportional editing (O) for smoother transitions when shaping larger forms. - 4
Add modifiers and refine
Try a Subdivision Surface modifier to smooth edges without altering the base geometry. Tweak levels to balance performance and detail. Remember: modifiers are non-destructive and can be adjusted later.
Tip: Apply modifiers only after your modeling steps are stable to preserve editability. - 5
Assign basic materials
Go to the Materials tab, create a new material, and assign it to your object. Start with simple color values to understand how lighting affects surfaces.
Tip: Keep materials descriptively named and organized for multi-object scenes. - 6
Set up lighting and render
Add a light source and adjust position and power. Choose Eevee for fast previews, then render a test image. Observe how shadows and reflections fall on your model.
Tip: Use a basic three-point lighting setup to achieve balanced illumination.
Frequently Asked Questions
What is Blender and is it free?
Blender is a free, open-source 3D software used for modeling, animation, rendering, and more. It’s suitable for beginners and professionals alike, with a supportive community and frequent updates.
Blender is free and open-source, making it accessible for beginners to start learning 3D without upfront costs.
Do I need a powerful computer to start with Blender?
You don’t need the top-of-the-line machine to begin. A modern multi-core CPU, adequate RAM, and a dedicated GPU help, but Blender runs on a wide range of systems, and you can start with simple projects to learn the basics.
A reasonably current computer is enough to start; you can gradually scale up as your projects become more demanding.
Should I start with Eevee or Cycles for rendering?
Start with Eevee for fast, interactive previews. Move to Cycles when you want more physically accurate lighting and materials. This progression helps you learn without long render times.
Begin with Eevee to get quick visual feedback, then try Cycles for higher realism.
How long does it take to learn Blender as a beginner?
Learning pace varies, but with consistent practice, you’ll see steady progress over weeks. Break tasks into small, achievable projects to build confidence and skills.
Progress depends on practice, but regular, small projects yield noticeable improvement over weeks.
Where can I find official Blender tutorials?
Blender’s official website hosts tutorials, guides, and documentation. Community channels and reputable educational sites also provide structured courses and project-based lessons.
Check Blender's official site for tutorials and docs, plus trusted community resources.
What is a good first project in Blender?
A simple scene like a room or a basic piece of furniture lets you practice modeling, lighting, and rendering without overwhelming complexity.
Start with a small, complete scene to learn the basics end-to-end.
Watch Video
What to Remember
- Master Blender basics before diving into complex features
- Set up a clean workspace and repeatable workflow
- Practice a few modeling techniques to build confidence
- Render early to validate lighting and materials