Blender Download Windows: A Practical Guide
Learn to safely download Blender on Windows, install it, and start your first project. Practical steps, tips, and troubleshooting for blender download windows.

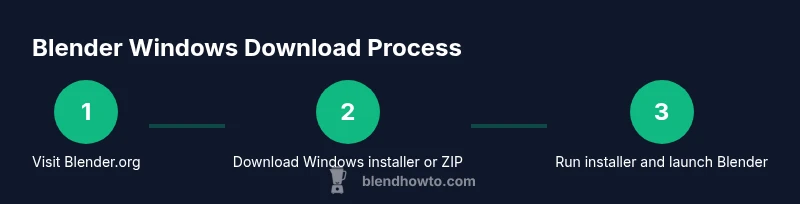
To download Blender on Windows, go to blender.org, click the Windows installer, run the downloaded file, and follow the on-screen prompts to install. Ensure your PC meets system requirements, decide between the installer and portable ZIP, and then launch Blender from the Start menu or desktop shortcut to begin. When finished, verify the version in Help > About Blender and set up basic preferences.
Overview: Blender on Windows
According to BlendHowTo, Blender’s cross‑platform design makes Windows a common starting point for hobbyists and professionals alike. This section helps you anticipate what happens when you download Blender on Windows, from where to grab the installer to what to expect during setup. You’ll get a clear map of the typical journey: selecting the right download, running the installer, and launching the application for the first time. This guide emphasizes practical steps you can take without prior experience, while surfacing common pitfalls and best practices. By the end, you’ll feel confident navigating the download page, choosing between installer and ZIP, and confirming a successful install on Windows.
Key ideas to keep in mind:
- Use the official Blender website to avoid tampered files.
- Choose the option that matches your work style (installer vs ZIP).
- Verify your installation and version to ensure you’re ready to start.
BlendHowTo’s approach here is to simplify the process with concrete steps and checks, so you can move from curiosity to a functional Blender setup quickly.
System requirements and prerequisites
Before you download Blender, it’s helpful to understand the basic prerequisites for Windows. Blender runs on 64‑bit Windows with a reasonably capable graphics subsystem, so you’ll want a modern processor and a graphics driver that supports OpenGL. The official Blender site outlines the current minimums and recommended hardware, but the exact numbers can vary between releases. In general, a fairly recent Windows 10 or Windows 11 installation, 8–16 GB of RAM for typical modeling tasks, and a CUDA/OpenGL capable GPU will improve performance. For artists who plan to work with complex scenes, a faster GPU and more memory translate into smoother previews and render times. Always check Blender.org for the latest requirements and note that performance improves with optimized drivers and GPU compatibility.
From a workflow perspective:
- Update your graphics driver to the latest stable release before installing Blender.
- Ensure your Windows installation is up to date with the latest security patches.
- Consider enabling hardware acceleration in Blender’s preferences after install for better viewport performance.
BlendHowTo analysis shows that users who verify system compatibility prior to download experience fewer install errors and fewer post‑install surprises. This proactive step saves time and frustration later in the project.
Where to download safely
The safest place to download Blender is the official Blender website (blender.org). Downloading from the official source reduces the risk of bundled malware or adware that sometimes appears on third‑party mirrors. After you download, you should also verify the file integrity if the option is provided by Blender.org—some builds include checksums or digital signatures. Avoid unofficial mirrors and untrusted sites. If you’re on a shared or work computer, consider asking IT for permission or guidance before downloading. Once downloaded, you can proceed with installation.
To reinforce safety:
- Always download from blender.org.
- Compare the file size and checksum when provided.
- Be wary of download prompts that push additional software.
BlendHowTo’s guidance emphasizes sourcing from reputable sites to minimize risk and ensure you’re getting a legitimate build. This is a foundational best practice for any software installation on Windows.
Installer vs ZIP: which should you choose?
Blender offers two common distribution formats for Windows: the standard installer (.exe) and a portable ZIP package. The installer is the simplest to use, as it sets up shortcuts, registers file associations, and configures default paths automatically. The portable ZIP version, on the other hand, does not require installation and is ideal for portable environments or systems with restricted permissions. If you work on multiple machines or prefer not to alter system settings, the ZIP option can be advantageous. In a typical home setup, the installer is the recommended choice for most users because it streamlines updates and preferences.
When deciding:
- If you want a quick setup with automatic shortcuts and a clean uninstall, choose the installer.
- If you need a portable, non‑install approach or you’re using a restrictive PC, choose the ZIP.
BlendHowTo notes that for most beginners and hobbyists, the installer approach reduces friction and yields a consistent user experience across projects.
Installing Blender on Windows: step-by-step explanation
Installing Blender on Windows is a straightforward process, but following the steps helps prevent common misconfigurations. First, locate the downloaded installer or ZIP file. If you chose the installer, run it and approve any User Account Control prompts. Follow the on-screen prompts to select install location, components, and whether to create desktop shortcuts. After installation, you’ll typically see a Blender shortcut on the Start menu. If you chose the ZIP file, extract it to a preferred folder and run blender.exe directly.
What to expect during installation:
- The installer may present options for associating Blender with specific file types.
- You may be asked to enable hardware acceleration or set default render engines.
- The first launch might take a moment as the application initializes.
Post‑install checks:
- Open Blender and confirm the version in Help > About Blender.
- Verify access to the user interface and basic tools by opening a new project.
- If you use a GPU, ensure the driver is recognized in Preferences > System.
First launch and configuring preferences
The first launch is your chance to tailor Blender to your workflow. Start by adjusting preferences under Edit > Preferences. Set your preferred theme, default autosave behavior, and the location of your projects. For Windows users, you may want to set the temporary files directory to a drive with ample space. In the System tab, specify your Compute Device (CPU or GPU) to optimize rendering performance for your hardware. Consider enabling Preferences for Add-ons you plan to use, such as a few essential modeling or shading tools.
A practical setup tip:
- Enable Auto Save and set it to a frequent interval to protect your work.
- Configure the startup project to open a blank scene so you can begin immediately.
- Try a quick render to confirm GPU acceleration is active if supported.
Troubleshooting common download/installation issues
Even with official sources, you may encounter hiccups. If the download fails, retry from a stable internet connection, disable browser extensions that might block downloads, or try a different browser. If the installer won’t run due to security warnings, check Windows Defender SmartScreen settings or right‑click and choose Run as administrator (only if you trust the source). For GPU issues, ensure you have the latest drivers and a compatible OpenGL runtime. On ZIP installations, make sure the extracted folder isn’t read‑only and that the executable isn’t blocked by antivirus software.
Common fixes:
- Re‑download the installer from blender.org if the file is corrupted.
- Update graphics drivers before launching Blender.
- Run the installer or extract ZIP in a folder with full permissions.
Security best practices and updates
Maintain security by keeping Blender up to date. Official updates from Blender.org include bug fixes, security improvements, and new features. Consider enabling automatic updates or setting a reminder to check for updates every few months. Always verify that you are downloading the latest official build from Blender.org. Do not bypass the installer’s integrity checks or install from unverifiable mirrors. If you work in a studio environment, establish a standard update workflow to ensure all users stay current.
Security tips:
- Only download from blender.org and verify checksums when available.
- Keep Windows and graphics drivers updated to reduce vulnerability exposure.
- Use a standard user account for day‑to‑day work and elevate privileges only when necessary.
Quick-start projects and next steps
With Blender installed, your next steps are to create a simple project to verify the setup and begin learning. Start with a basic object like a cube, then apply transformations, lighting, and a simple material. Explore the default layout: 3D Viewport, Outliner, and Properties panels. Follow a short tutorial on modeling a simple object or creating a basic scene to get a feel for navigation. As you grow more confident, add lighting, shading, and rendering to your workflow. The learning curve for Blender is gradual, and small, consistent practice yields noticeable progress over time.
Tools & Materials
- Windows PC (Windows 10/11 recommended)(A 64-bit edition is standard for Blender on Windows.)
- Active internet connection(Needed to download Blender and receive updates.)
- Web browser (Chrome, Edge, Firefox, etc.)(To access blender.org and download files.)
- Admin rights for installation (optional for ZIP)(Installer may require admin rights; ZIP does not.)
- USB drive or external storage (optional)(Useful to carry a portable ZIP version.)
- External storage for backup (optional)(Keep a local backup of the installer in a safe location.)
Steps
Estimated time: 15-25 minutes
- 1
Prepare your PC
Verify you have a 64‑bit Windows installation, a working internet connection, and administrative access if you plan to install Blender system‑wide. Close other applications to prevent conflicts during the installation.
Tip: Close background apps to free up memory and avoid interruptions. - 2
Choose the download format
Visit blender.org and choose between the installer (.exe) or the portable ZIP. The installer is simpler for most users, while ZIP is useful if you need portability or restricted systems.
Tip: If unsure, start with the installer for the easiest setup. - 3
Download Blender
Click the Windows option and save the file to your Downloads folder or another preferred location. Wait for the download to complete before proceeding.
Tip: If downloads stall, pause and resume or switch browsers. - 4
Run the installer or extract ZIP
If using the installer, run the .exe and follow prompts to install. If using ZIP, extract to a chosen folder and open blender.exe.
Tip: For the installer, opt for the default install location unless you have a reason to customize. - 5
Launch Blender
Open Blender from the Start menu or the extracted folder. Allow initial setup in case it asks about preferences or hardware acceleration.
Tip: First launch may take a moment as components initialize. - 6
Verify setup and adjust preferences
Confirm the version in Help > About Blender. Go to Edit > Preferences to configure theme, autosave, and system settings (Compute Device).
Tip: Enable autosave and set a reasonable interval to protect your work.
Frequently Asked Questions
Is Blender free to download and use on Windows?
Yes. Blender is free and open‑source, available to download and use on Windows without payment. You can explore features and contribute to the project.
Yes—Blender is free and open‑source for Windows users.
What are the minimum system requirements for Windows?
Blender’s Windows builds require a 64‑bit OS and a compatible GPU; for exact requirements, please check Blender.org for the current release. Sufficient RAM and a capable graphics driver improve performance.
Blender needs a 64‑bit Windows OS and a compatible GPU; check Blender.org for the exact minimums.
Should I download the installer or the ZIP version?
The installer is the easiest option for most users, as it creates shortcuts and handles settings automatically. The ZIP version is portable and doesn’t require installation, which is useful on restricted systems.
installer is easiest for most people, ZIP is portable if you don’t want to install.
Do I need admin rights to install Blender on Windows?
If you install Blender system‑wide, admin rights are typically required. The portable ZIP version can run without admin rights, making it suitable for restricted environments.
Admin rights may be needed for the installer; ZIP can run without admin rights.
How can I verify the download’s integrity?
Always use Blender.org’s official download page to obtain files. If a checksum or signature is provided, compare it with the downloaded file to ensure integrity.
Verify the download against the official checksum if provided.
What should I do if Windows blocks the installer?
If you trust the source, you can allow the installer to run from your browser or Downloads folder. Prefer verifying the file from Blender.org before bypassing security prompts.
If blocked, confirm the source is official and re‑download if needed.
Watch Video
What to Remember
- Download Blender from the official site first.
- Choose installer for ease or ZIP for portability.
- Validate version and enable autosave for safety.
- Update GPU drivers to maximize performance.
- Configure preferences before starting a project.